We are excited to announce two new capabilities in Amazon SageMaker Studio that will accelerate iterative development for machine learning (ML) practitioners: Local Mode and Docker support. ML model development often involves slow iteration cycles as developers switch between coding, training, and deployment. Each step requires waiting for remote compute resources to start up, which delays validating implementations and getting feedback on changes.
With Local Mode, developers can now train and test models, debug code, and validate end-to-end pipelines directly on their SageMaker Studio notebook instance without the need for spinning up remote compute resources. This reduces the iteration cycle from minutes down to seconds, boosting developer productivity. Docker support in SageMaker Studio notebooks enables developers to effortlessly build Docker containers and access pre-built containers, providing a consistent development environment across the team and avoiding time-consuming setup and dependency management.
Local Mode and Docker support offer a streamlined workflow for validating code changes and prototyping models using local containers running on a SageMaker Studio notebook
instance. In this post, we guide you through setting up Local Mode in SageMaker Studio, running a sample training job, and deploying the model on an Amazon SageMaker endpoint from a SageMaker Studio notebook.
SageMaker Studio Local Mode
SageMaker Studio introduces Local Mode, enabling you to run SageMaker training, inference, batch transform, and processing jobs directly on your JupyterLab, Code Editor, or SageMaker Studio Classic notebook instances without requiring remote compute resources. Benefits of using Local Mode include:
- Instant validation and testing of workflows right within integrated development environments (IDEs)
- Faster iteration through local runs for smaller-scale jobs to inspect outputs and identify issues early
- Improved development and debugging efficiency by eliminating the wait for remote training jobs
- Immediate feedback on code changes before running full jobs in the cloud
The following figure illustrates the workflow using Local Mode on SageMaker.
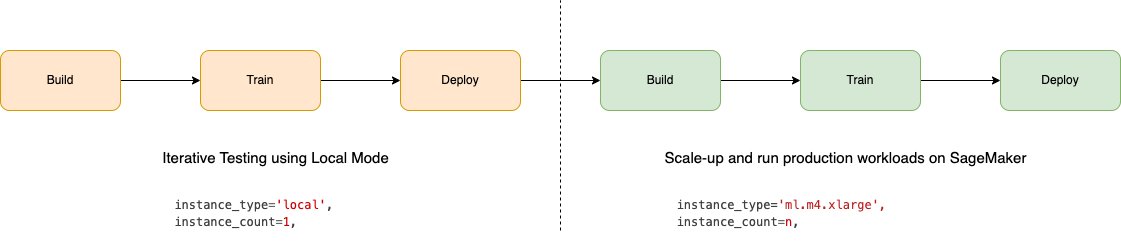
To use Local Mode, set instance_type='local' when running SageMaker Python SDK jobs such as training and inference. This will run them on the instances used by your SageMaker Studio IDEs instead of provisioning cloud resources.
Although certain capabilities such as distributed training are only available in the cloud, Local Mode removes the need to switch contexts for quick iterations. When you’re ready to take advantage of the full power and scale of SageMaker, you can seamlessly run your workflow in the cloud.
Docker support in SageMaker Studio
SageMaker Studio now also enables building and running Docker containers locally on your SageMaker Studio notebook instance. This new feature allows you to build and validate Docker images in SageMaker Studio before using them for SageMaker training and inference.
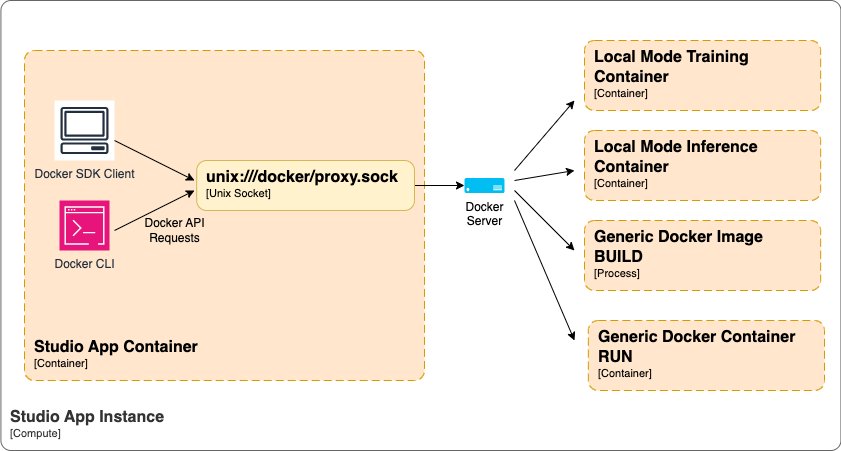
The following diagram illustrates the high-level Docker orchestration architecture within SageMaker Studio.
With Docker support in SageMaker Studio, you can:
- Build Docker containers with integrated models and dependencies directly within SageMaker Studio
- Eliminate the need for external Docker build processes to simplify image creation
- Run containers locally to validate functionality before deploying models to production
- Reuse local containers when deploying to SageMaker for training and hosting
Although some advanced Docker capabilities like multi-container and custom networks are not supported as of this writing, the core build and run functionality is available to accelerate developing containers for bring your own container (BYOC) workflows.
Prerequisites
To use Local Mode in SageMaker Studio applications, you must complete the following prerequisites:
- For pulling images from Amazon Elastic Container Registry (Amazon ECR), the account hosting the ECR image must provide access permission to the user’s Identity and Access Management (IAM) role. The domain’s role must also allow Amazon ECR access.
- To enable Local Mode and Docker capabilities, you must set the
EnableDockerAccessparameter to true for the domain’sDockerSettingsusing the AWS Command Line Interface (AWS CLI). This allows users in the domain to use Local Mode and Docker features. By default, Local Mode and Docker are disabled in SageMaker Studio. Any existing SageMaker Studio apps will need to be restarted for the Docker service update to take effect. The following is an example AWS CLI command for updating a SageMaker Studio domain:
- You need to update the SageMaker IAM role in order to be able to push Docker images to Amazon ECR:
Run Python files in SageMaker Studio spaces using Local Mode
SageMaker Studio JupyterLab and Code Editor (based on Code-OSS, Visual Studio Code – Open Source), extends SageMaker Studio so you can write, test, debug, and run your analytics and ML code using the popular lightweight IDE. For more details on how to get started with SageMaker Studio IDEs, refer to Boost productivity on Amazon SageMaker Studio: Introducing JupyterLab Spaces and generative AI tools and New – Code Editor, based on Code-OSS VS Code Open Source now available in Amazon SageMaker Studio. Complete the following steps:
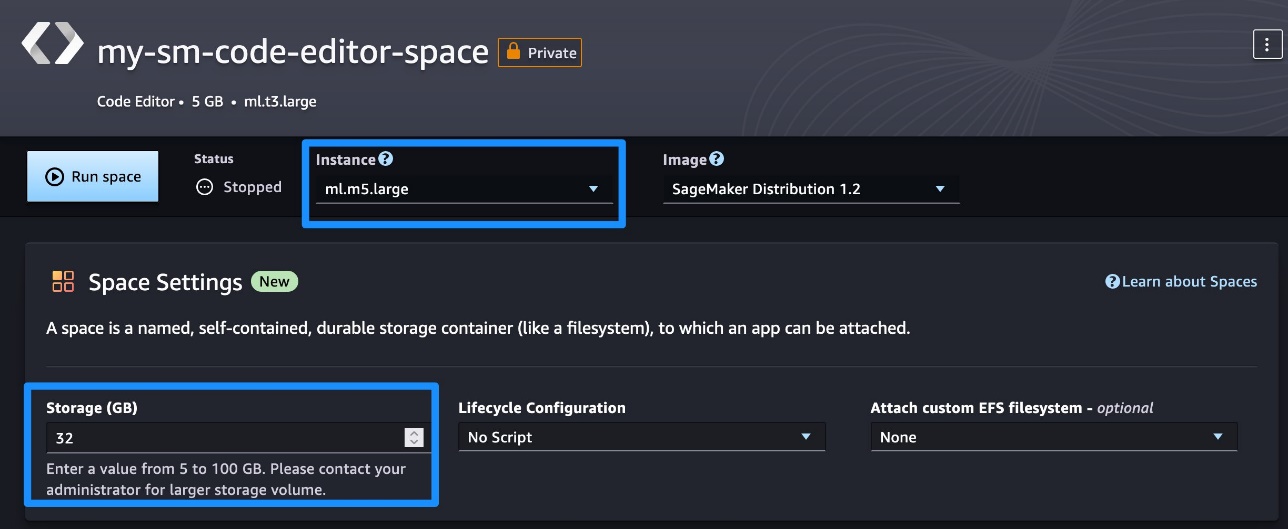
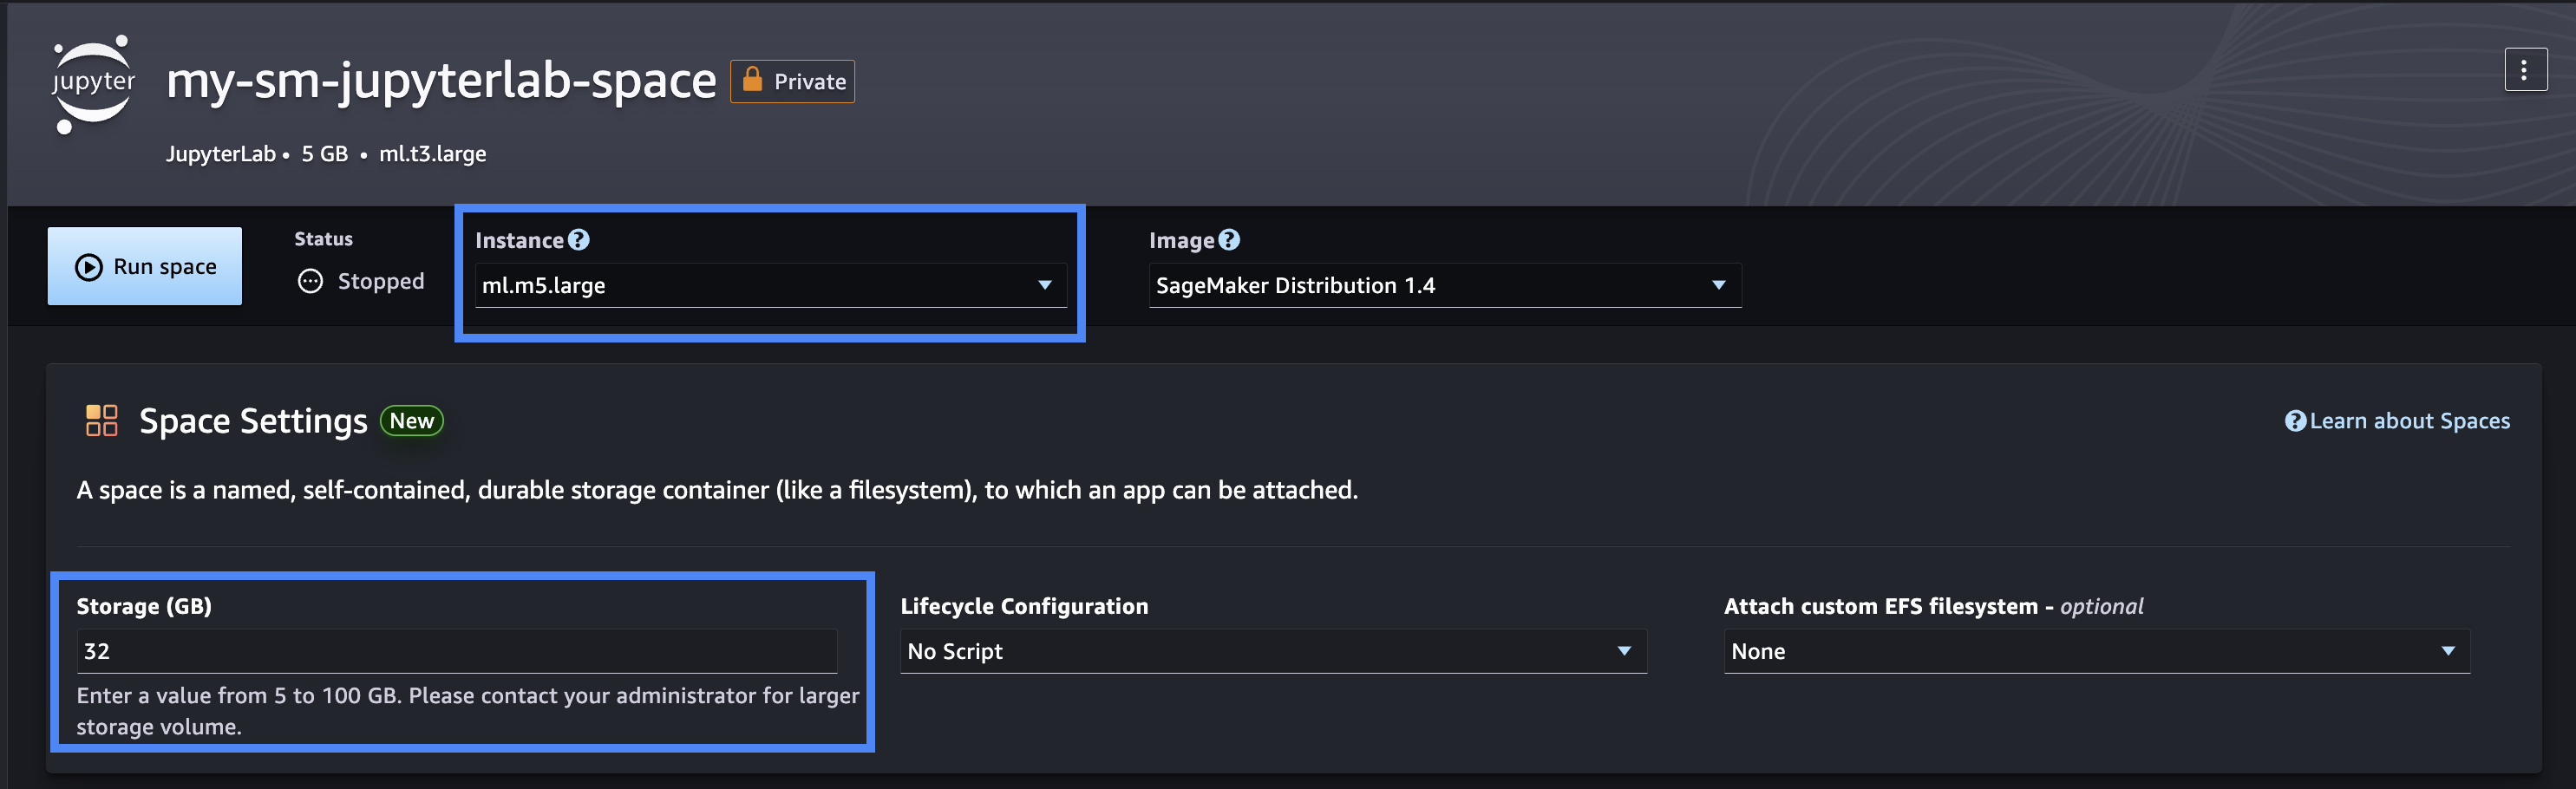
- Create a new Code Editor or JupyterLab space called
my-sm-code-editor-spaceormy-sm-jupyterlab-space, respectively. - Choose Create space.
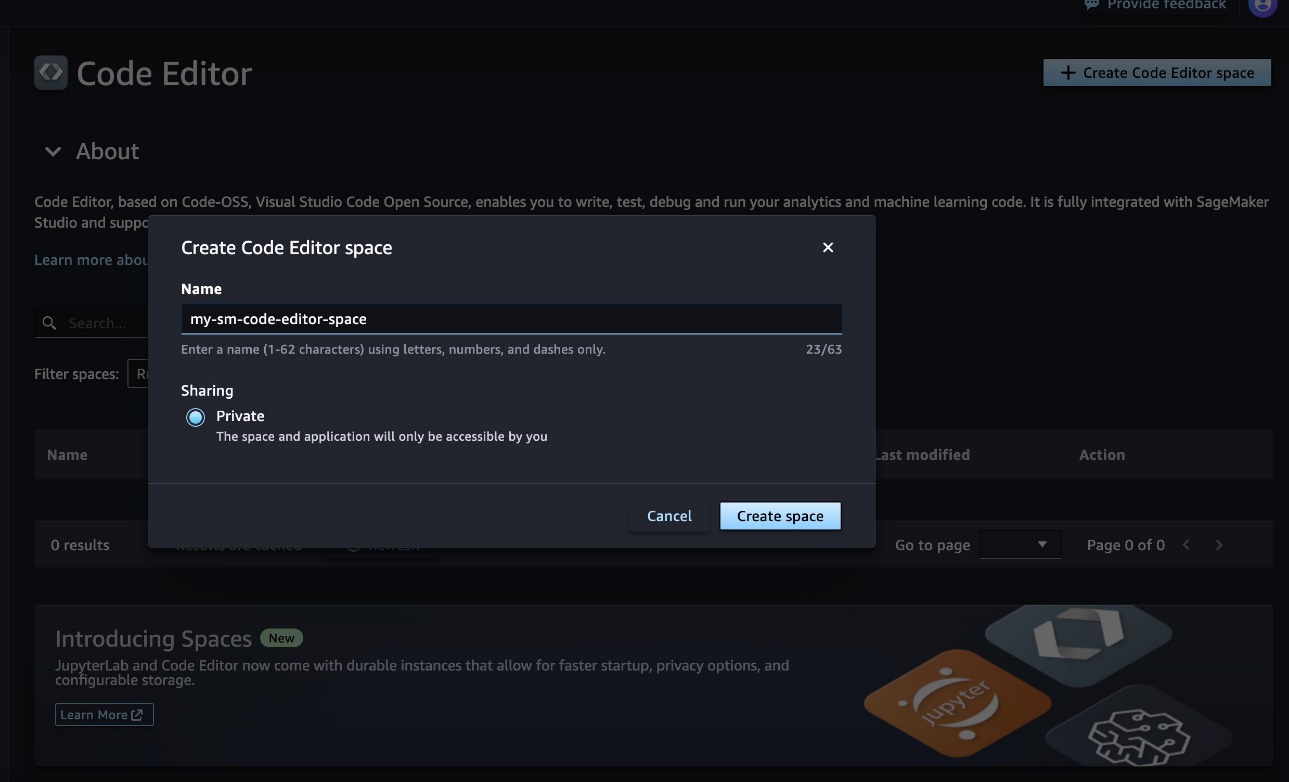
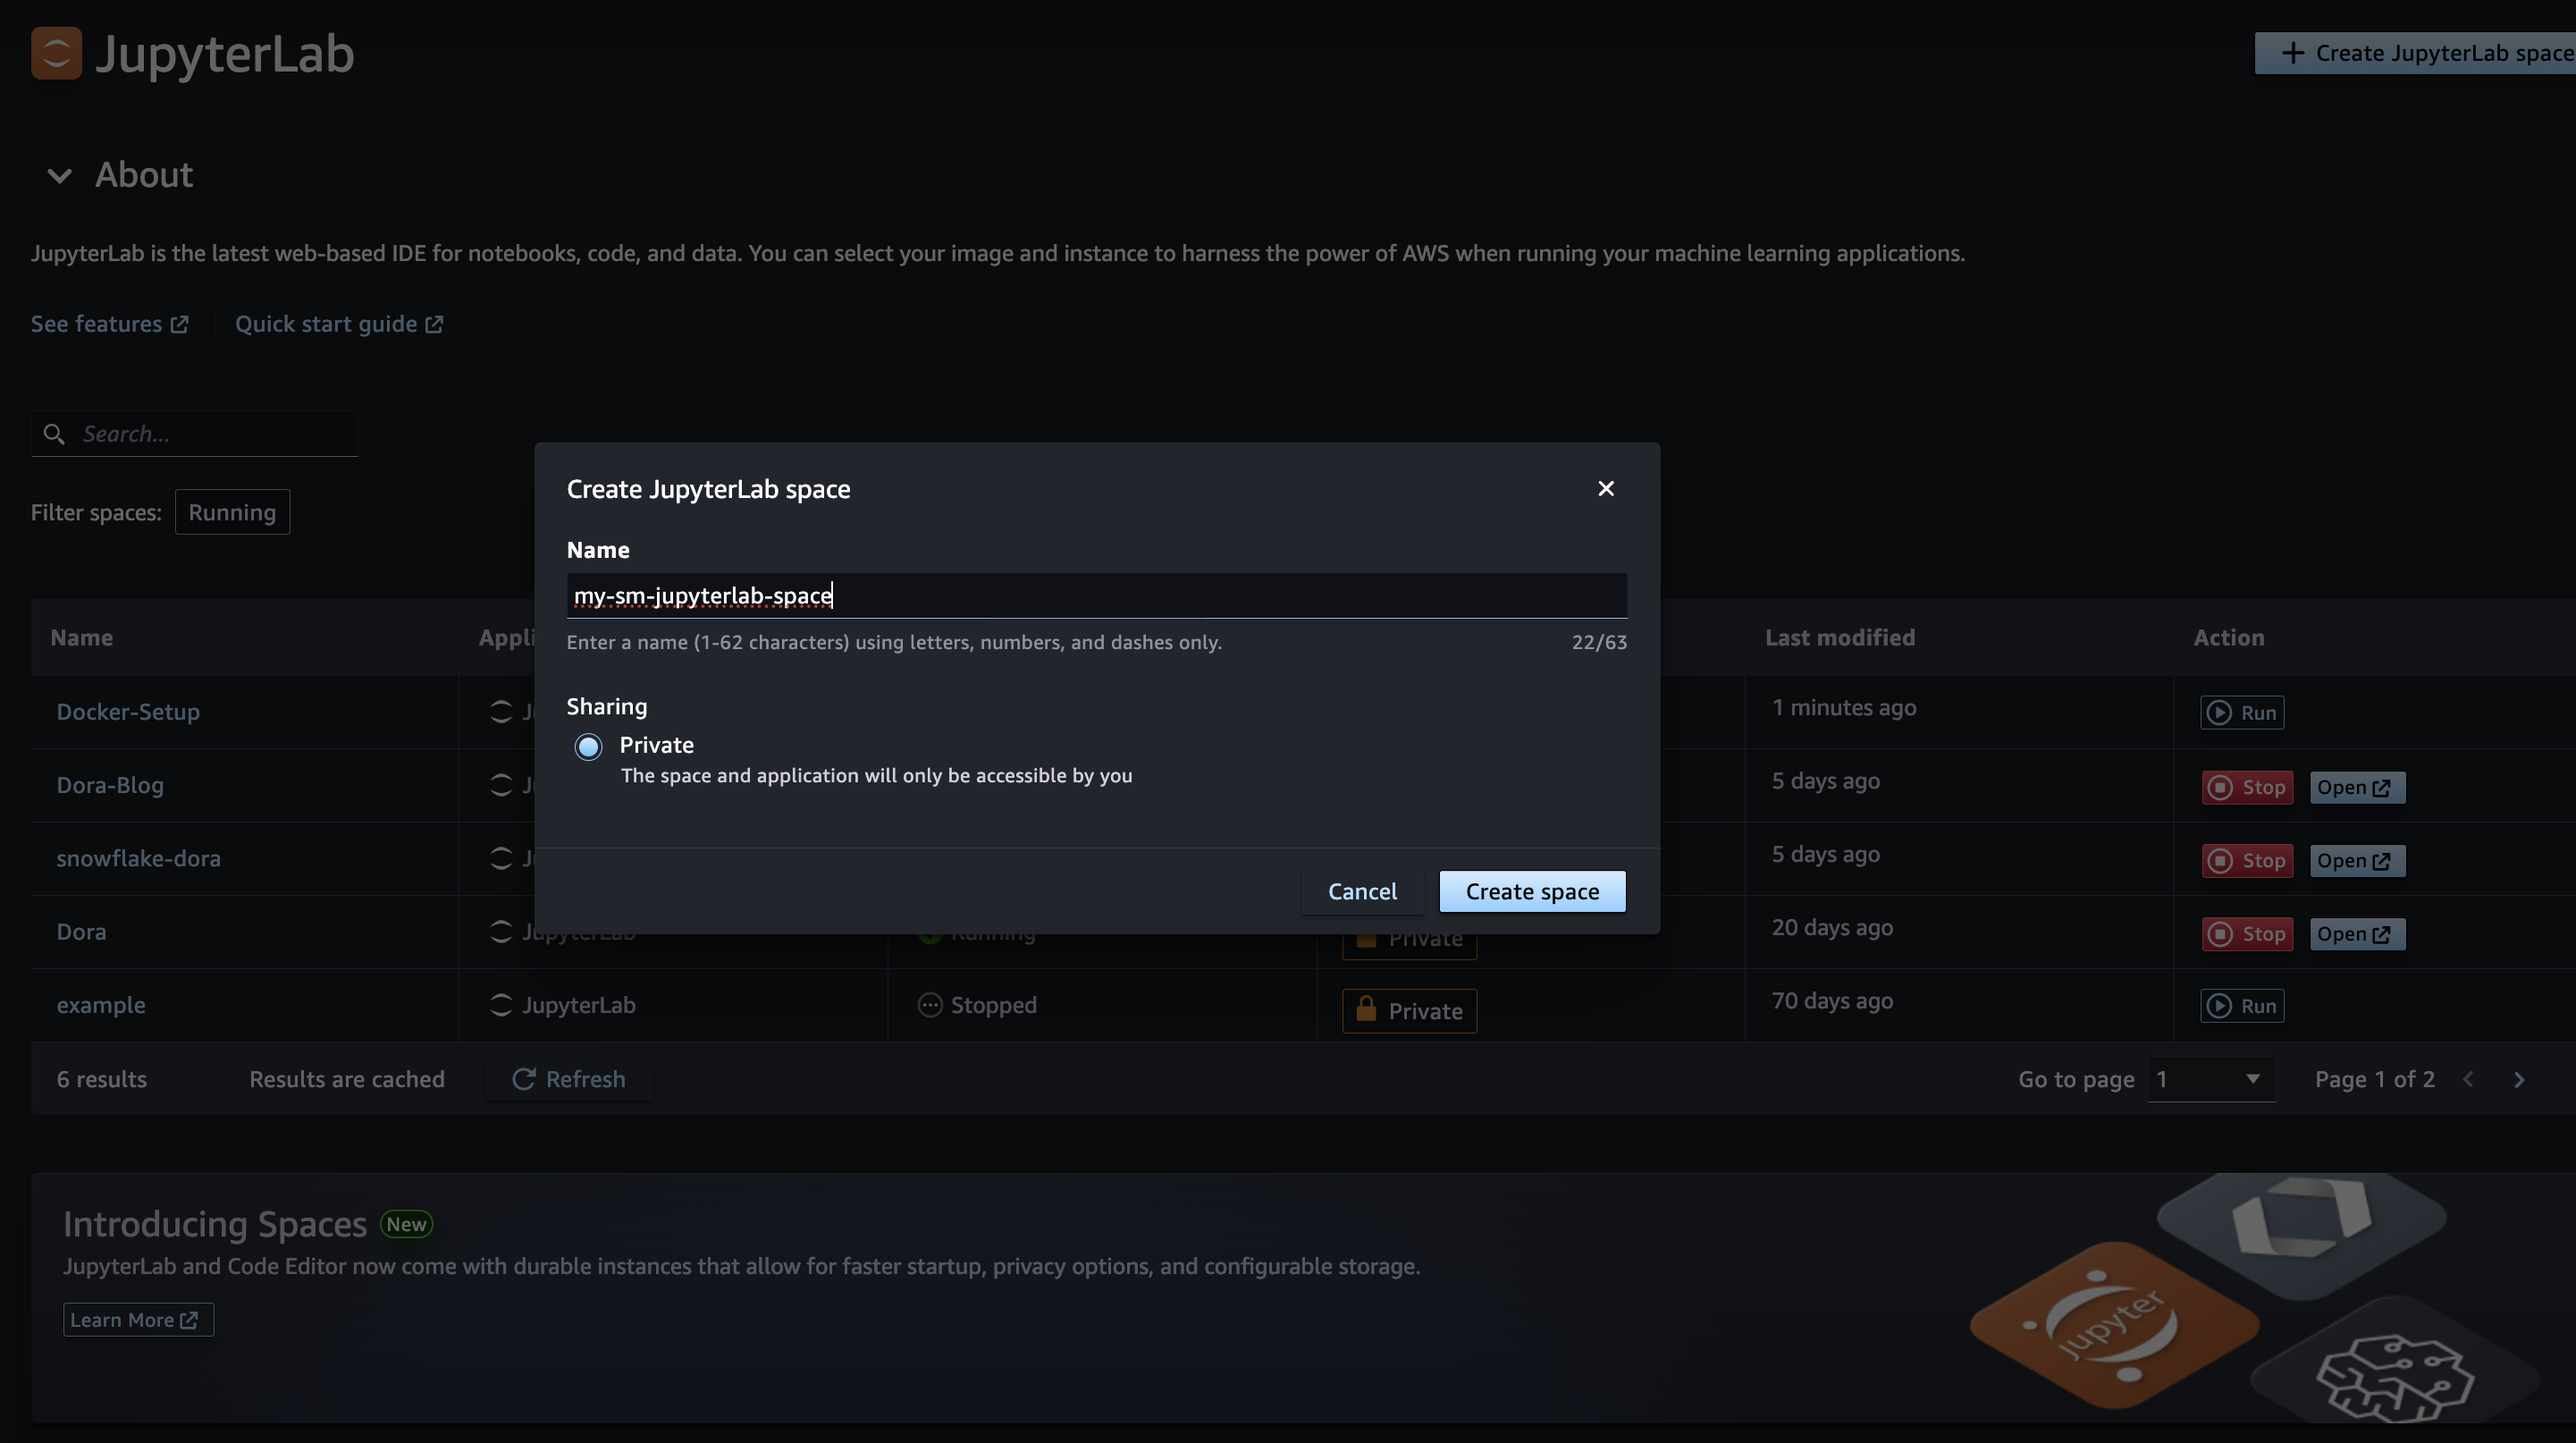
- Choose the
ml.m5.largeinstance and set storage to 32 GB. - Choose Run space.
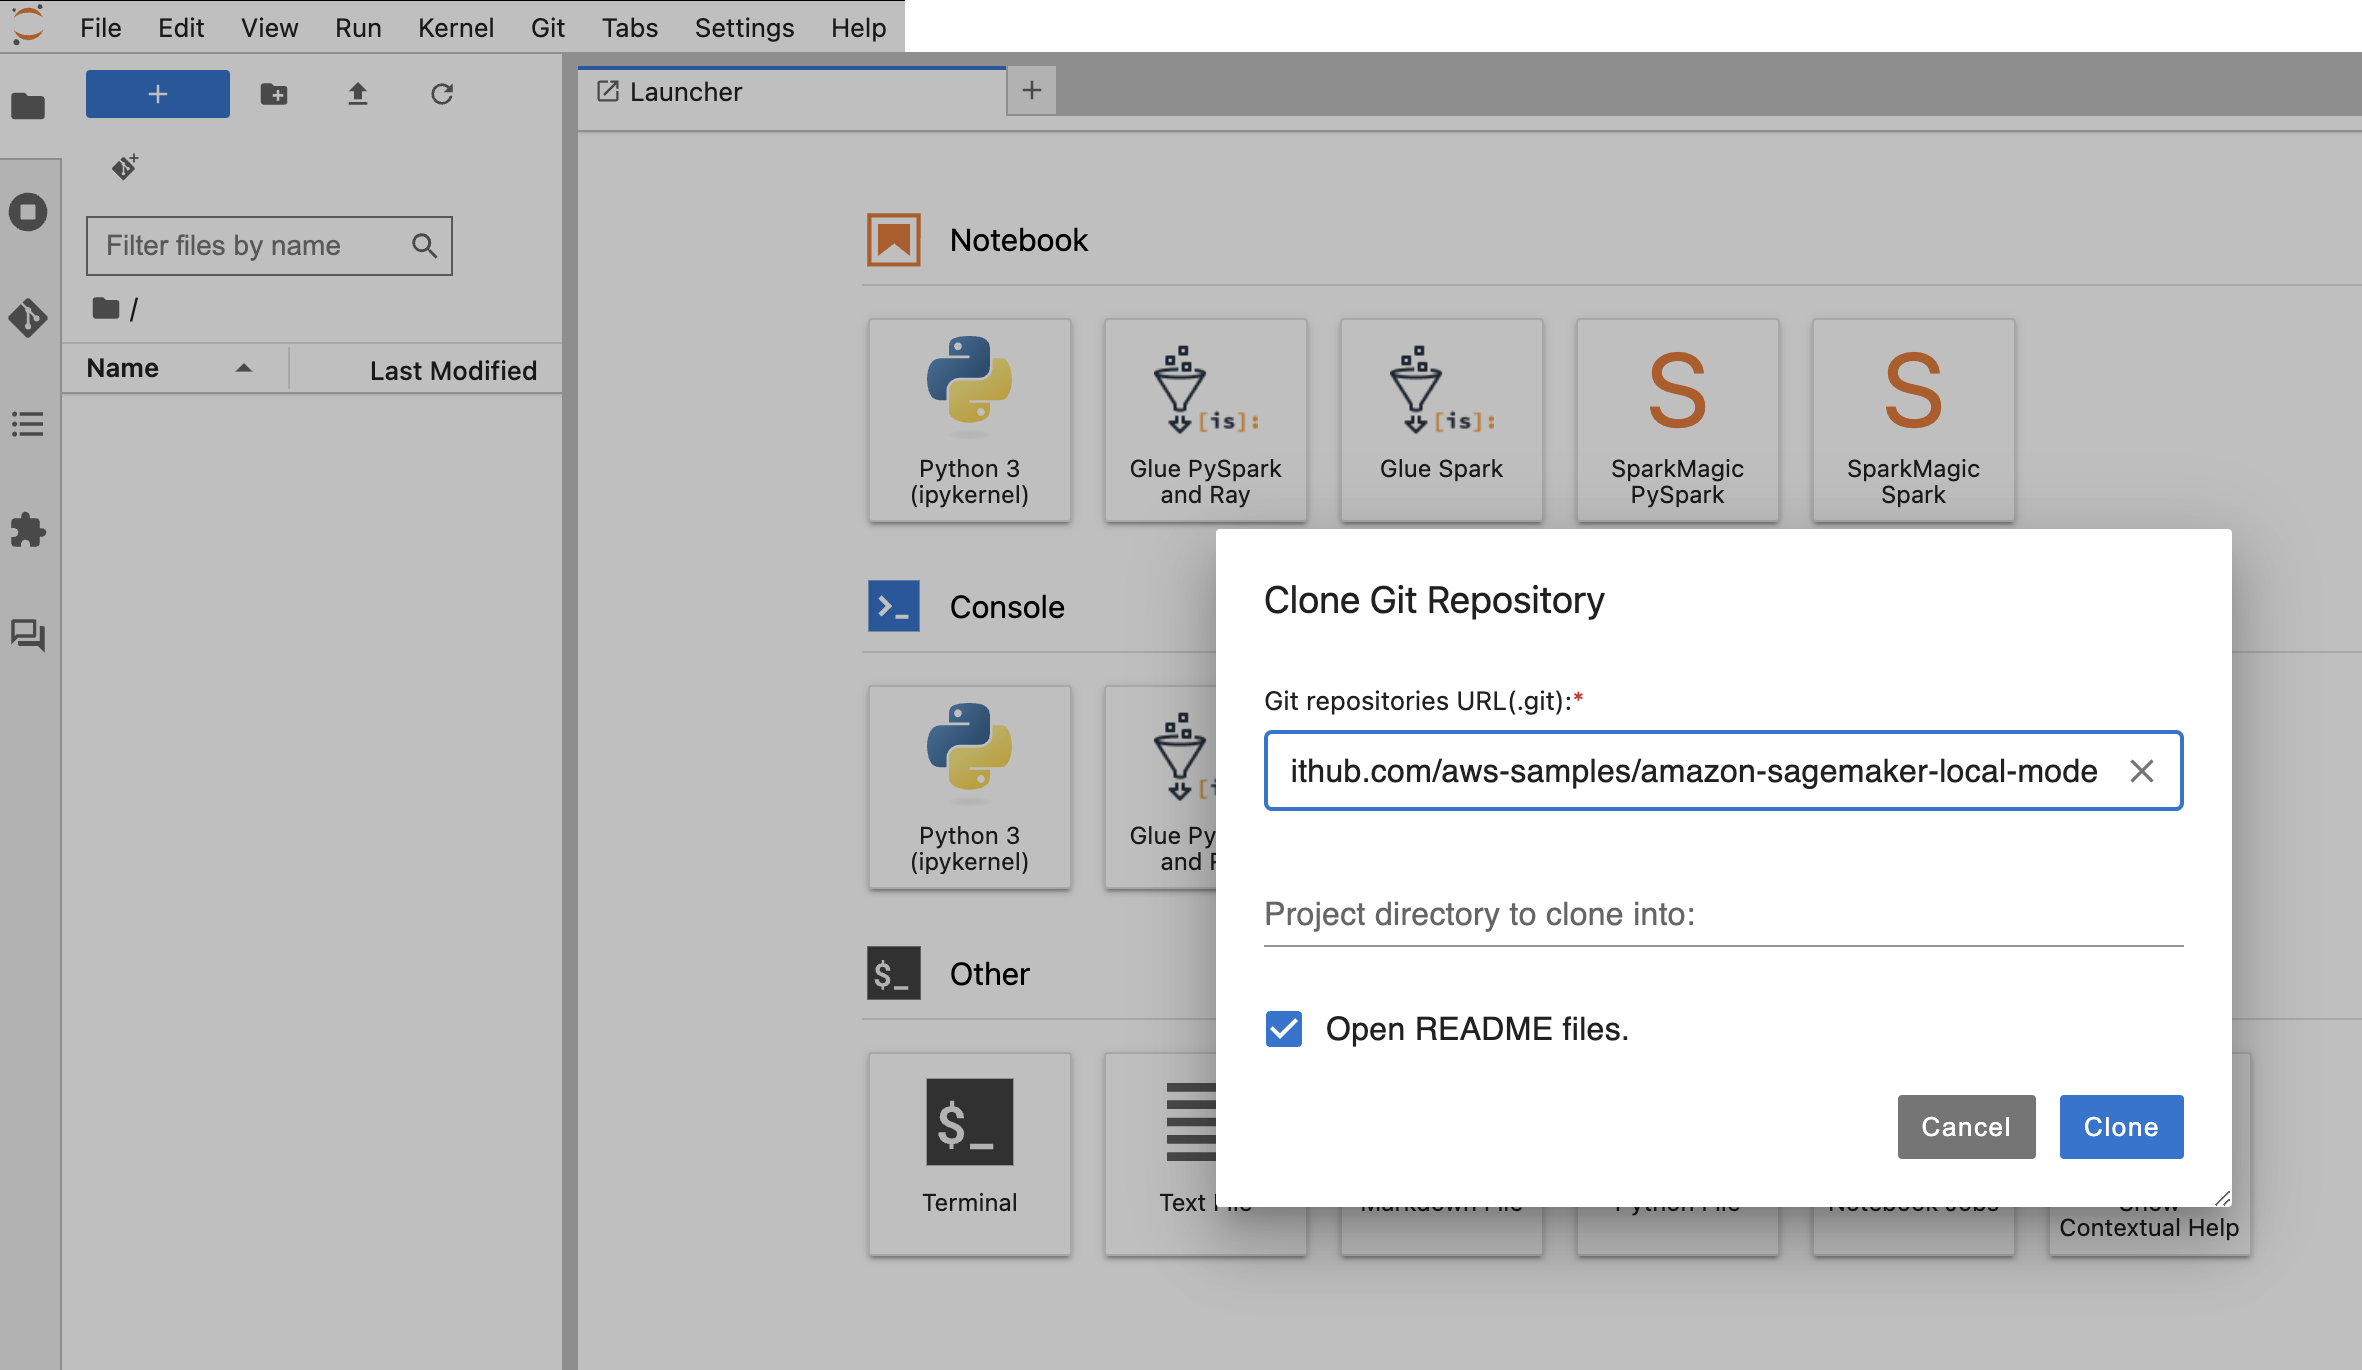
- Open the JupyterLab or Code Editor space and clone the GitHub repo.
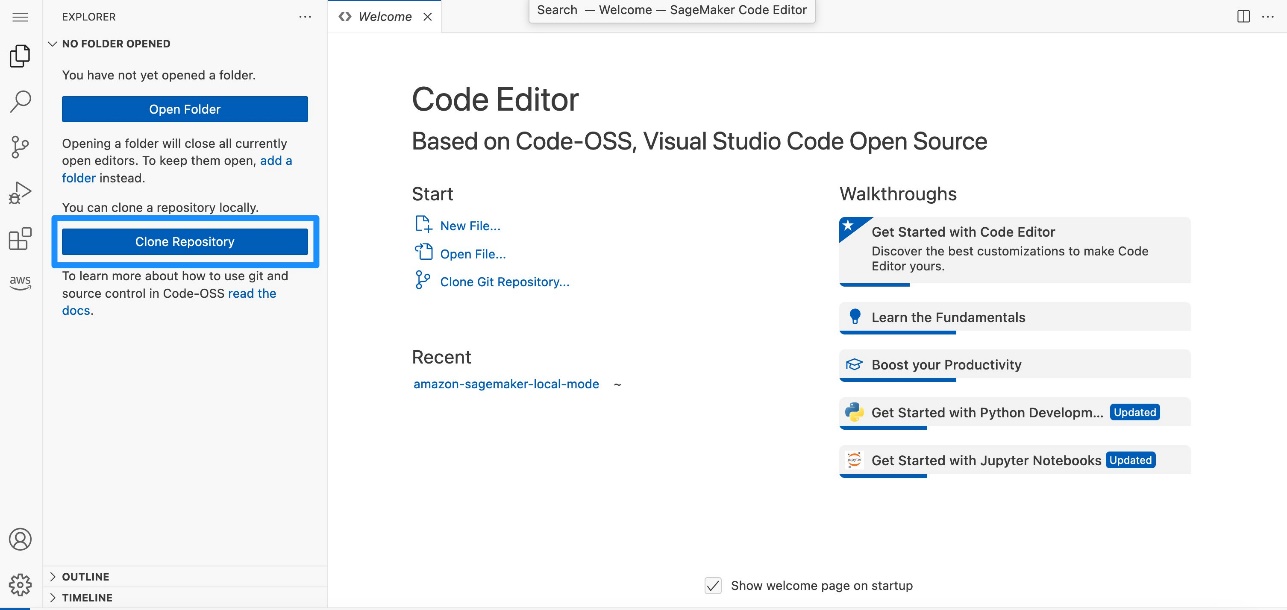
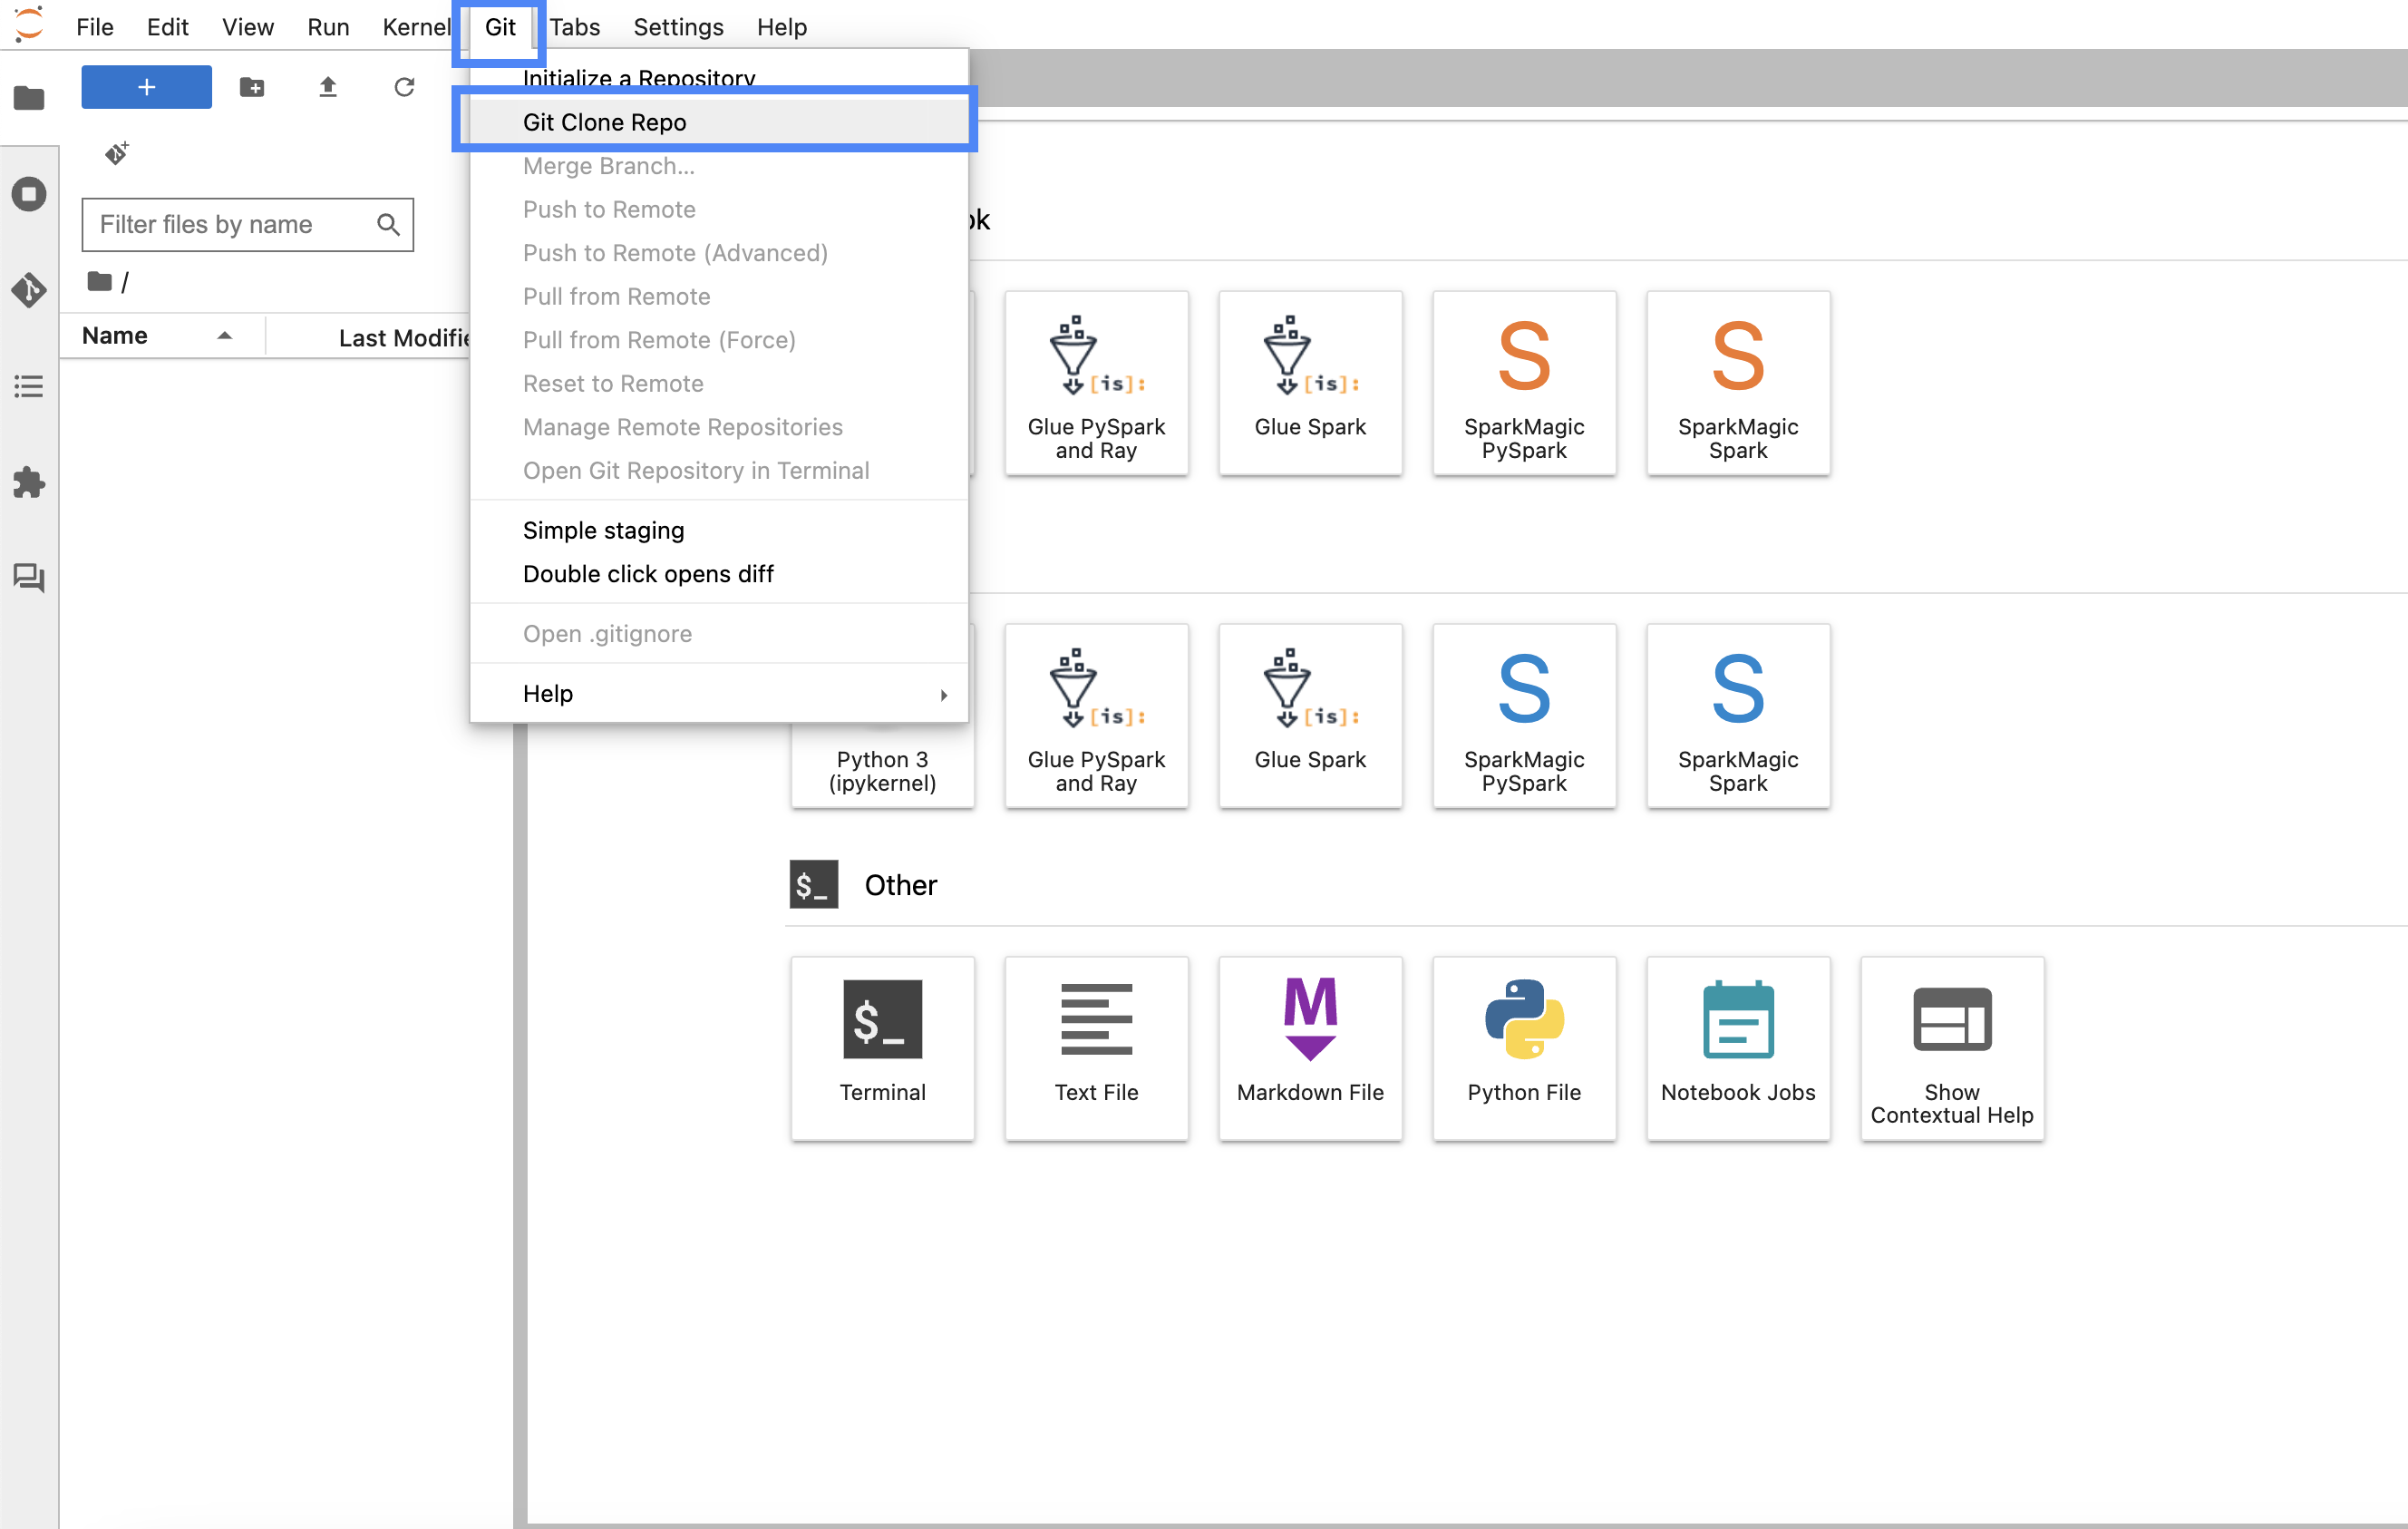
- Clone the GitHub repo, with
/home/sagemaker-user/as the target folder.

- Create a new terminal.


- Install the Docker CLI and Docker Compose plugin following the instructions in the following GitHub repo. If chained commands fail, run the commands one at a time.
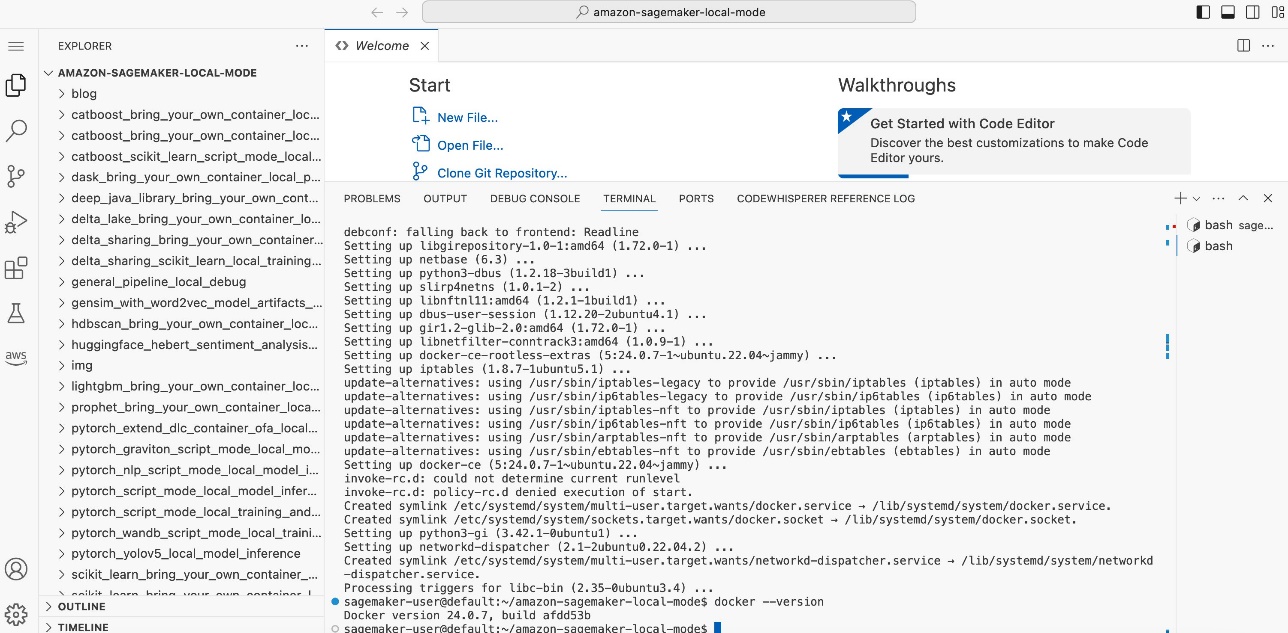
 You must update the SageMaker SDK to the latest version.
- Run
pip install sagemaker -Uqin the terminal.
For Code Editor only, you need to set the Python environment to run in the current terminal.
- In Code Editor, on the File menu¸ choose Preferences and Settings.
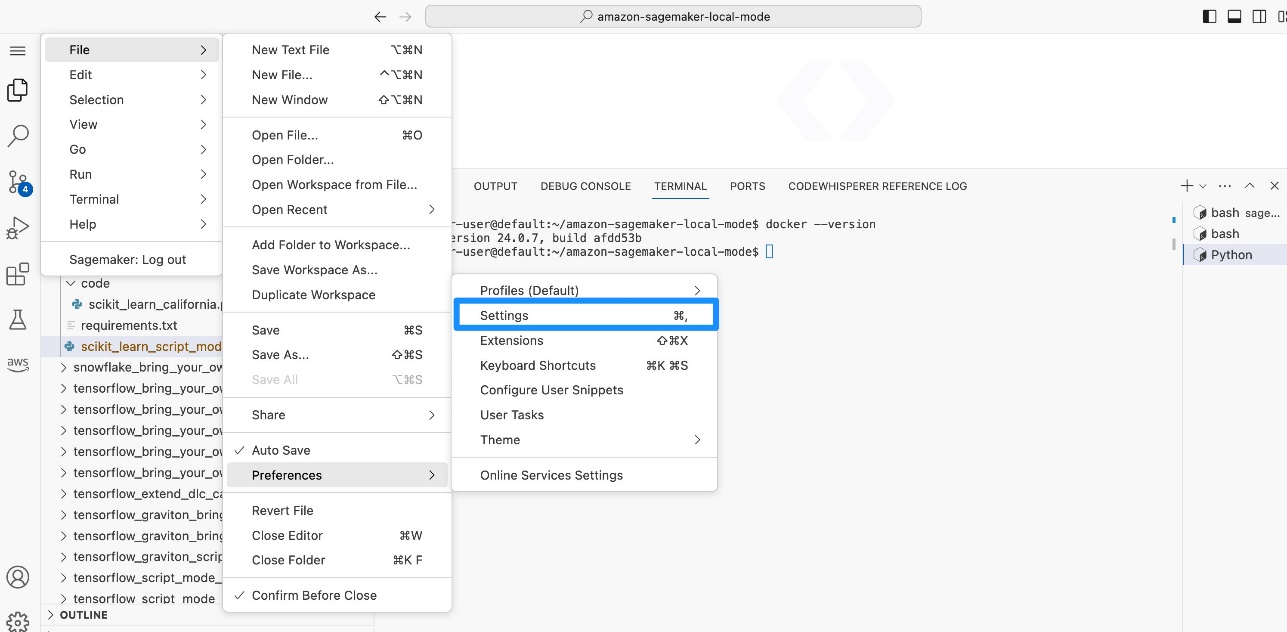
- Search for and select Terminal: Execute in File Dir.
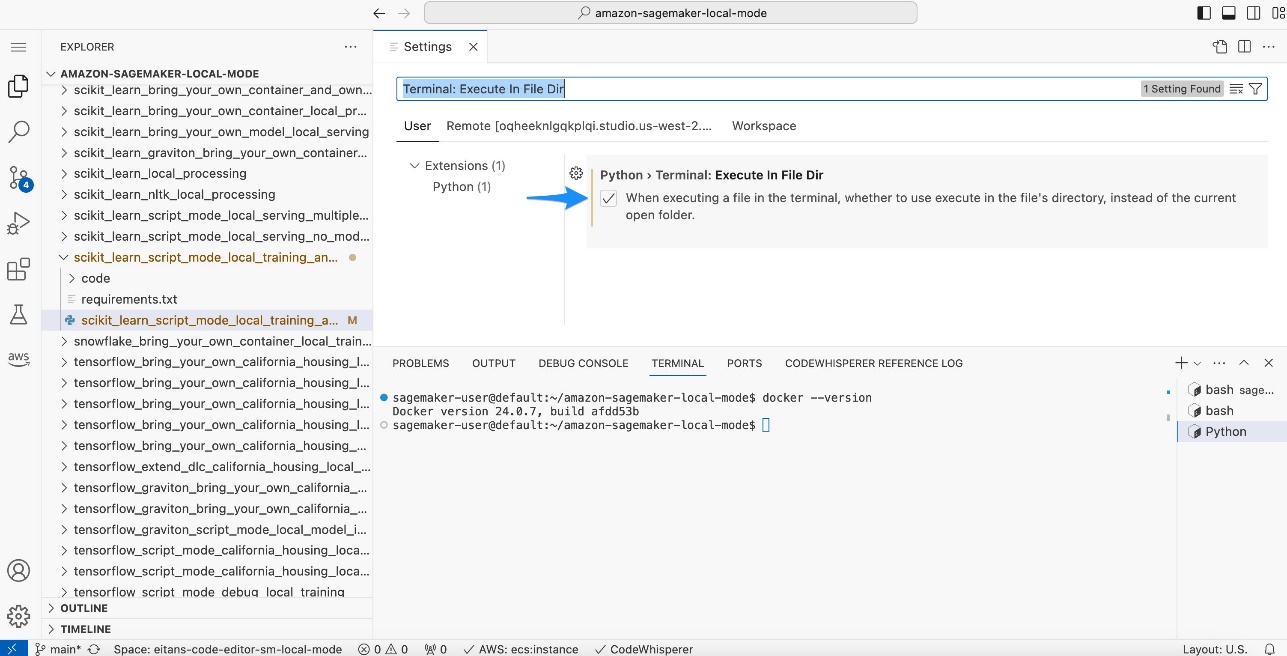
- In Code Editor or JupyterLab, open the
scikit_learn_script_mode_local_training_and_servingfolder and run thescikit_learn_script_mode_local_training_and_serving.pyfile.
You can run the script by choosing Run in Code Editor or using the CLI in a JupyterLab terminal. 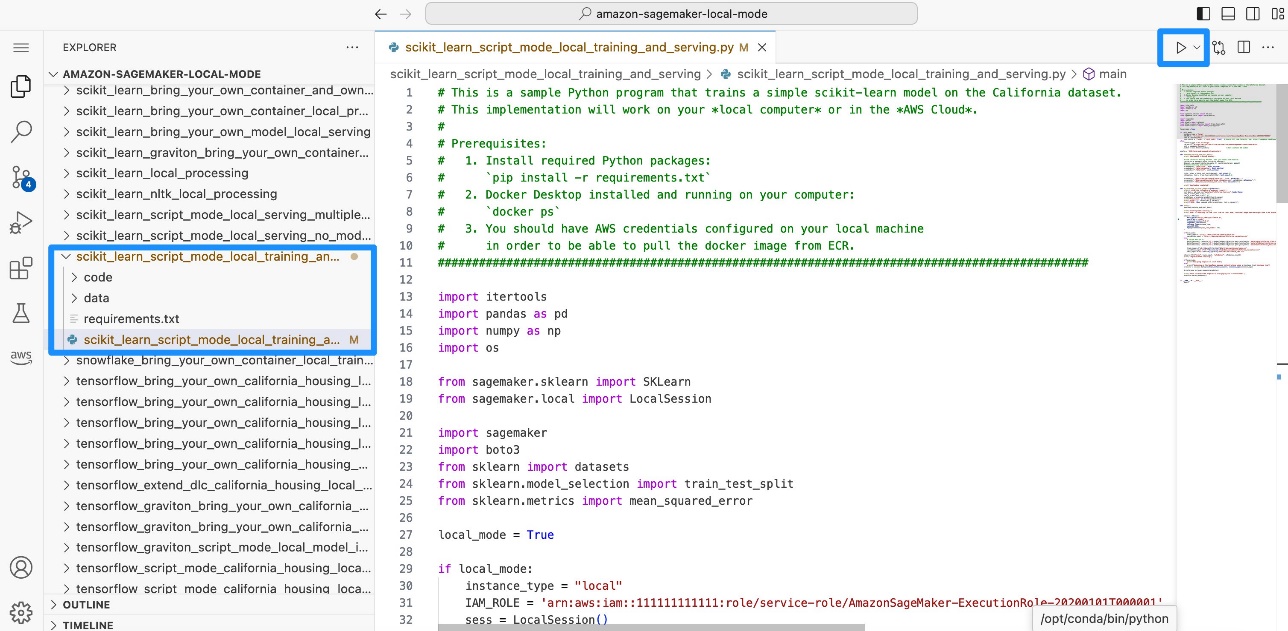
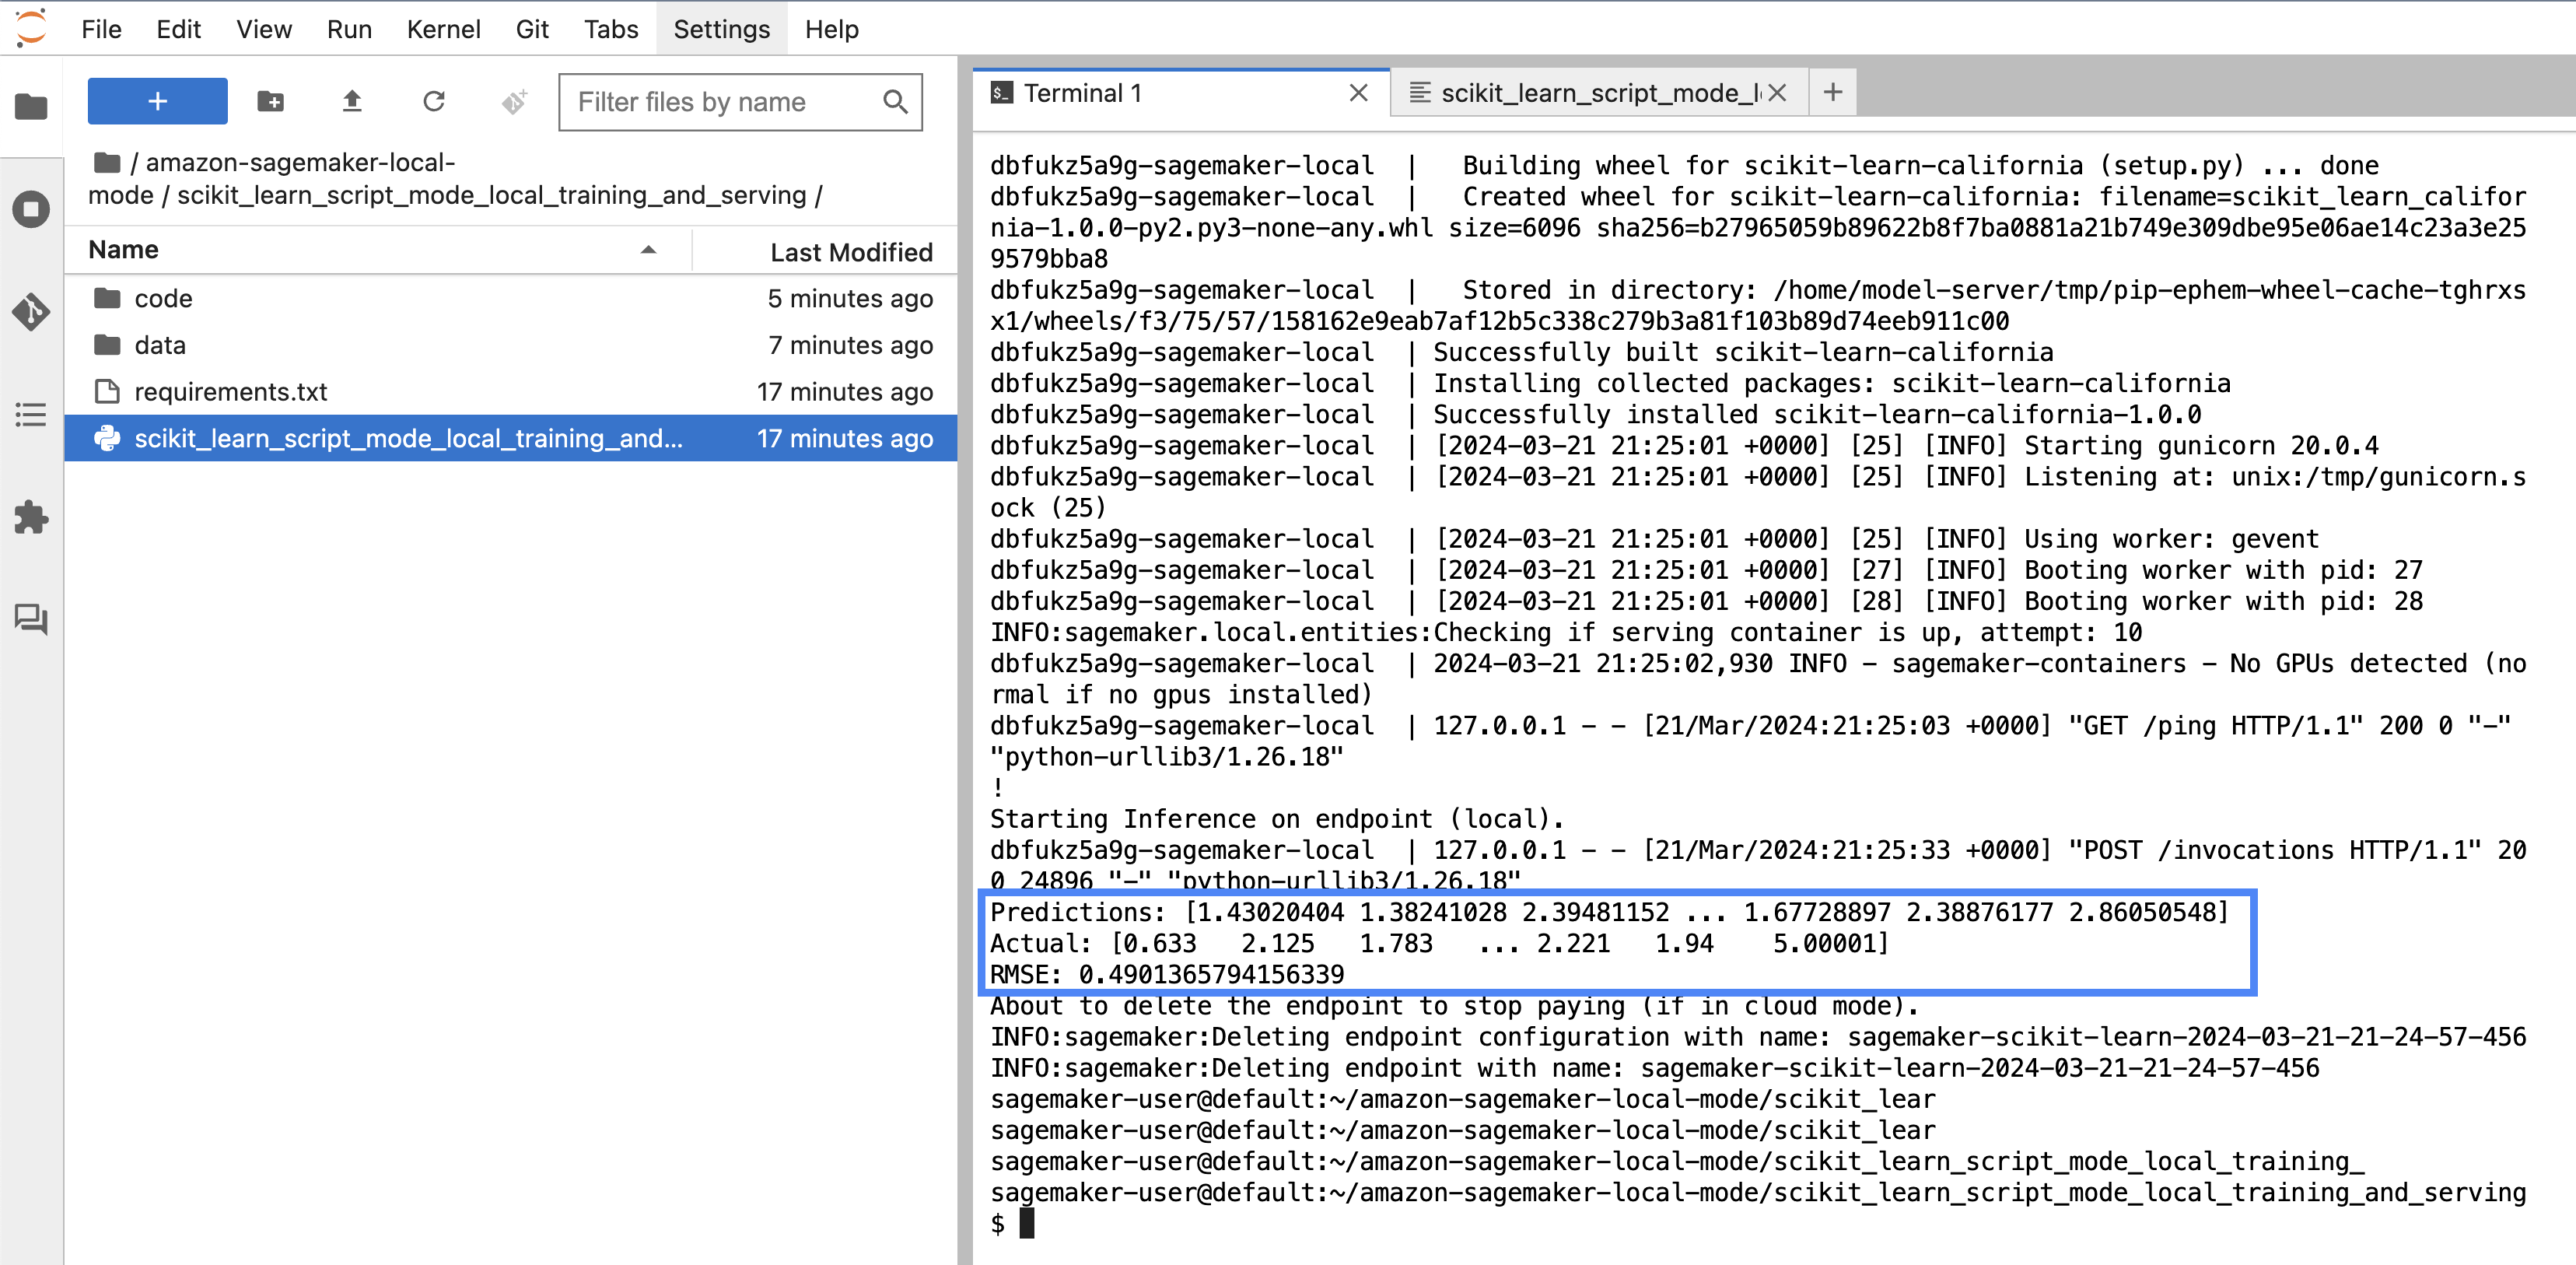
 You will be able to see how the model is trained locally. Then you deploy the model to a SageMaker endpoint locally, and calculate the root mean square error (
RMSE). 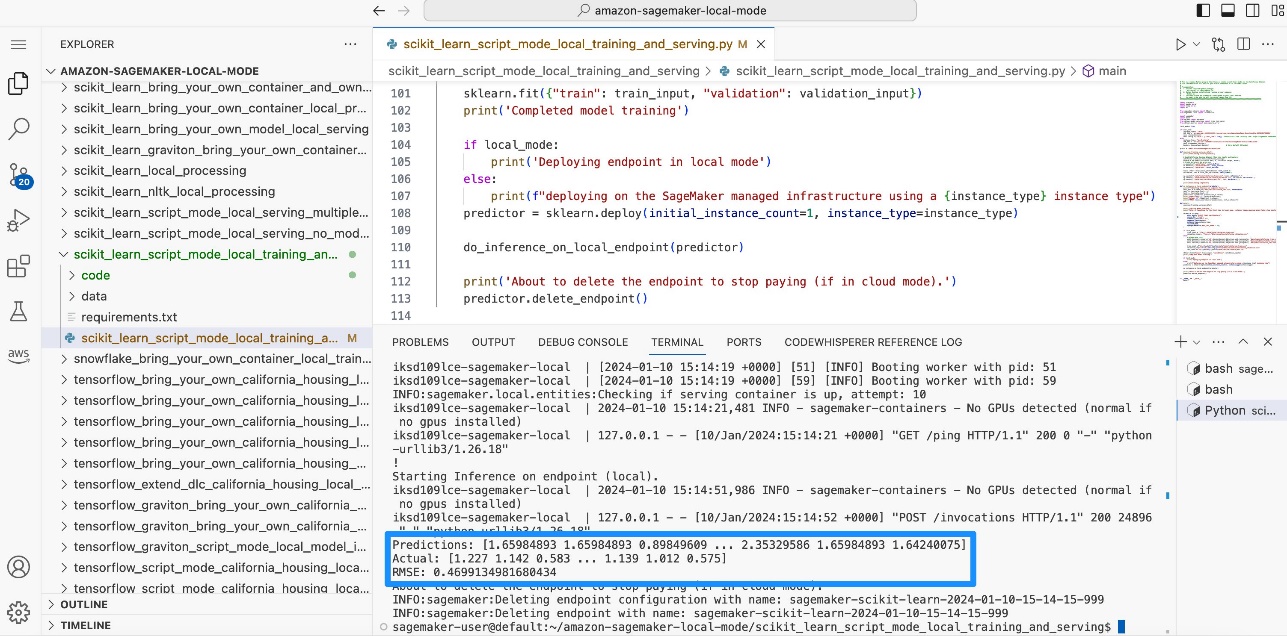
Simulate training and inference in SageMaker Studio Classic using Local Mode
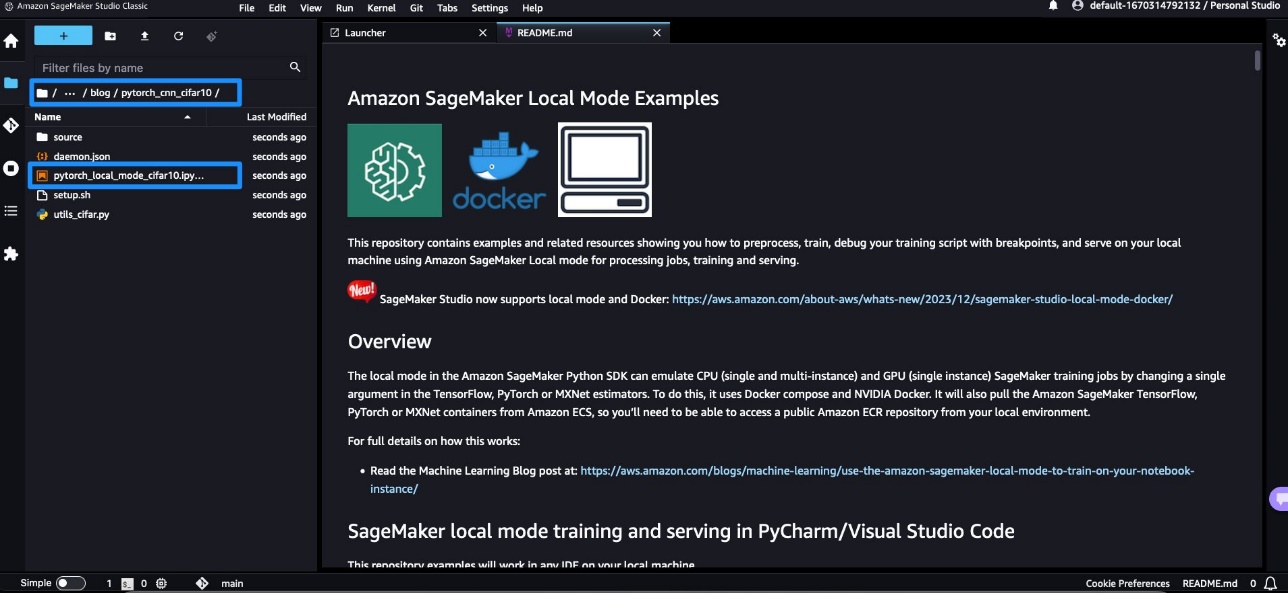
You can also use a notebook in SageMaker Studio Classic to run a small-scale training job on CIFAR10 using Local Mode, deploy the model locally, and perform inference.
Set up your notebook
To set up the notebook, complete the following steps:
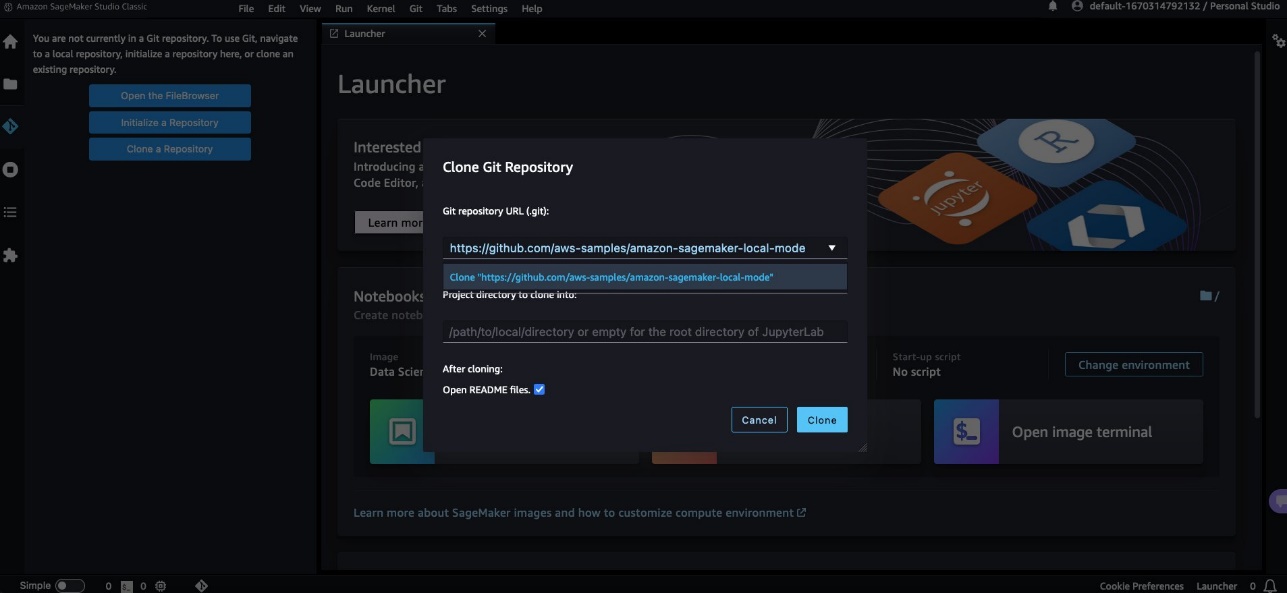
- Open SageMaker Studio Classic and clone the following GitHub repo.
- Open the
pytorch_local_mode_cifar10.ipynb notebook in blog/pytorch_cnn_cifar10.
- For Image, choose
PyTorch 2.1.0 Python 3.10 CPU Optimized.
 Confirm that your notebook shows the correct instance and kernel selection.
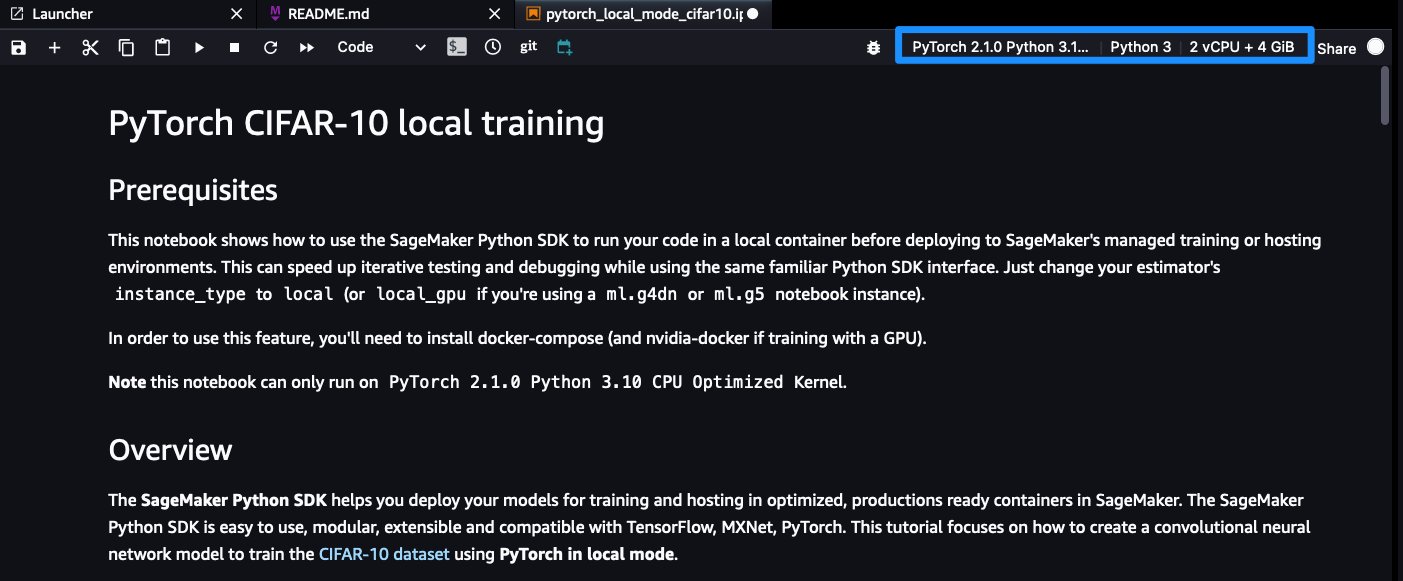
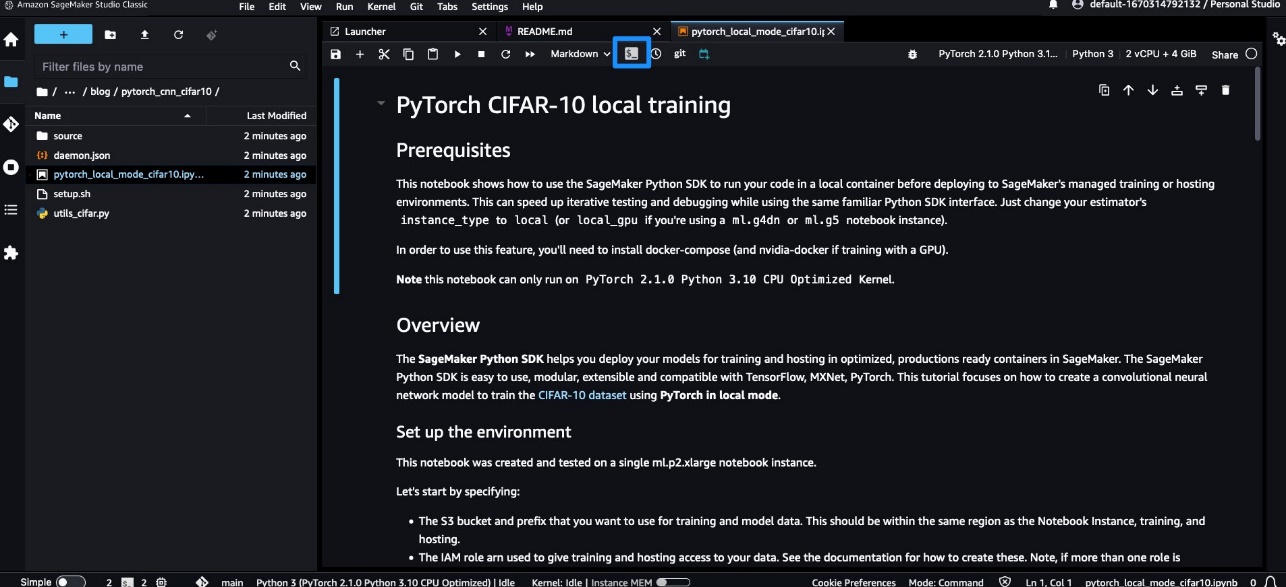
- Open a terminal by choosing Launch Terminal in the current SageMaker image.
- Install the Docker CLI and Docker Compose plugin following the instructions in the following GitHub repo.
Because you’re using Docker from SageMaker Studio Classic, remove sudo when running commands because the terminal already runs under superuser. For SageMaker Studio Classic, the installation commands depend on the SageMaker Studio app image OS. For example, DLC-based framework images are Ubuntu based, in which the following instructions would work. However, for a Debian-based image like DataScience Images, you must follow the instructions in the following GitHub repo. If chained commands fail, run the commands one at a time. You should see the Docker version displayed. 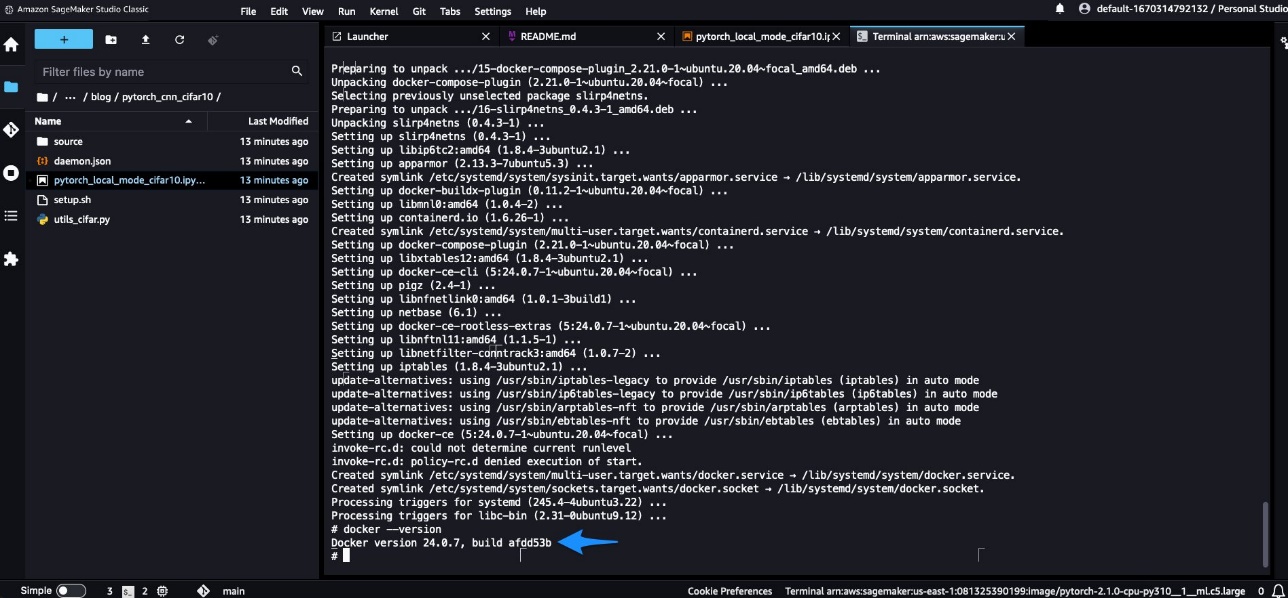
- Leave the terminal window open, go back to the notebook, and start running it cell by cell.
Make sure to run the cell with pip install -U sagemaker so you’re using the latest version of the SageMaker Python SDK.
Local training
When you start running the local SageMaker training job, you will see the following log lines:
This indicates that the training was running locally using Docker.
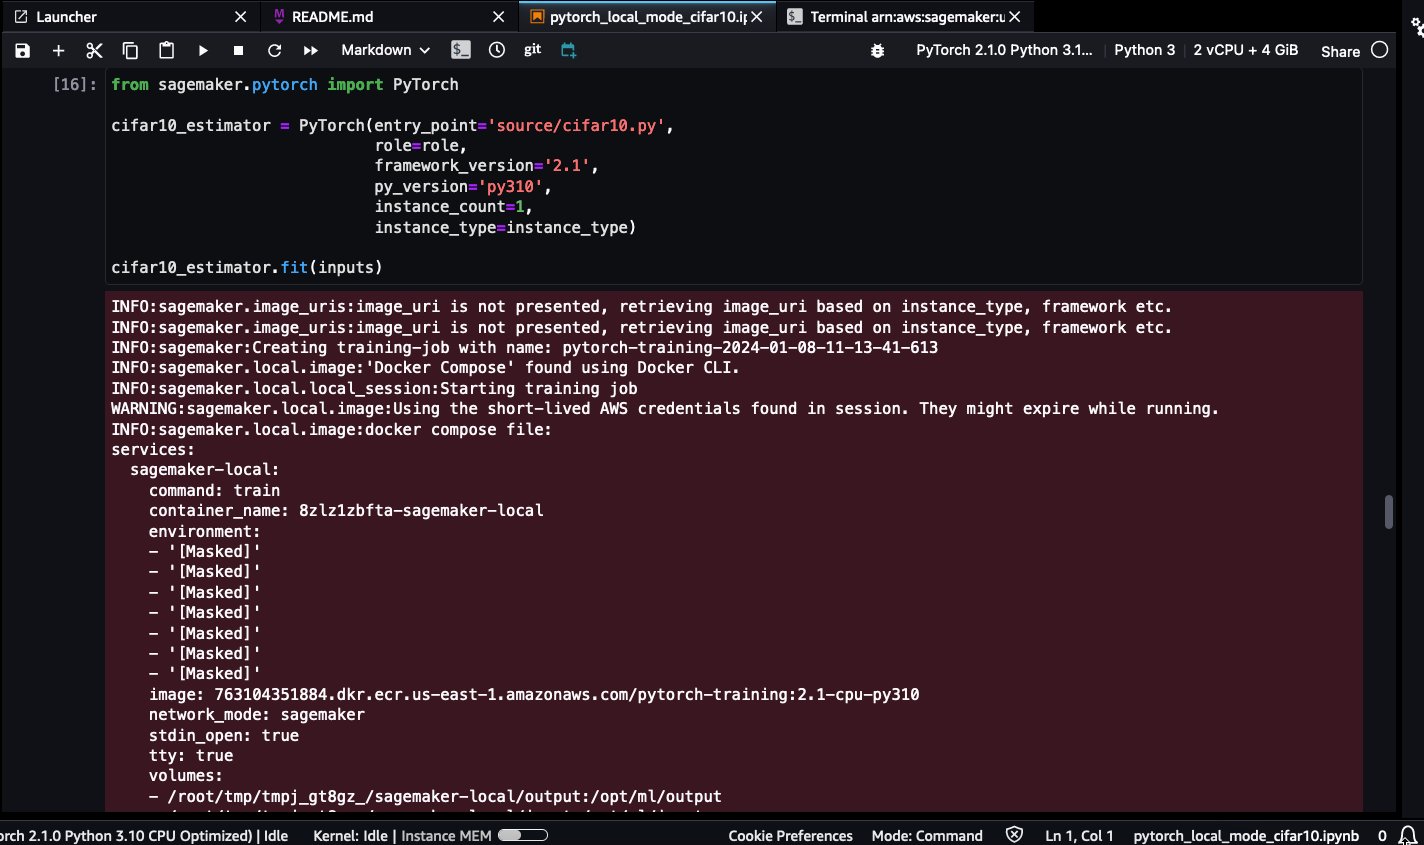
Be patient while the pytorch-training:2.1-cpu-py310 Docker image is pulled. Due to its large size (5.2 GB), it could take a few minutes.
Docker images will be stored in the SageMaker Studio app instance’s root volume, which is not accessible to end-users. The only way to access and interact with Docker images is via the exposed Docker API operations.
From a user confidentiality standpoint, the SageMaker Studio platform never accesses or stores user-specific images.
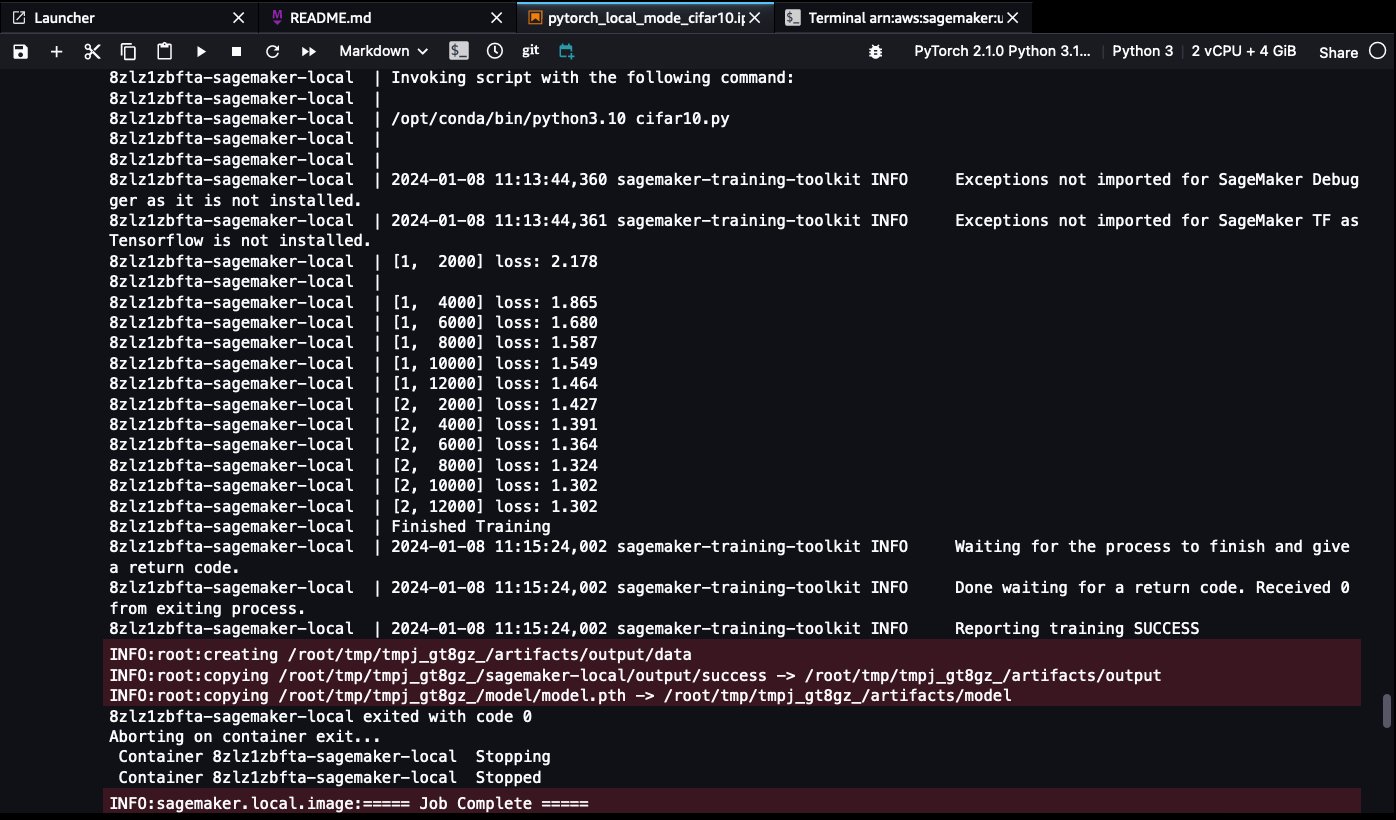
When the training is complete, you’ll be able to see the following success log lines:
Local inference
Complete the following steps:
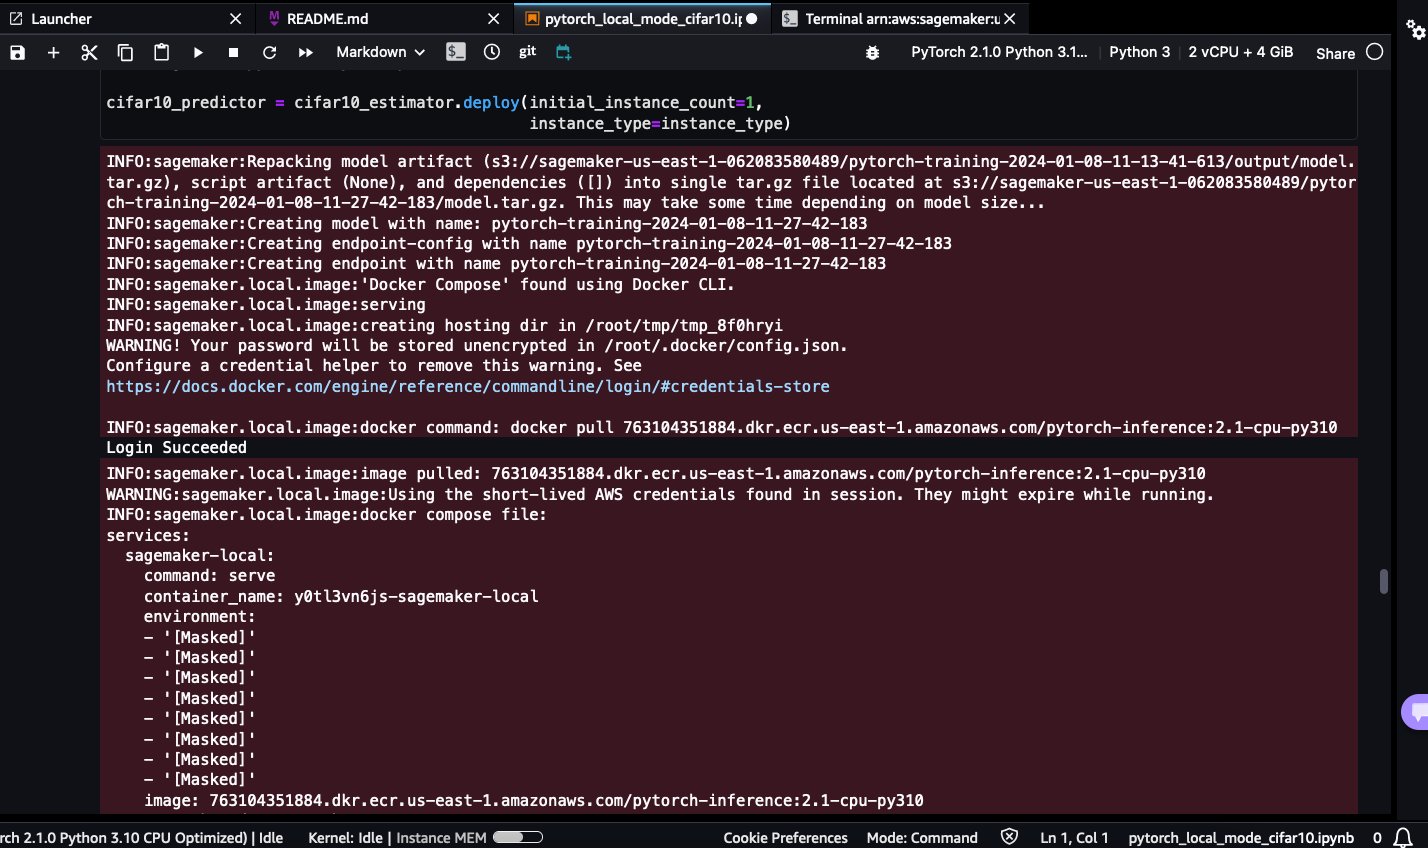
- Deploy the SageMaker endpoint using SageMaker Local Mode.
Be patient while the pytorch-inference:2.1-cpu-py310 Docker image is pulled. Due to its large size (4.32 GB), it could take a few minutes.
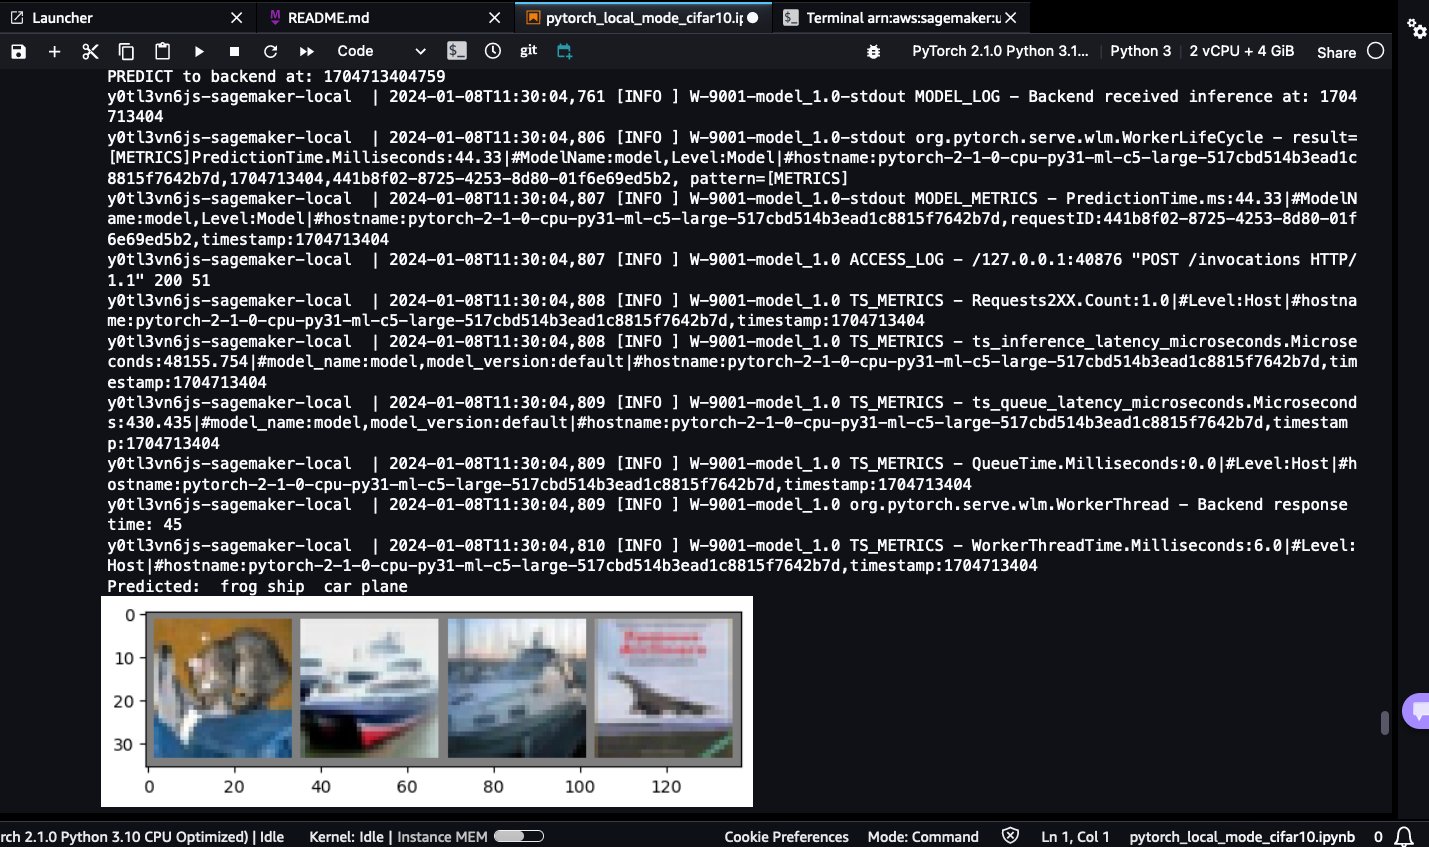
- Invoke the SageMaker endpoint deployed locally using the test images.
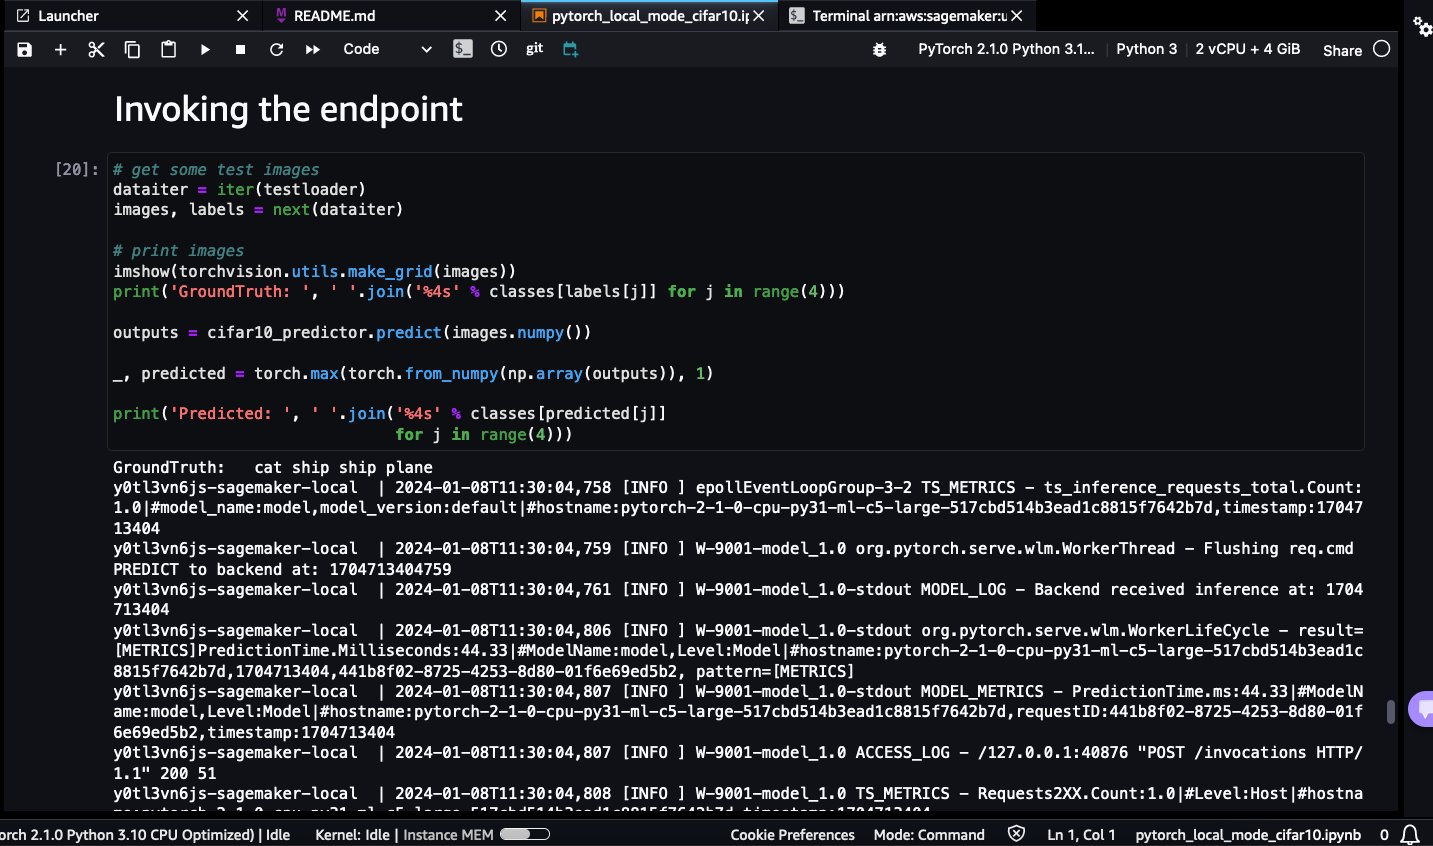
You will be able to see the predicted classes: frog, ship, car, and plane:
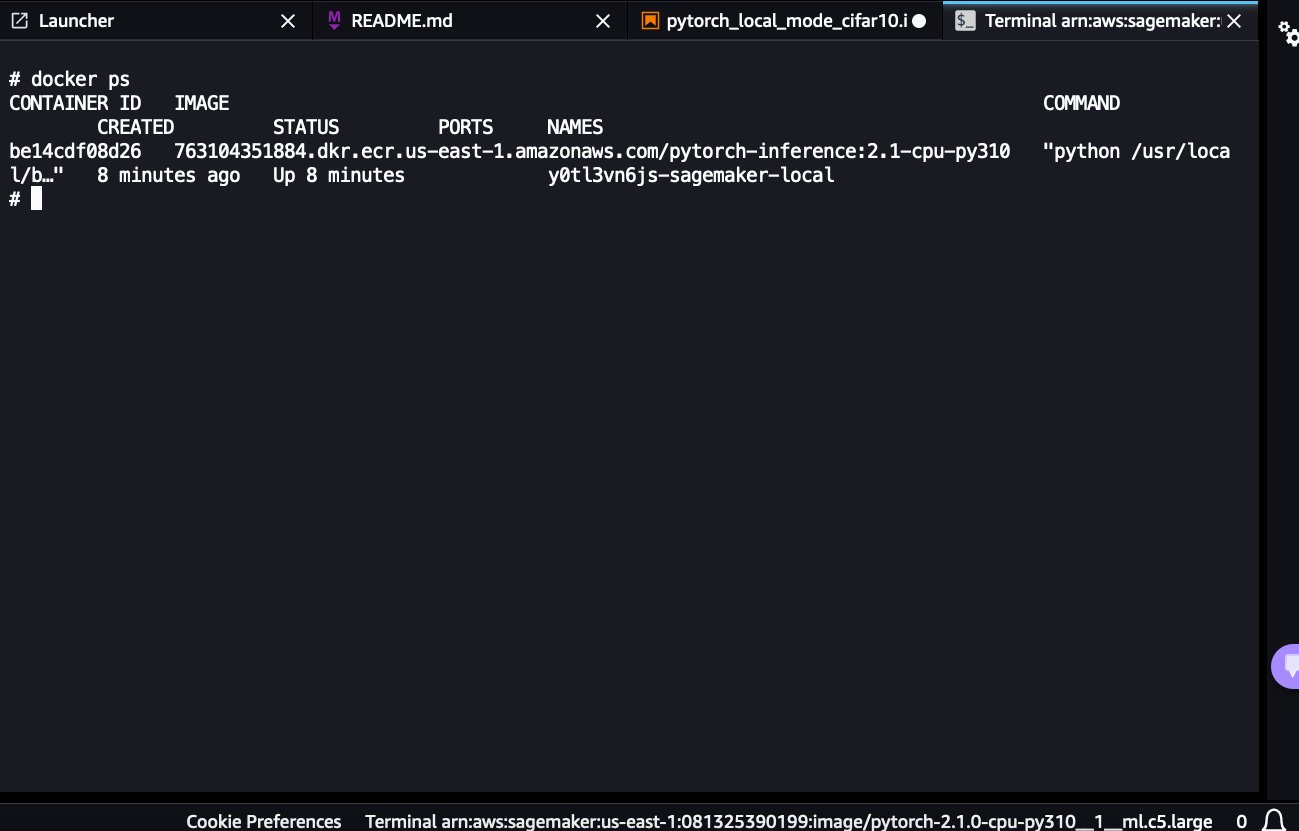
- Because the SageMaker Local endpoint is still up, navigate back to the open terminal window and list the running containers:
docker ps
You’ll be able to see the running pytorch-inference:2.1-cpu-py310 container backing the SageMaker endpoint.
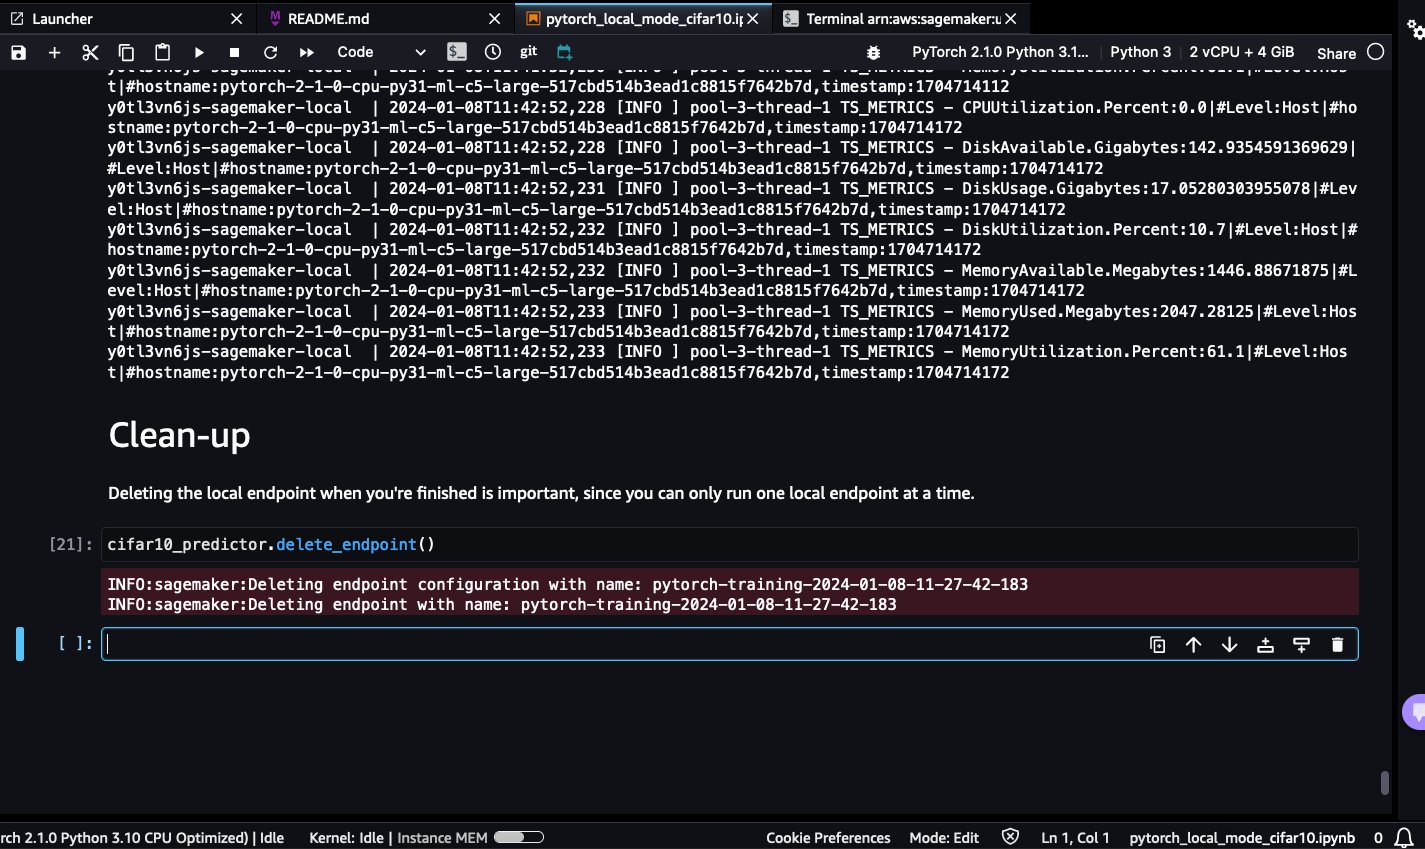
- To shut down the SageMaker local endpoint and stop the running container, because you can only run one local endpoint at a time, run the cleanup code.
- To make sure the Docker container is down, you can navigate to the opened terminal window, run docker ps, and make sure there are no running containers.
- If you see a container running, run
docker stop <CONTAINER_ID>to stop it.
Tips for using SageMaker Local Mode
If you’re using SageMaker for the first time, refer to Train machine learning models. To learn more about deploying models for inference with SageMaker, refer to Deploy models for inference.
Keep in mind the following recommendations:
- Print input and output files and folders to understand dataset and model loading
- Use 1–2 epochs and small datasets for quick testing
- Pre-install dependencies in a Dockerfile to optimize environment setup
- Isolate serialization code in endpoints for debugging
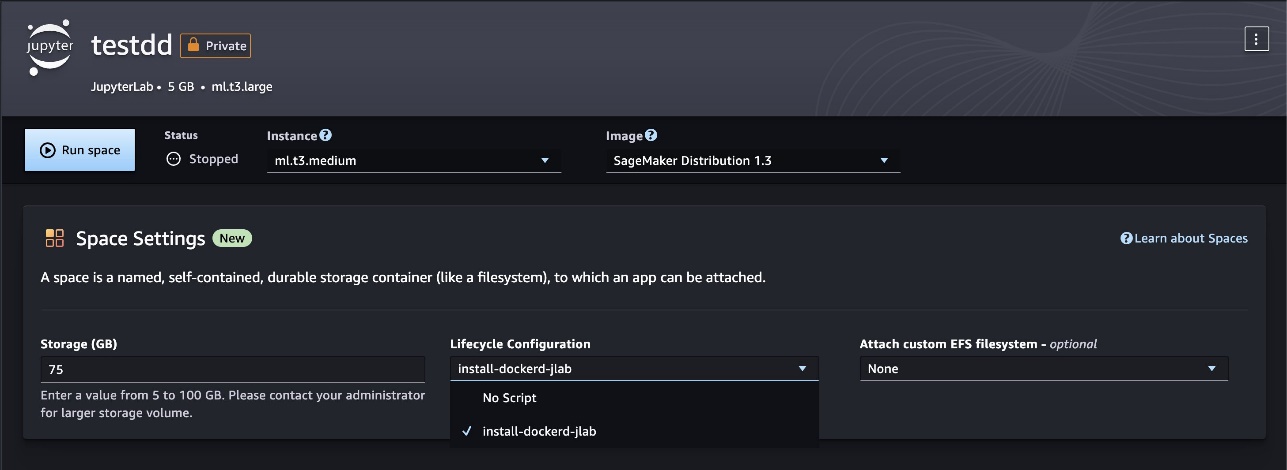
Configure Docker installation as a Lifecycle Configuration
You can define the Docker install process as a Lifecycle Configuration (LCC) script to simplify setup each time a new SageMaker Studio space starts. LCCs are scripts that SageMaker runs during events like space creation. Refer to the JupyterLab, Code Editor, or SageMaker Studio Classic LCC setup (using docker install cli as reference) to learn more.
Build and test custom Docker images in SageMaker Studio spaces
In this step, you install Docker inside the JupyterLab (or Code Editor) app space and use Docker to build, test, and publish custom Docker images with SageMaker Studio spaces. Spaces are used to manage the storage and resource needs of some SageMaker Studio applications. Each space has a 1:1 relationship with an instance of an application. Every supported application that is created gets its own space. To learn more about SageMaker spaces, refer to Boost productivity on Amazon SageMaker Studio: Introducing JupyterLab Spaces and generative AI tools. Make sure you provision a new space with at least 30 GB of storage to allow sufficient storage for Docker images and artifacts.
Install Docker inside a space
To install the Docker CLI and Docker Compose plugin inside a JupyterLab space, run the commands in the following GitHub repo. SageMaker Studio only supports Docker version 20.10.X.
Build Docker images
To confirm that Docker is installed and working inside your JupyterLab space, run the following code:
To build a custom Docker image inside a JupyterLab (or Code Editor) space, complete the following steps:
- Create an empty Dockerfile:
touch Dockerfile
- Edit the Dockerfile with the following commands, which create a simple flask web server image from the base python:3.10.13-bullseye image hosted on Docker Hub:
The following code shows the contents of an example flask application file app.py:
Additionally, you can update the reference Dockerfile commands to include packages and artifacts of your choice.
- Build a Docker image using the reference Dockerfile:
docker build --network sagemaker --tag myflaskapp:v1 --file ./Dockerfile .
Include --network sagemaker in your docker build command, otherwise the build will fail. Containers can’t be run in Docker default bridge or custom Docker networks. Containers are run in same network as the SageMaker Studio application container. Users can only use sagemaker for the network name.
- When your build is complete, validate if the image exists. Re-tag the build as an ECR image and push. If you run into permission issues, run the aws ecr get-login-password… command and try to rerun the Docker push/pull:
Test Docker images
Having Docker installed inside a JupyterLab (or Code Editor) SageMaker Studio space allows you to test pre-built or custom Docker images as containers (or containerized applications). In this section, we use the docker run command to provision Docker containers inside a SageMaker Studio space to test containerized workloads like REST web services and Python scripts. Complete the following steps:
- Check if the image you’re testing exists on the space’s Amazon Elastic Block Store (Amazon EBS) volume:
- If the test image doesn’t exist, run docker pull to pull the image into your local machine:
sagemaker-user@default:~$ docker pull 123456789012.dkr.ecr.us-east-2.amazonaws.com/myflaskapp:v1
- If you encounter authentication issues, run the following commands:
aws ecr get-login-password --region region | docker login --username AWS --password-stdin aws_account_id.dkr.ecr.region.amazonaws.com
- Create a container to test your workload:
docker run --network sagemaker 123456789012.dkr.ecr.us-east-2.amazonaws.com/myflaskapp:v1
This spins up a new container instance and runs the application defined using Docker’s ENTRYPOINT:
- To test if your web endpoint is active, navigate to the URL
https://<sagemaker-space-id>.studio.us-east-2.sagemaker.aws/jupyterlab/default/proxy/6006/.
You should see a JSON response similar to following screenshot.

Clean up
To avoid incurring unnecessary charges, delete the resources that you created while running the examples in this post:
- In your SageMaker Studio domain, choose Studio Classic in the navigation pane, then choose Stop.
- In your SageMaker Studio domain, choose JupyterLab or Code Editor in the navigation pane, choose your app, and then choose Stop.
Conclusion
SageMaker Studio Local Mode and Docker support empower developers to build, test, and iterate on ML implementations faster without leaving their workspace. By providing instant access to test environments and outputs, these capabilities optimize workflows and improve productivity. Try out SageMaker Studio Local Model and Docker support using our quick onboard feature, which allows you to spin up a new domain for single users within minutes. Share your thoughts in the comments section!
About the Authors
 Shweta Singh is a Senior Product Manager in the Amazon SageMaker Machine Learning (ML) platform team at AWS, leading SageMaker Python SDK. She has worked in several product roles in Amazon for over 5 years. She has a Bachelor of Science degree in Computer Engineering and Masters of Science in Financial Engineering, both from New York University
 Eitan Sela is a Generative AI and Machine Learning Specialist Solutions Architect ta AWS. He works with AWS customers to provide guidance and technical assistance, helping them build and operate Generative AI and Machine Learning solutions on AWS. In his spare time, Eitan enjoys jogging and reading the latest machine learning articles.
 Pranav Murthy is an AI/ML Specialist Solutions Architect at AWS. He focuses on helping customers build, train, deploy and migrate machine learning (ML) workloads to SageMaker. He previously worked in the semiconductor industry developing large computer vision (CV) and natural language processing (NLP) models to improve semiconductor processes using state of the art ML techniques. In his free time, he enjoys playing chess and traveling. You can find Pranav on LinkedIn.
 Mufaddal Rohawala is a Software Engineer at AWS. He works on the SageMaker Python SDK library for Amazon SageMaker. In his spare time, he enjoys travel, outdoor activities and is a soccer fan.