Amazon Textract is a machine learning (ML) service that makes it easy to extract text and data from scanned documents. Textract goes beyond simple optical character recognition (OCR) to identify the contents of fields in forms and information stored in tables. This allows you to use Amazon Textract to instantly “read” virtually any type of document and accurately extract text and data without needing any manual effort or custom code.
Amazon Textract has multiple applications in a variety of fields. For example, talent management companies can use Amazon Textract to automate the process of extracting a candidate’s skill set. Healthcare organizations can extract patient information from documents to fulfill medical claims.
When your organization processes a variety of documents, you sometimes need to extract entities from unstructured text in the documents. A contract document, for example, can have paragraphs of text where names and other contract terms are listed in the paragraph of text instead of as a key/value or form structure. Amazon Comprehend is a natural language processing (NLP) service that can extract key phrases, places, names, organizations, events, sentiment from unstructured text, and more. With custom entity recognition, you can to identify new entity types not supported as one of the preset generic entity types. This allows you to extract business-specific entities to address your needs.
In this post, we show how to extract custom entities from scanned documents using Amazon Textract and Amazon Comprehend.
Use case overview
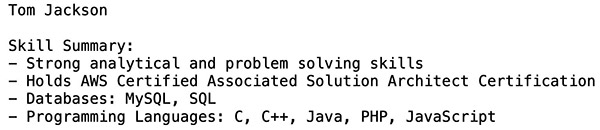
For this post, we process resume documents from the Resume Entities for NER dataset to get insights such as candidates’ skills by automating this workflow. We use Amazon Textract to extract text from these resumes and Amazon Comprehend custom entity recognition to detect skills such as AWS, C, and C++ as custom entities. The following screenshot shows a sample input document.
The following screenshot shows the corresponding output generated using Amazon Textract and Amazon Comprehend.

Solution overview
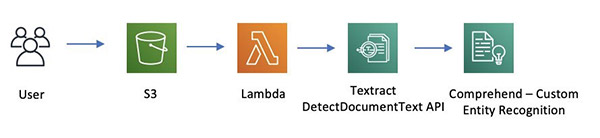
The following diagram shows a serverless architecture that processes incoming documents for custom entity extraction using Amazon Textract and custom model trained using Amazon Comprehend. As documents are uploaded to an Amazon Simple Storage Service (Amazon S3) bucket, it triggers an AWS Lambda function. The function calls the Amazon Textract DetectDocumentText API to extract the text and calls Amazon Comprehend with the extracted text to detect custom entities.
The solution consists of two parts:
- Training:
- Extract text from PDF documents using Amazon Textract
- Label the resulting data using Amazon SageMaker Ground Truth
- Train custom entity recognition using Amazon Comprehend with the labeled data
- Inference:
- Send the document to Amazon Textract for data extraction
- Send the extracted data to the Amazon Comprehend custom model for entity extraction
Launching your AWS CloudFormation stack
For this post, we use an AWS CloudFormation stack to deploy the solution and create the resources it needs. These resources include an S3 bucket, Amazon SageMaker instance, and the necessary AWS Identity and Access Management (IAM) roles. For more information about stacks, see Walkthrough: Updating a stack.
- Download the following CloudFormation template and save to your local disk.
- Sign in to the AWS Management Console with your IAM user name and password.
- On the AWS CloudFormation console, choose Create Stack.
Alternatively, you can choose Launch Stack directly.
- On the Create Stack page, choose Upload a template file and upload the CloudFormation template you downloaded.
- Choose Next.
- On the next page, enter a name for the stack.

- Leave everything else at their default setting.
- On the Review page, select I acknowledge that AWS CloudFormation might create IAM resources with custom names.
- Choose Create stack.

- Wait for the stack to finish running.
You can examine various events from the stack creation process on the Events tab. After the stack creation is complete, look at the Resources tab to see all the resources the template created.
- On the Outputs tab of the CloudFormation stack, record the Amazon SageMaker instance URL.

Running the workflow on a Jupyter notebook
To run your workflow, complete the following steps:
- Open the Amazon SageMaker instance URL that you saved from the previous step.
- Under the New drop-down menu, choose Terminal.
- On the terminal, clone the GitHub
cd Sagemaker; git cloneURL.
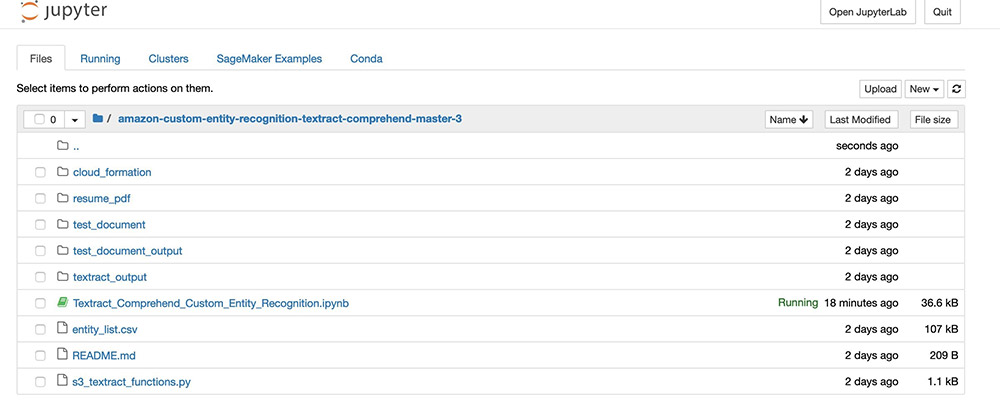
You can check the folder structure (see the following screenshot).
- Open
Textract_Comprehend_Custom_Entity_Recognition.ipynb. - Run the cells.
Code walkthrough
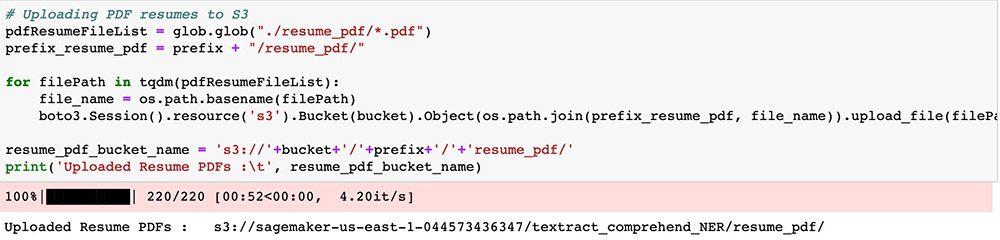
Upload the documents to your S3 bucket.
The PDFs are now ready for Amazon Textract to perform OCR. Start the process with a StartDocumentTextDetection asynchronous API call.
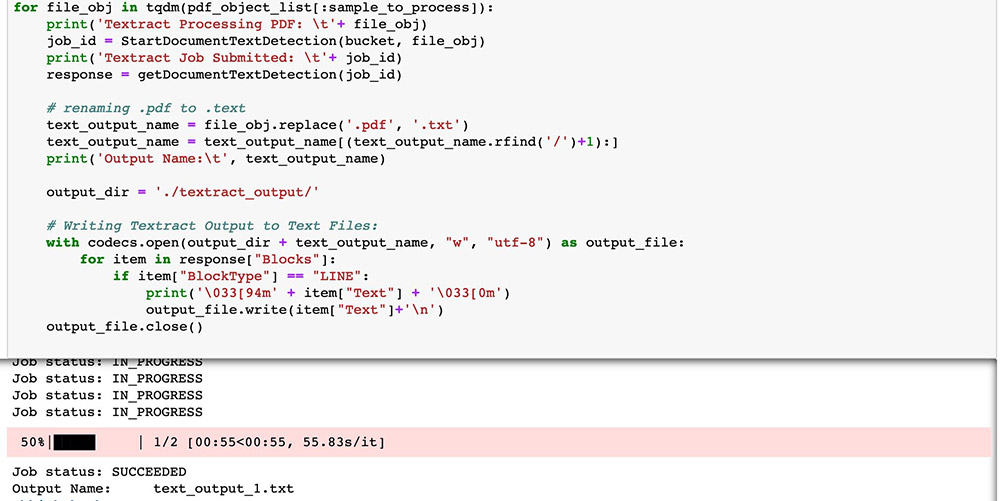
For this post, we process two resumes in PDF format for demonstration, but you can process all 220 if needed. The results have all been processed and are ready for you to use.
Because we need to train a custom entity recognition model with Amazon Comprehend (as with any ML model), we need training data. In this post, we use Ground Truth to label our entities. By default, Amazon Comprehend can recognize entities like person, title, and organization. For more information, see Detect Entities. To demonstrate custom entity recognition capability, we focus on candidate skills as entities inside these resumes. We have the labeled data from Ground Truth. The data is available in the GitHub repo <(see: entity_list.csv)>. For instructions on labeling your data, see Developing NER models with Amazon SageMaker Ground Truth and Amazon Comprehend.
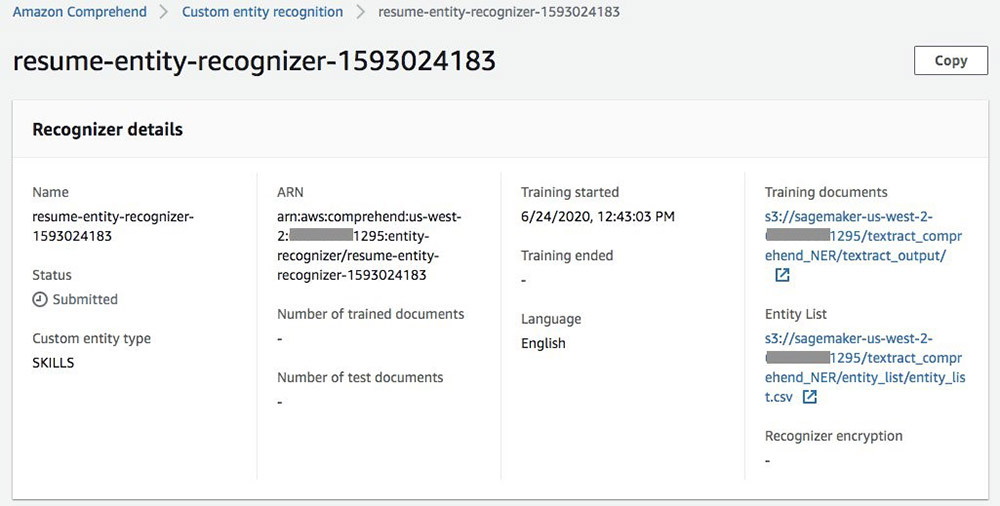
Now we have our raw and labeled data and are ready to train our model. To start the process, use the create_entity_recognizer API call. When the training job is submitted, you can see the recognizer being trained on the Amazon Comprehend console.
In the training, Amazon Comprehend sets aside some data for testing. When the recognizer is trained, you can see the performance of each entity and the recognizer overall.

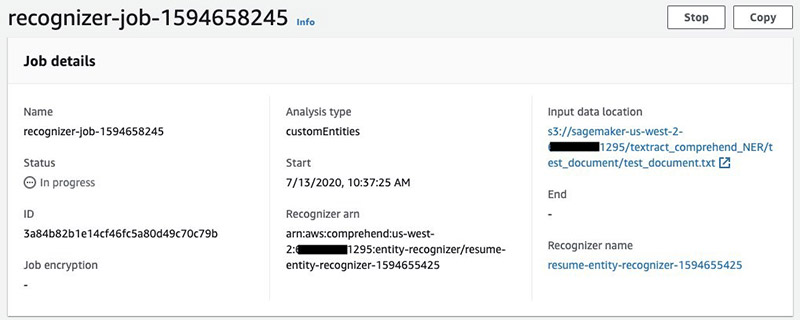
We have prepared a small sample of text to test out the newly trained custom entity recognizer. We run the same step to perform OCR, then upload the Amazon Textract output to Amazon S3 and start a custom recognizer job.

When the job is submitted, you can see the progress on the Amazon Comprehend console under Analysis Jobs.
When the analysis job is complete, you can download the output and see the results. For this post, we converted the JSON result into table format for readability.

Conclusion
ML and artificial intelligence allow organizations to be agile. It can automate manual tasks to improve efficiency. In this post, we demonstrated an end-to-end architecture for extracting entities such as a candidate’s skills on their resume by using Amazon Textract and Amazon Comprehend. This post showed you how to use Amazon Textract to do data extraction and use Amazon Comprehend to train a custom entity recognizer from your own dataset and recognize custom entities. You can apply this process to a variety of industries, such as healthcare and financial services.
To learn more about different text and data extraction features of Amazon Textract, see How Amazon Textract Works.
About the Authors
 Yuan Jiang is a Solution Architect with a focus on machine learning. He is a member of the Amazon Computer Vision Hero program.
 Sonali Sahu is a Solution Architect and a member of Amazon Machine Learning Technical Field Community. She is also a member of the Amazon Computer Vision Hero program.
 Kashif Imran is a Principal Solution Architect and the leader of Amazon Computer Vision Hero program.