Amazon Kendra is a highly accurate and easy-to-use intelligent search service powered by machine learning (ML). To simplify the process of connecting data sources to your index, Amazon Kendra offers several native data source connectors to help get your documents easily ingested.
For many organizations, Google Drive is a core part of their productivity suite, and often contains important documents and presentations. In this post, we illustrate how you can use the Google Drive connector in Amazon Kendra to synchronize content between Google Drive and your Amazon Kendra index, making it searchable using Amazon Kendra’s intelligent search capabilities.
The Google Drive connector indexes documents stored in shared drives as well as documents stored in a user’s own drive (such as My Drives). By default, Amazon Kendra indexes all documents in your Google Drive, but it also provides the flexibility to exclude documents from the index based on certain criteria, including the ID of a shared drive, document owner, the MIME type of the document, or the document path.
Prerequisites
The Amazon Kendra Google Drive connector supports Google Docs and Google Slides. We demonstrate how to search a Google Drive Workspace in Amazon Kendra using an AWS Whitepaper dataset.
First, we set up the necessary permissions within your Google Drive Workspace. We then illustrate how to create the Amazon Kendra Google Drive connector on the AWS Management Console, followed by creating the Amazon Kendra Google Drive connector via the (Python) API. Lastly, we perform some example search queries with Amazon Kendra after ingesting the AWS Whitepaper dataset.
Setting up an Amazon Kendra Google Drive connector includes the following steps:
- Setting up a name and tags
- Entering the credentials for your Google service account
- Setting up a sync schedule
- Configuring the index field mappings
Setting up the necessary permissions within your Google Drive Workspace includes the following steps:
- Creating a Google Drive service account if one doesn’t exist
- Configuring the Google Drive service account
- Enabling the Admin and Google Drive APIs
- Enabling the Google API scope
If you haven’t previously created a service account, see the section Creating a Google Drive service account in this post.
Creating a Google Drive data source on the Amazon Kendra console
Before you create your data source, you must create an Amazon Kendra index. For instructions, see the section Creating an Amazon Kendra index in Getting started with the Amazon Kendra SharePoint Online connector.
After you create your index, you can create a Google Drive data source.
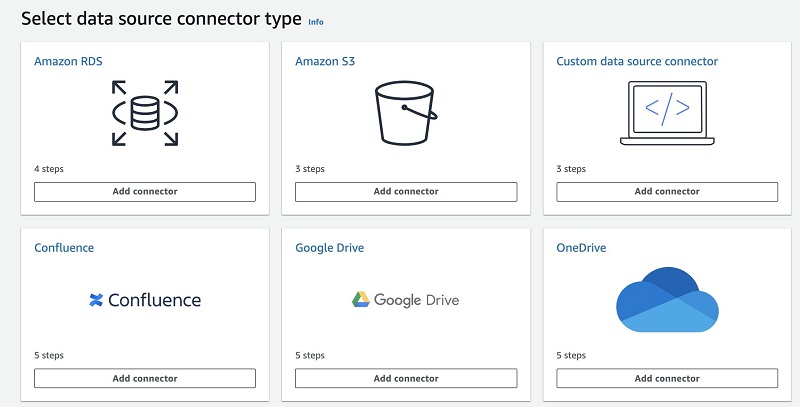
- On the Amazon Kendra console, under Data management¸ choose Data sources.
- Choose Create data source.
- Under Google Drive, choose Add connector.
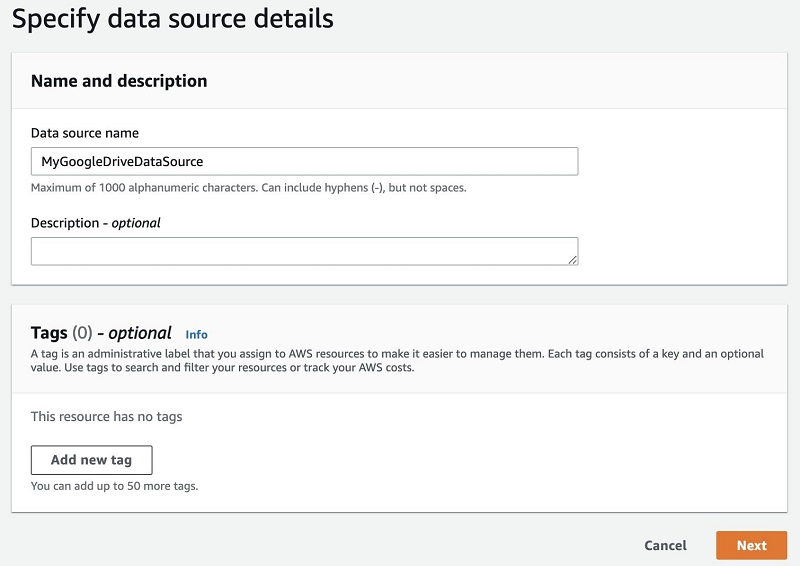
- For Data source name¸ a name (for example,
MyGoogleDriveDataSource). - Choose Next.
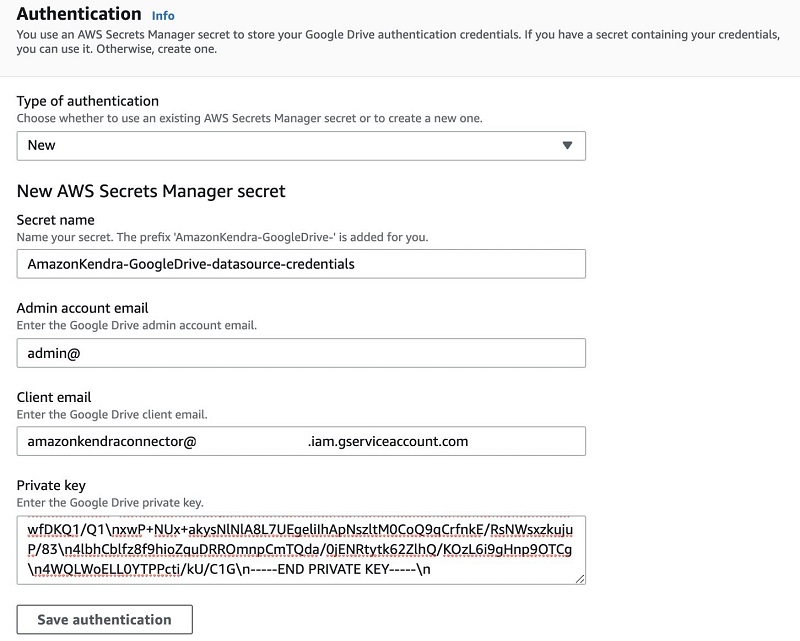
- In the Authentication section, you need information from the JSON document that was downloaded when you configured the service account. Make sure you include everything between ” ” for your private key.
The following screenshot shows what the JSON document looks like.

The following screenshot shows our configuration on the Authentication page.
- For IAM role¸ choose Create a new role to create a new AWS Identity and Access Management (IAM) role.
- For Role name, enter a name for your role.
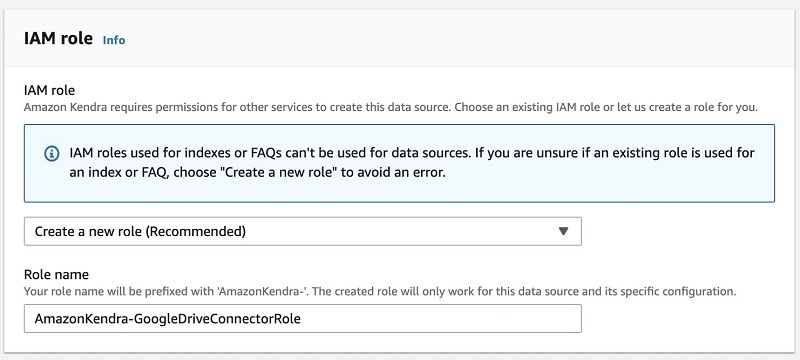
- Choose Next.
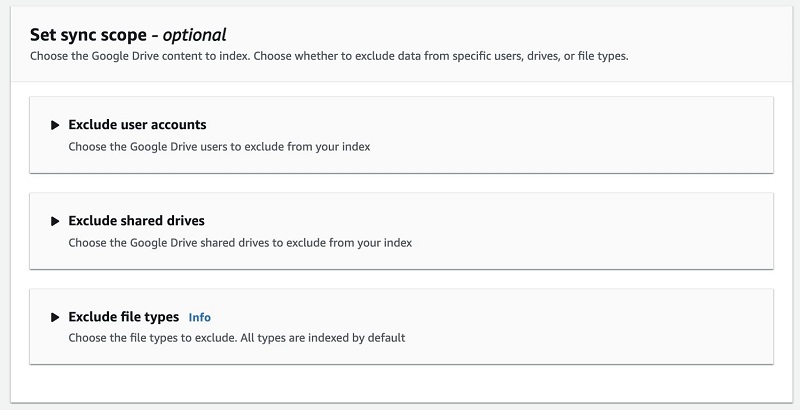
- For Set sync scope, you can define which user accounts, shared drives, or file type to exclude. For this post, we don’t modify these settings.
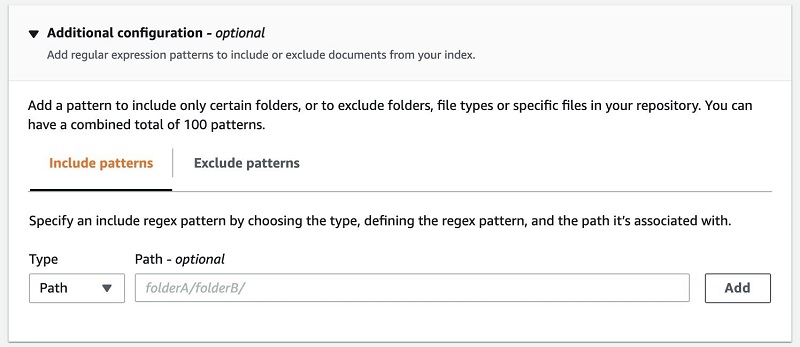
- For Additional configuration, you can also include or exclude paths, files, or file types. For this post, I ingest everything I have on my Google Drive.
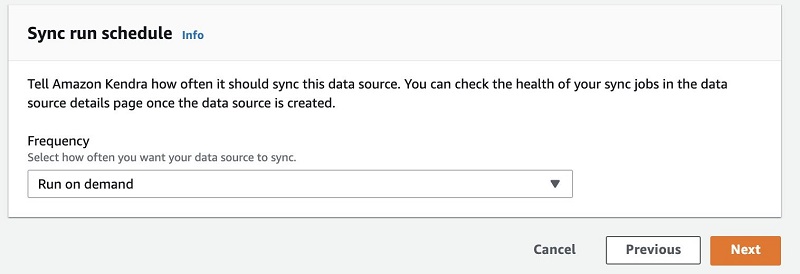
- In the Sync run schedule section, for Frequency, you can choose the frequency of data source synchronization—on demand, hourly, daily, weekly or monthly, or custom. For this post, I choose Run on demand.
- Choose Next.
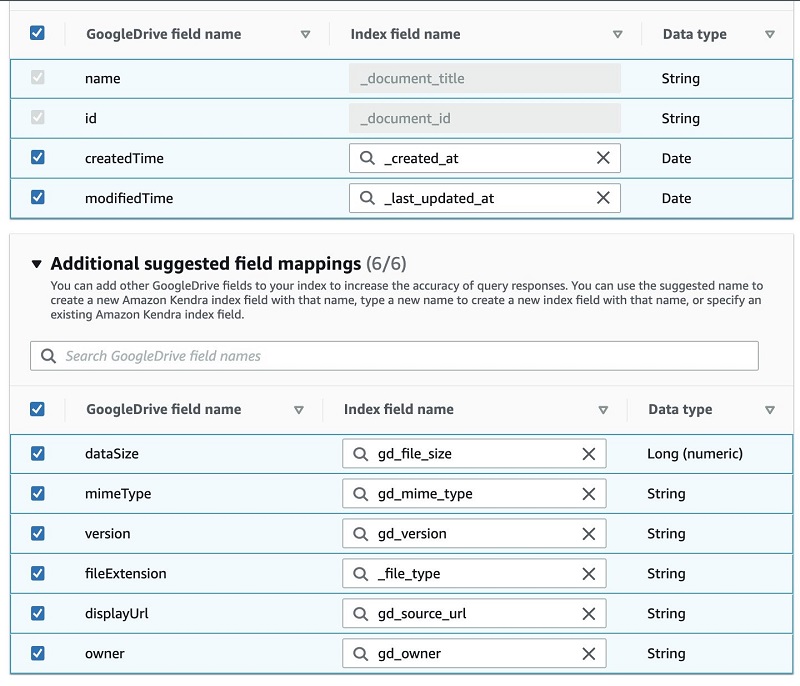
- In the Field mapping section, you can define which file attributes you want to map into your index. For this post, I use the default field mapping.
The following table lists the available fields.
| Google Drive Property Name | Suggested Amazon Kendra Field Name |
createdTime |
_created_at |
dataSize |
gd_data_size |
displayUrl |
gd_source_url |
fileExtension |
_file_type |
id |
_document_id |
mimeType |
gd_mime_type |
modifiedTime |
_last_updated_at |
name |
_document_title |
owner |
gd_owner |
version |
gd_version |
The following screenshot shows our configuration.
- Choose Next.
- Review your settings and choose Create.
- After the data source is created, you can start the sync process by choosing Sync now.

Creating an Amazon Kendra Google Drive connector with Python
You can create a new Amazon Kendra index Google Drive connector and sync it by using the AWS SDK for Python (Boto3). Boto3 makes it easy to integrate your Python application, library, or script with AWS services, including Amazon Kendra.
IAM roles requirements and overview
To create an index using the AWS SDK, you need to have the policy AmazonKendraFullAccess attached to the role you’re using.
At a high level, Amazon Kendra requires the following:
- IAM roles for indexes – Needed to write to Amazon CloudWatch Logs.
- IAM roles for data sources – Needed when you use the
CreateDataSourceThese roles require a specific set of permissions depending on the connector you use. For our use case, it needs permissions to access the following:- AWS Secrets Manager, where the Google Drive credentials are stored.
- The AWS Key Management Service (AWS KMS) customer master key (CMK) to decrypt the credentials by Secrets Manager.
- The
BatchPutDocumentandBatchDeleteDocumentoperations to update the index.
For more information, see IAM access roles for Amazon Kendra.
For this solution, you also need the following:
- An Amazon Kendra IAM role for CloudWatch
- An Amazon Kendra IAM role for the Google Drive connector
- Google Drive service account credentials stored on Secrets Manager
Creating an Amazon Kendra index
To create an index, use the following code:
import boto3
from botocore.exceptions import ClientError
import pprint
import time

kendra = boto3.client("kendra")

print("Creating an index")

description = "<YOUR INDEX DESCRIPTION>"
index_name = "<YOUR NEW INDEX NAME>"
role_arn = "KENDRA ROLE WITH CLOUDWATCH PERMISSIONS ROLE"

try:
    index_response = kendra.create_index(
        Description = description,
        Name = index_name,
        RoleArn = role_arn,
        Edition = "DEVELOPER_EDITION",
        Tags=[
        {
            'Key': 'Project',
            'Value': 'Google Drive Test'
        }
        ]
    )

    pprint.pprint(index_response)

    index_id = index_response['Id']

    print("Wait for Kendra to create the index.")

    while True:
        # Get index description
        index_description = kendra.describe_index(
            Id = index_id
        )
        # If status is not CREATING quit
        status = index_description["Status"]
        print("    Creating index. Status: "+status)
        if status != "CREATING":
            break
        time.sleep(60)

except ClientError as e:
        print("%s" % e)

print("Done creating index.")
While your index is being created, you get regular updates (every 60 seconds; check line 38) until the process is complete. See the following code:
Creating an index{'Id': '3311b507-bfef-4e2b-bde9-7c297b1fd13b','ResponseMetadata': {'HTTPHeaders': {'content-length': '45','content-type': 'application/x-amz-json-1.1','date': 'Mon, 20 Jul 2020 19:58:19 GMT','x-amzn-requestid': 'a148a4fc-7549-467e-b6ec-6f49512c1602'},'HTTPStatusCode': 200,'RequestId': 'a148a4fc-7549-467e-b6ec-6f49512c1602','RetryAttempts': 2}}
Wait for Kendra to create the index.
    Creating index. Status: CREATING
    Creating index. Status: CREATING
    Creating index. Status: CREATING
    Creating index. Status: CREATING
    Creating index. Status: ACTIVE
Done creating index
When your index is ready, it provides an ID 3311b507-bfef-4e2b-bde9-7c297b1fd13b on the response. Your index ID will be different than the ID in this post.
Providing the Google Drive service account credentials
You also need to have GetSecretValue for your secret stored in Secrets Manager.
If you need to create a new secret in Secrets Manager to store the Google service account credentials, make sure the role you use has permissions to create a secret and tagging. See the following policy code:
{"Version": "2012-10-17","Statement": [{"Sid": "SecretsManagerWritePolicy","Effect": "Allow","Action": ["secretsmanager:UntagResource","secretsmanager:CreateSecret","secretsmanager:TagResource"],"Resource": "*"}]}To create a secret on Secrets Manager, enter the following code:
secretsmanager = boto3.client('secretsmanager')

SecretName = "<YOUR_SECRETNAME>"
GoogleDriveCredentials= "{'clientAccount': '<YOUR SERVICE ACCOUNT EMAIL>','adminAccount': '<YOUR GSUITE ADMINISTRATOR EMAIL>','privateKey': '<YOUR SERVICE ACCOUNT PRIVATE KEY>'}"

try:
    create_secret_response = secretsmanager.create_secret(
        Name=SecretName,
        Description='Secret for a Google Drive data source connector',
        SecretString=GoogleDriveCredentials,
        Tags=[{'Key': 'Project','Value': 'Google Drive Test'}])
except ClientError as e:
    print('%s' % e)
pprint.pprint(create_secret_response)
If everything goes well, you get a response with your secret’s ARN:
{'ARN': <YOUR_SECRET_ARN>,
 'Name': 'YOUR_SECRETNAME',
 'ResponseMetadata': {'HTTPHeaders': {'connection': 'keep-alive',
                                      'content-length': '161',
                                      'content-type': 'application/x-amz-json-1.1',
                                      'date': 'Wed, 25 Nov 2020 14:23:54 GMT',
                                      'x-amzn-requestid': 'a2f7af73-be54-4388-bc53-427b5f201b8f'},
                      'HTTPStatusCode': 200,
                      'RequestId': 'a2f7af73-be54-4388-bc53-427b5f201b8f',
                      'RetryAttempts': 0},
 'VersionId': '90c1f8b7-6c26-4d42-ba4c-e1470b648c5c'}
Creating the Amazon Kendra Google Drive data source
Your Amazon Kendra index is up and running and you have established the attributes that you want to map to your Google Drive document’s attributes.
You now need an IAM role with Kendra:BatchPutDocument and kendra:BatchDeleteDocument permissions. For more information, see IAM access roles for Amazon Kendra. We use the ARN for this IAM role when invoking the CreateDataSource API.
Make sure the role you use for your data source connector has a trust relationship with Amazon Kendra. See the following code:
{
    "Version": "2012-10-17",
    "Statement": [
        {
            "Effect": "Allow",
            "Principal": {
                "Service": "kendra.amazonaws.com"
            },
            "Action": "sts:AssumeRole"
        }
    ]
}
The following code is the policy structure used:
{
    "Version": "2012-10-17",
    "Statement": [
        {
            "Effect": "Allow",
            "Action": [
                "secretsmanager:GetSecretValue"
            ],
            "Resource": [
                "arn:aws:secretsmanager:<REGION>-<YOUR ACCOUNT NUMBER>:secret:<YOUR-SECRET-ID>"
            ]
        },
        {
            "Effect": "Allow",
            "Action": [
                "kms:Decrypt"
            ],
            "Resource": [
                "arn:aws:kms:<REGION>-<YOUR ACCOUNT NUMBER>:index/<YOUR-INDEX-ID>"
            ],
            "Condition": {
                "StringLike": {
                    "kms:ViaService": [
                        "secretsmanager.*.amazonaws.com"
                    ]
                }
            }
        },
        {
            "Effect": "Allow",
            "Action": [
                "kendra:BatchPutDocument",
                "kendra:BatchDeleteDocument"
            ],
            "Resource": "arn:aws:kendra:<REGION>-<YOUR ACCOUNT NUMBER>:index/<YOUR-INDEX-ID>"
        }
    ]
}
The following code is my role’s ARN:
arn:aws:iam::<YOUR ACCOUNT NUMBER>:role/Kendra-DatasourceFollowing the least privilege principle, we only allow our role to put and delete documents in our index and read the credentials of the Google service account.
When creating a data source, you can specify the sync schedule, which indicates how often your index syncs with the data source we create. This schedule is defined on the Schedule key of our request. You can use schedule expressions for rules to define how often you want to sync your data source. For this use case, the ScheduleExpression is 'cron(0 11 * * ? *)', which sets the data source to sync every day at 11:00 AM.
I use the following code. Make sure you match your SiteURL and SecretARN, and IndexID.
import boto3
from botocore.exceptions import ClientError
import pprint
import time

print('Create a Google Drive data source')

SecretArn= "<YOUR-SECRET-ARN>"
DSName= "<YOUR-DATASOURCE-NAME>"
IndexId= "<YOUR-INDEX-ID>"
DSRoleArn= "<YOUR-DATASOURCE-ROLE-ARN>"
ScheduleExpression='cron(0 11 * * ? *)'

try:
    datasource_response = kendra.create_data_source(
    Name=DSName,
    IndexId=IndexId,
    Type='GOOGLEDRIVE',
    Configuration={
        'GoogleDriveConfiguration': {
            'SecretArn': SecretArn,
        },
               },
    Description='My GoogleDrive Datasource',
    RoleArn=DSRoleArn,
    Schedule=ScheduleExpression,
    Tags=[
        {
            'Key': 'Project',
            'Value': 'GoogleDrive Test'
        }
    ]
    )
    pprint.pprint(datasource_response)
    print('Waiting for Kendra to create the DataSource.')
    datasource_id = datasource_response['Id']
    while True:
        # Get index description
        datasource_description = kendra.describe_data_source(
            Id=datasource_id,
            IndexId=IndexId
        )
        # If status is not CREATING quit
        status = datasource_description["Status"]
        print("    Creating index. Status: "+status)
        if status != "CREATING":
            break
        time.sleep(60)

except  ClientError as e:
        print('%s' % e)
You should get a response like the following code:
'ResponseMetadata': {'HTTPHeaders': {'content-length': '45',
                                      'content-type': 'application/x-amz-json-1.1',
                                      'date': 'Wed, 02 Dec 2020 19:03:17 GMT',
                                      'x-amzn-requestid': '8d19fa35-adb6-41e2-92d6-0df2797707d8'},
                      'HTTPStatusCode': 200,
                      'RequestId': '8d19fa35-adb6-41e2-92d6-0df2797707d8',
                      'RetryAttempts': 0}}
Syncing the data source
Even though you defined a schedule for syncing the data source, you can sync on demand by using start_data_source_sync_job:
DSId=<YOUR DATA SOURCE ID>
IndexId=<YOUR INDEX ID>

try:
  ds_sync_response = kendra.start_data_source_sync_job(
  Id=DSId,
  IndexId=IndexId
  )
except ClientError as e:
  print('%s' % e)

pprint.pprint(ds_sync_response)
You get a result similar to the following code:
{'ExecutionId': '99bdd945-fe1e-4401-a9d6-a0272ce2dae7',
 'ResponseMetadata': {'HTTPHeaders': {'content-length': '54',
                                      'content-type': 'application/x-amz-json-1.1',
                                      'date': 'Wed, 02 Dec 2020 19:12:25 GMT',
                                      'x-amzn-requestid': '68a05d7b-26bf-4821-ae43-1a491f4cf314'},
                      'HTTPStatusCode': 200,
                      'RequestId': '68a05d7b-26bf-4821-ae43-1a491f4cf314',
                      'RetryAttempts': 0}}
Testing
Now that you have ingested the AWS Whitepapers dataset into your Amazon Kendra index, you can test some queries. I submit each test query first into the built-in Google Drive search bar and then retry the search with Amazon Kendra.
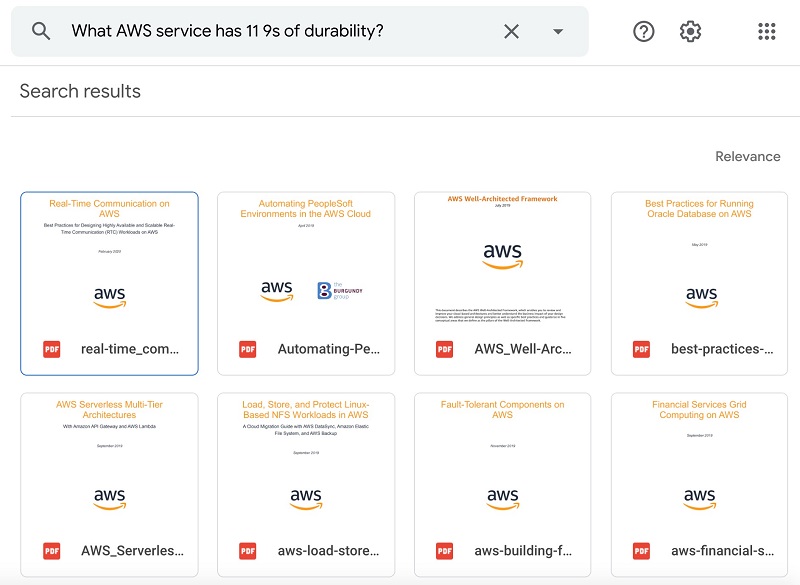
The first query I test is “What AWS service has 11 9s of durability?” The following screenshot shows the Google Drive output.
The following screenshot shows the query results in Amazon Kendra.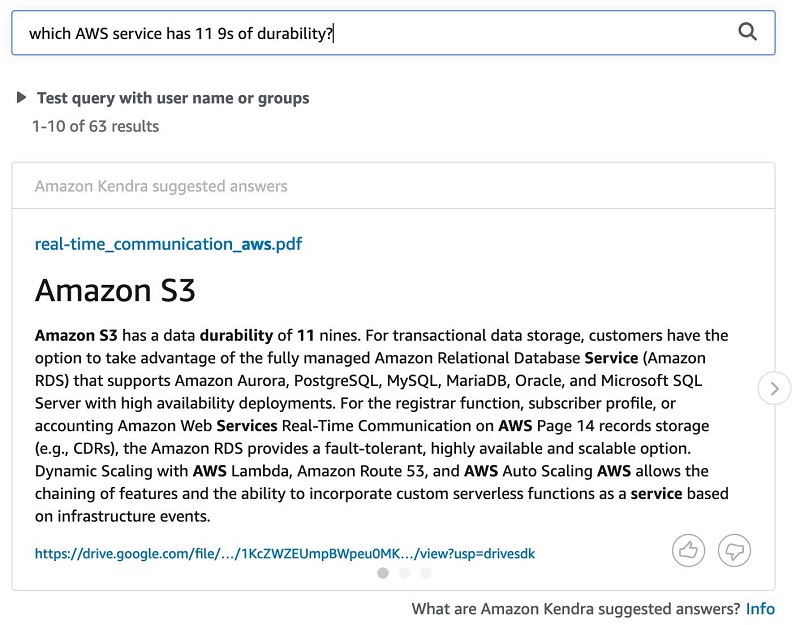
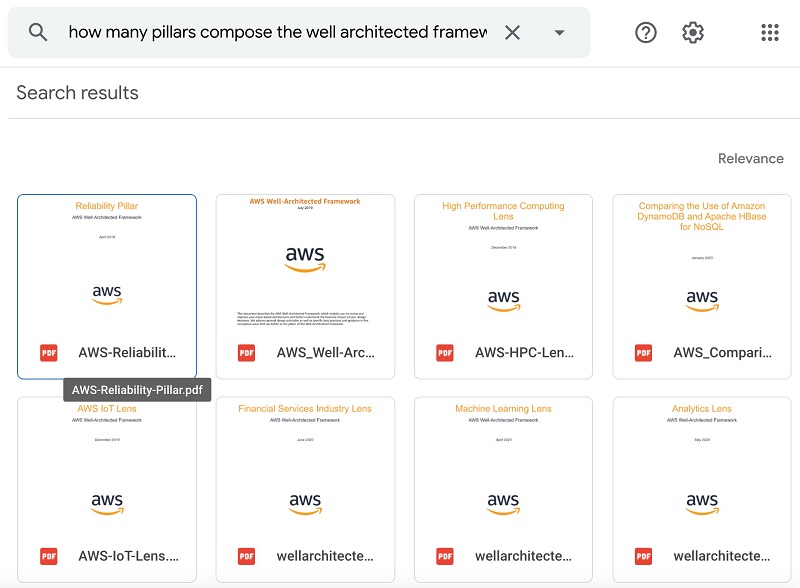
The next query is “How many pillars compose the well architected framework?” The following screenshot shows the response from Google Drive.
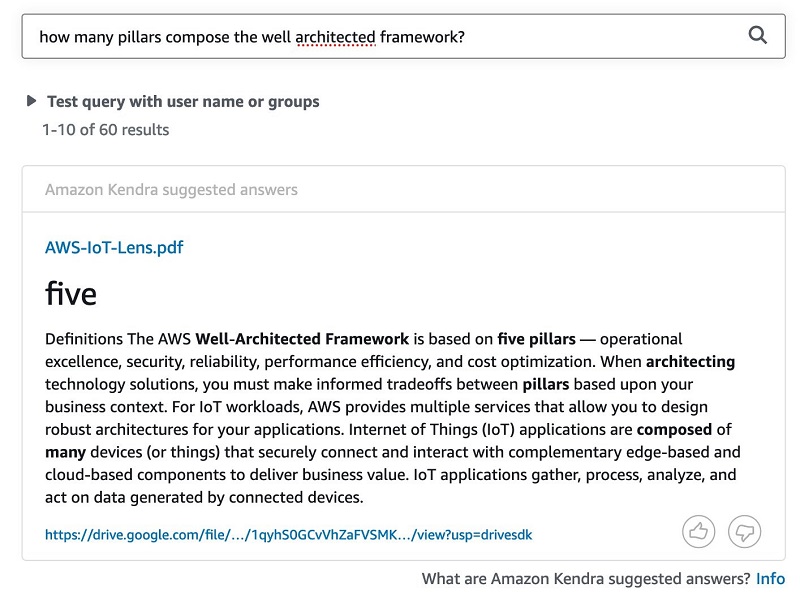
The following screenshot shows the results from Amazon Kendra.
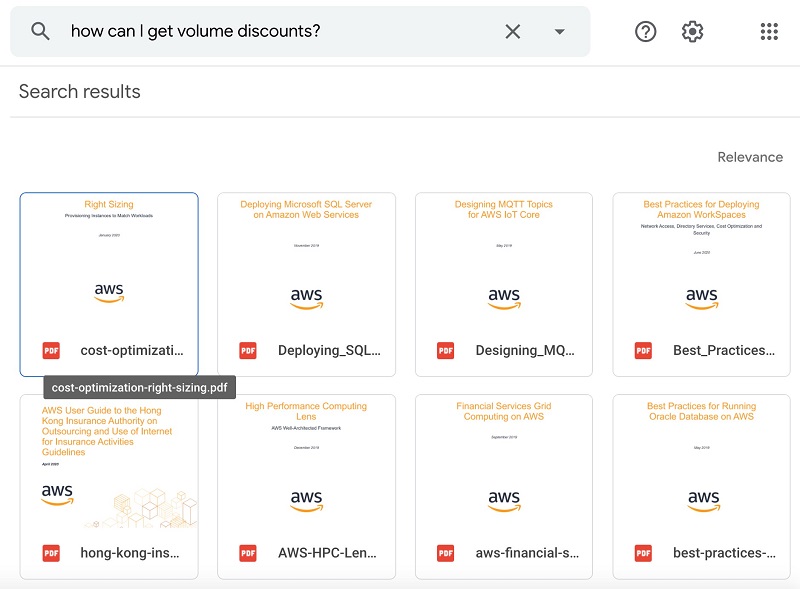
The third query is “How can I get volume discounts?” The following screenshot shows the response from Google Drive.
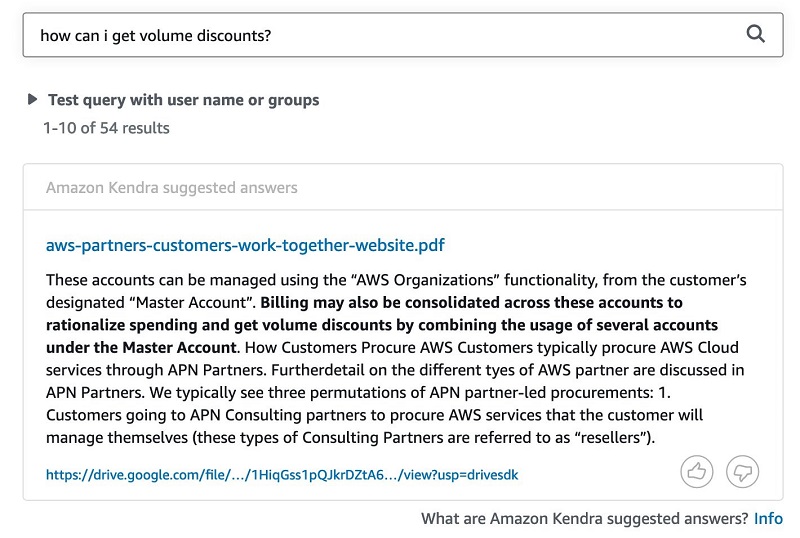
The following screenshot shows the query results in Amazon Kendra.
The fourth query is “How can you control access to an RDS instance?” The following screenshot shows the Google Drive response.

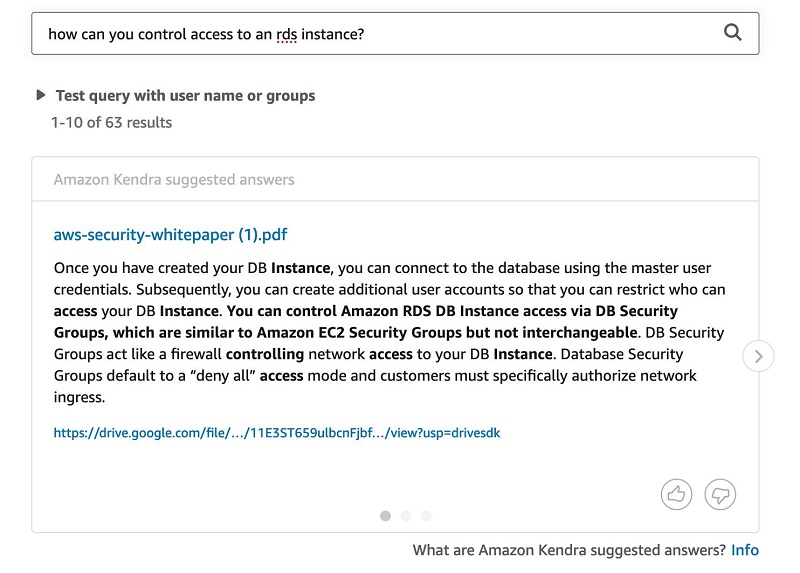
The following screenshot shows the query results in Amazon Kendra.
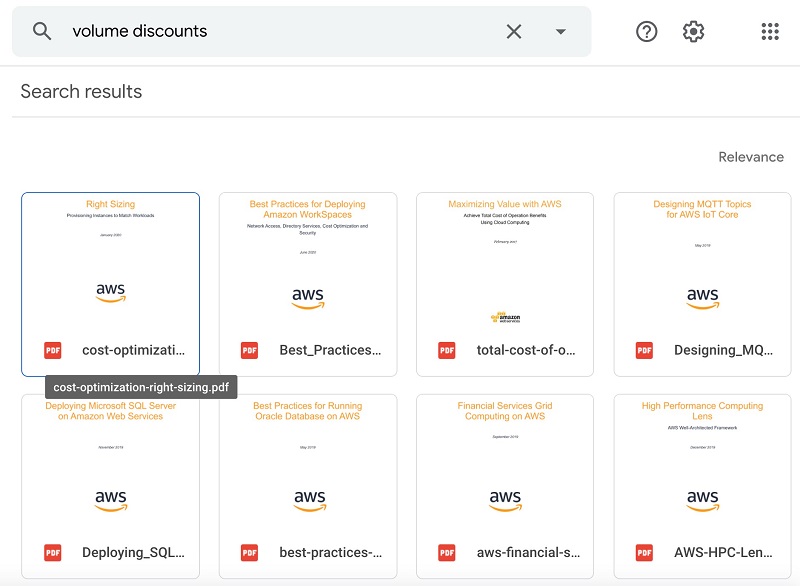
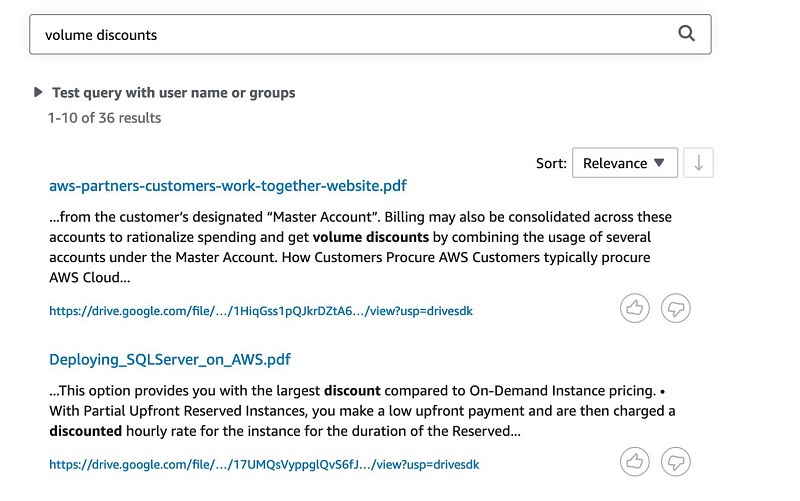
Now let’s try something else. Instead of natural language search, let’s try the keyword search “volume discounts.” The following screenshot shows the Google Drive response.
The following screenshot shows the Amazon Kendra response.
Conclusion
Helping customers and employees find relevant information quickly increases workforce productivity and enhances overall customer experiences. In this post, we outlined how you can set up an Amazon Kendra Google Drive connector with Google Workspace through either the Amazon Kendra console or via AWS API.
To learn more about the Amazon Kendra Google Drive connector, see Amazon Kendra Google data source documentation, or you can explore other Amazon Kendra data source connectors by visiting the Amazon Kendra connector library. To get started with Amazon Kendra, visit the Amazon Kendra Essentials+ workshop for an interactive walkthrough.
Appendix
If you haven’t previously created a service account, complete the steps in this section before creating your Google Drive data source.
Creating a Google Drive service account
To ingest your documents store in Google Drive to your Amazon Kendra index, you need to have a Google Drive service account with sufficient permissions to access the documents stored within the Google Drive Workspace.
Follow these instructions:
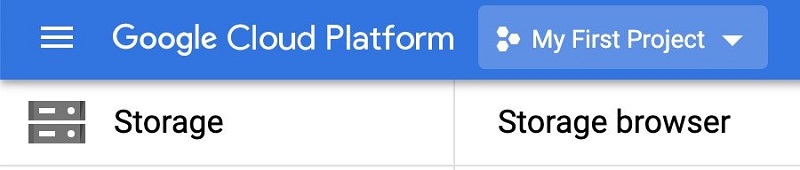
- Log in to the Google Cloud Platform console with an account that has administrator privilege.
- On the menu, choose your project (for this post,
MyFirstProject).
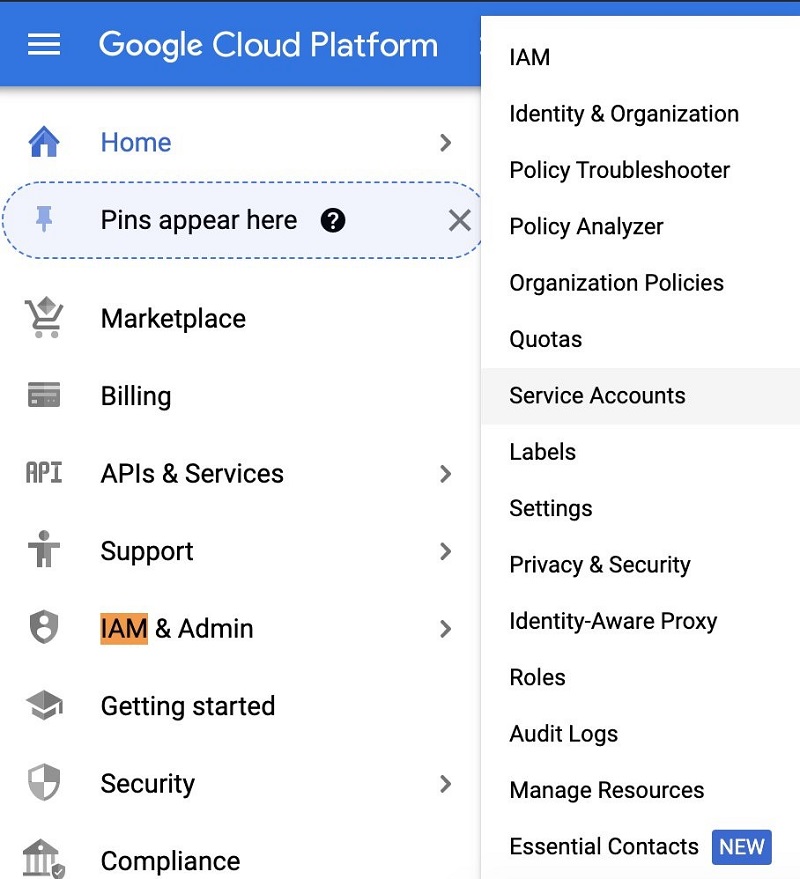
- Choose IAM & Admin and choose Service Accounts.
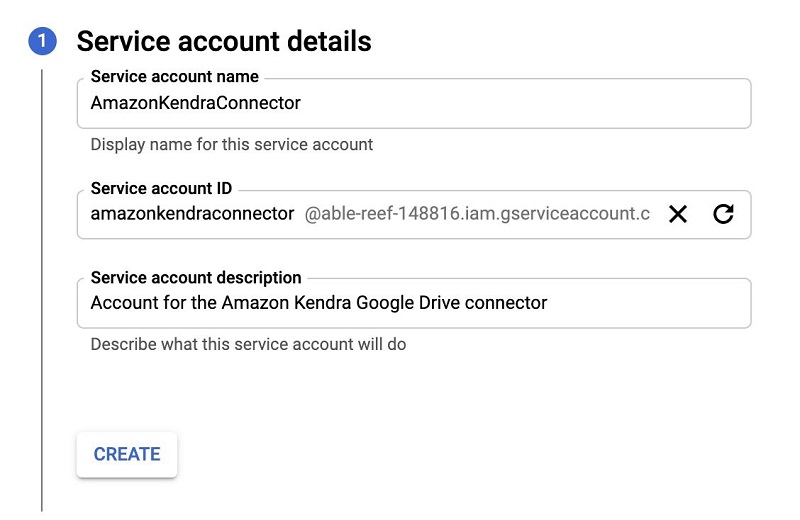
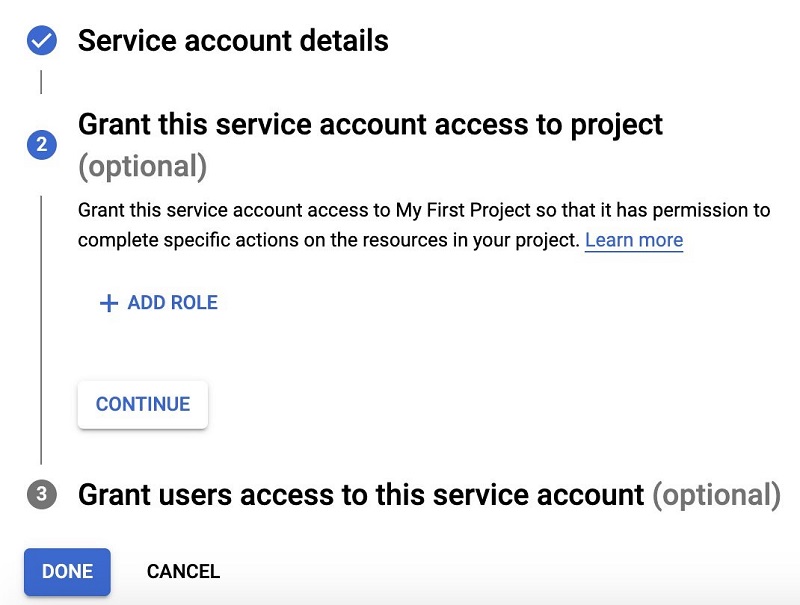
- Choose CREATE SERVICE ACCOUNT.

- Enter a service account name and description.
The service account ID, an email address, is generated automatically.
- Choose Create.
- Skip steps 2 (Grant this service account access to project) and 3 (Grant users access to this service account).
- Choose Done to continue.
Configuring Google Drive service account
Now that you have your service account created, it’s time configure it.
- Choose the service account name you created.
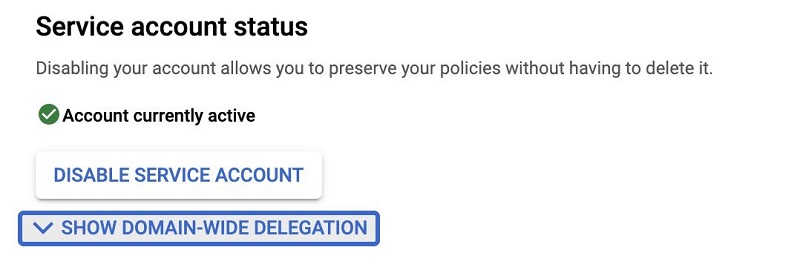
- Choose Edit.

- On the service account page, choose SHOW DOMAIN-WIDE DELEGATION to view the available options.
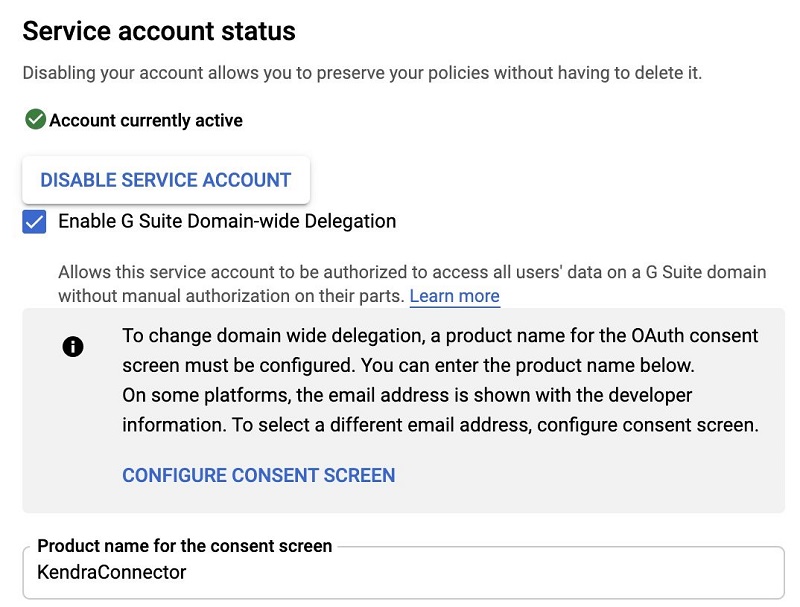
- Select Enable G Suite Domain-wide Delegation.
- For Product name for the consent screen, enter a name.
- In the Keys section, choose ADD KEY and choose Create new key.
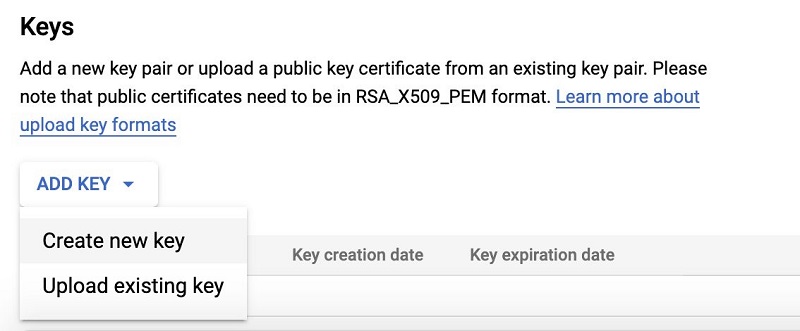
- For Key type¸ select JSON.
- Choose Create.
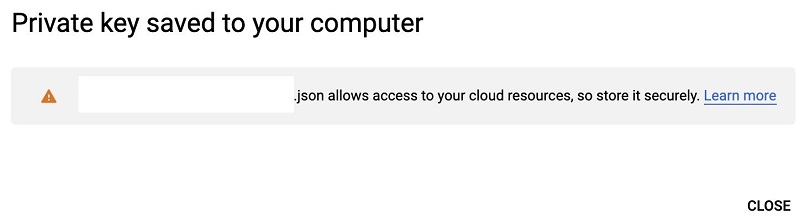
A JSON file containing the service account email address and private key is downloaded to your computer.
- Choose CLOSE.
- On the service account details page, take note of the account’s unique ID, to use later.

Enabling the Admin and Google Drive APIs
You’re now ready to enable the Admin and Google Drive APIs.
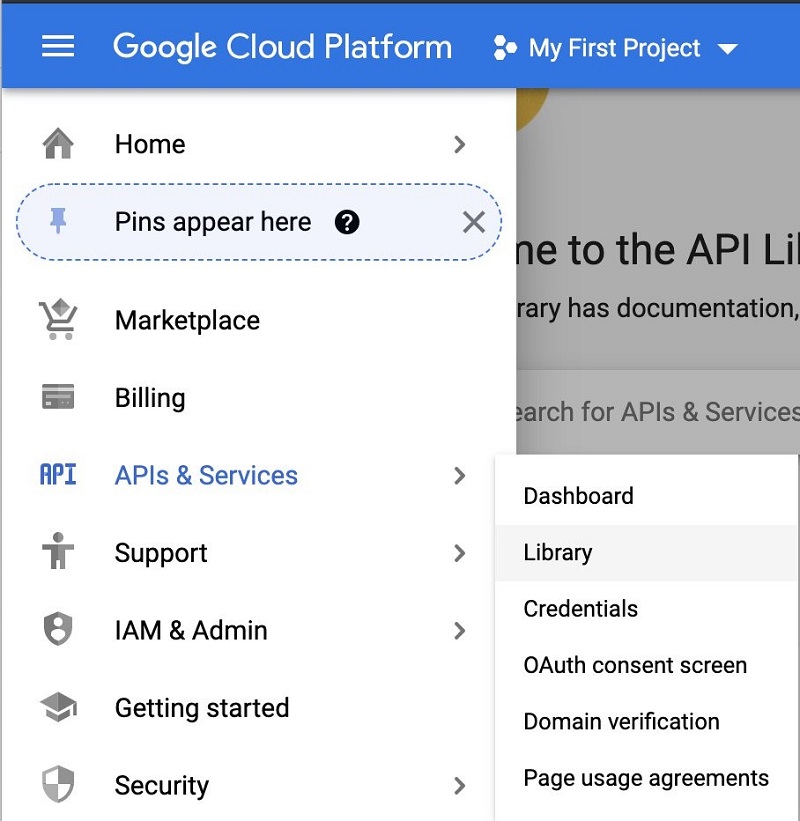
- Choose APIs & Services and choose Library.
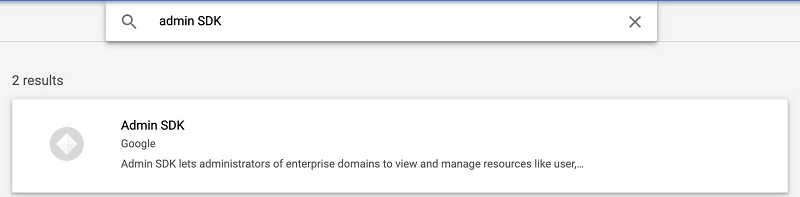
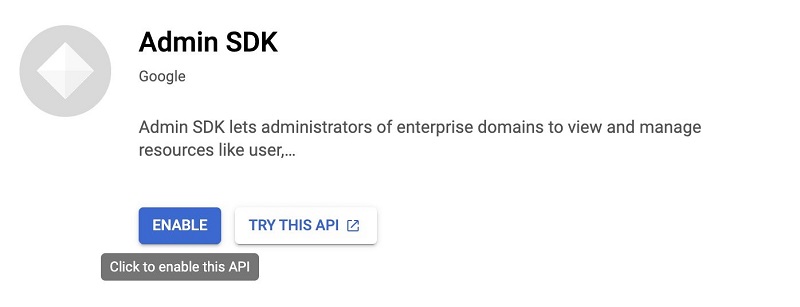
- Search for and choose Admin SDK.
- Choose Enable.
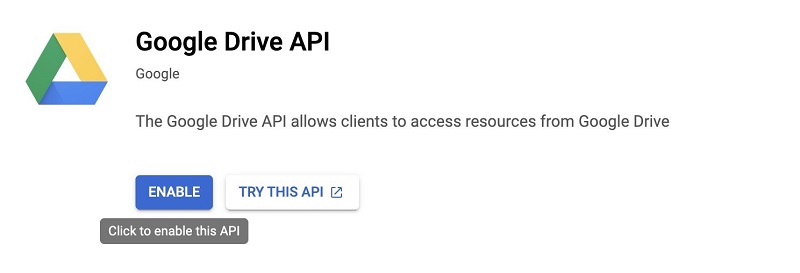
- Choose APIs & Services and choose Library.
- Search for and choose Google Drive API.
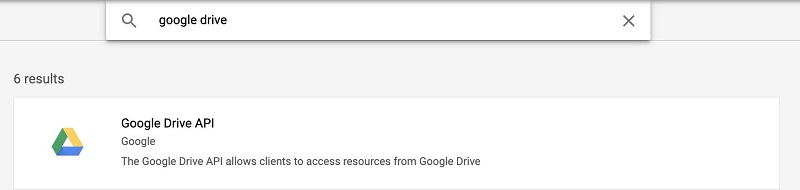
- Click on Enable.
Enabling Google API scopes
In this section, you configure the OAuth 2.0 scopes needed to access the Admin and Google Drive APIs required by the Amazon Kendra Google Drive connector.
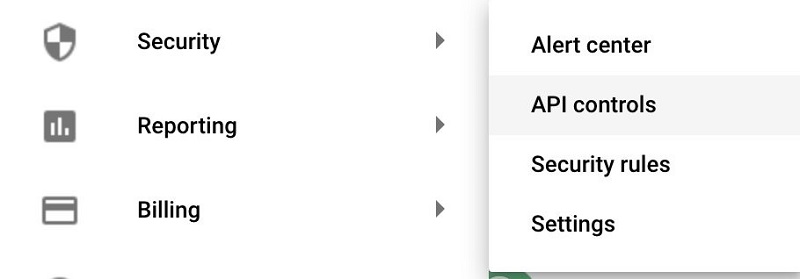
- Log in to Google’s admin interface as your organization’s administrator user.
- Choose Security and choose API controls.
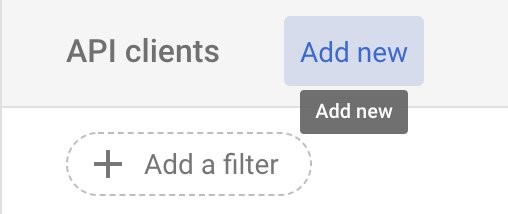
- Scroll down and choose MANAGE DOMAIN-WIDE DELEGATION in the Domain-wide delegation section.

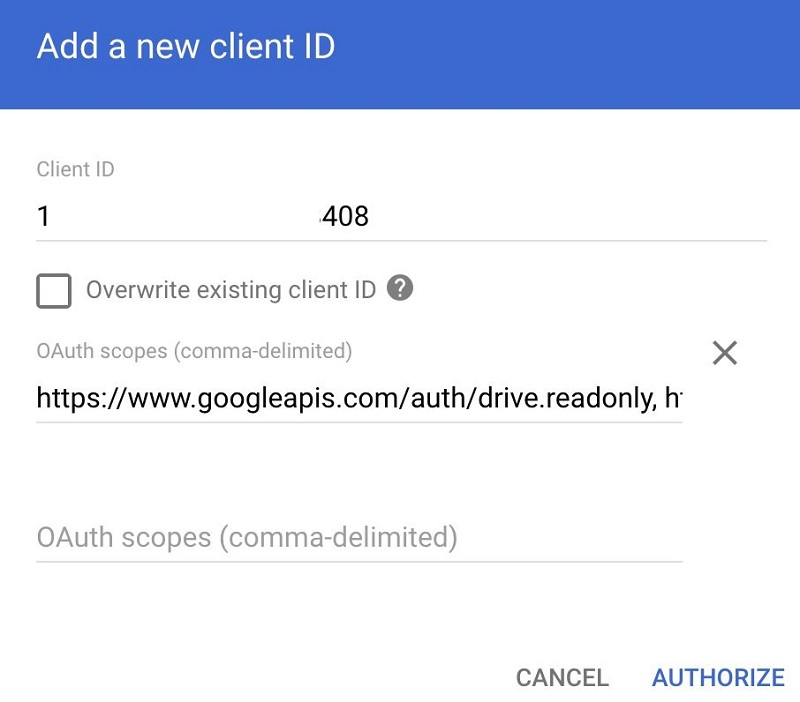
- Choose Add new.
- For Client ID, enter the unique ID from your service account details.
- For OAuth scopes, enter the following code:
https://www.googleapis.com/auth/drive.readonly,
https://www.googleapis.com/auth/drive.metadata.readonly,
https://www.googleapis.com/auth/admin.directory.user.readonly,
https://www.googleapis.com/auth/admin.directory.group.readonly
- Choose Authorize.
After you create a service account and configure it to use the Google API, you can create a Google Drive data source.
About the Authors
 Juan Pablo Bustos is an AI Services Specialist Solutions Architect at Amazon Web Services, based in Dallas, TX. Outside of work, he loves spending time writing and playing music as well as trying random restaurants with his family.
 David Shute is a Senior ML GTM Specialist at Amazon Web Services focused on Amazon Kendra. When not working, he enjoys hiking and walking on a beach.