This month in AWS Machine Learning: September 2020 edition

This month in AWS Machine Learning: September 2020 edition

Every day there is something new going on in the world of AWS Machine Learning—from launches to new use cases to interactive trainings. We’re packaging some of the not-to-miss information from the ML Blog and beyond for easy perusing each month. Check back at the end of each month for the latest roundup.

Launches

This month we announced native support for TorchServe in Amazon SageMaker, launched a new NFL Next Gen Stat, and enhanced our language services including Amazon Transcribe and Amazon Comprehend. Read on for our September launches:

 TorchServe is now natively supported in Amazon SageMaker as the default model server for PyTorch inference to help you bring models to production quickly without having to write custom code.

  • With the new automatic language detection feature for Amazon Transcribe, you can now simply provide audio files and Amazon Transcribe detects the dominant language from the speech signal and generates transcriptions in the identified language. Amazon Transcribe now also expands support for Channel Identification to streaming audio transcription. With Channel Identification, you can process live audio from multiple channels, and produce a single transcript of the conversation with channel labels.
  • You can now use Amazon Comprehend to detect and redact personally identifiable information (PII) in customer emails, support tickets, product reviews, social media, and more.
  • To kick off football season, AWS and the National Football League announced new Next Gen Stats powered by AWS. One of those stats, Expected Rushing Yards, was developed at the NFL’s Big Data Bowl, powered by AWS. Expected Rushing Yards is designed to show how many rushing yards a ball carrier is expected to gain on a given carry based on the relative location, speed, and direction of blockers and defenders.

Use cases

Get ideas and architectures from AWS customers, partners, ML Heroes, and AWS experts on how to apply ML to your use case:

Explore more ML stories

Want more news about developments in ML? Check out the following stories:

  • DBS Bank is training 3,000 employees in AI with the help of the AWS DeepRacer League. Watch to see how they are developing ML skills and fostering community for their workforce.
  • Amazon scientist Amaia Salvador shared her views on the challenges facing women in computer vision in a recent Science article.
  • Aella Credit is making banking more accessible using AWS ML.
  • Read about how ML is identifying and tracking pandemics like COVID-19, and check out this VentureBeat Webinar featuring Michelle Lee, VP of the Amazon ML Solutions Lab, on how companies are finding new ways to operate and respond in this pandemic with AI/ML.
  • Build, Train and Deploy a real-world flower classifier of 102 flower types with instruction from this tutorial by AWS ML Community Builder Juv Chan.
  • Earlier this month, we announced that Lena Taupie, a software developer for Blubrr, won the AWS DeepComposer Chartbusters challenge. Learn about Lena’s experience competing in the challenge and how she drew from her own background, having grown up in St. Lucia, a city with a history of oral and folk traditional music, to develop a new custom genre model using Generative AI.

Mark your calendars

Join us for the following exciting ML events:

  • SageMaker Fridays is back with season 2 and it is going to be bigger. You can get started faster with machine learning using Amazon SageMaker, where we will discuss practical use cases and applications through the season. Join us on the season premiere on Oct. 9, and we will continue to meet every week with a new use case.
  • On October 18, join Quantiphi for a conversation on how you can add AI to your contact centers to drive better customer engagement. Register now!
  • AWS is sponsoring the WSJ Pro AI Forum on October 28. Register to learn strategies for bringing AI and ML to your organization.

About the Author

Laura Jones is a product marketing lead for AWS AI/ML where she focuses on sharing the stories of AWS’s customers and educating organizations on the impact of machine learning. As a Florida native living and surviving in rainy Seattle, she enjoys coffee, attempting to ski and enjoying the great outdoors.

Read More

Using Amazon Rekognition Custom Labels and Amazon A2I for detecting pizza slices and augmenting predictions

Using Amazon Rekognition Custom Labels and Amazon A2I for detecting pizza slices and augmenting predictions

Customers need machine learning (ML) models to detect objects that are interesting for their business. In most cases doing so is hard as these models needs thousands of labelled images and deep learning expertise.  Generating this data can take months to gather, and can require large teams of labelers to prepare it for use. In addition, setting up a workflow for auditing or reviewing model predictions to validate adherence to your requirements can further add to the overall complexity.

With Amazon Rekognition Custom Labels, which is built on the existing capabilities of Amazon Rekognition, you can identify the objects and scenes in images that are specific to your business needs. For example, you can find your logo in social media posts, identify your products on store shelves, classify machine parts in an assembly line, distinguish healthy and infected plants, or detect animated characters in videos.

But what if the custom label model you trained can’t recognize images with a high level of confidence, or you need your team of experts to validate the results from your model during the testing phase or review the results in production? You can easily send predictions from Amazon Rekognition Custom Labels to Amazon Augmented AI (Amazon A2I). Amazon A2I makes it easy to integrate a human review into your ML workflow. This allows you to automatically have humans step into your ML pipeline to review results below a confidence threshold, set up review and auditing workflows, and augment the prediction results to improve model accuracy.

In this post, we show you to how to build a custom object detection model trained to detect pepperoni slices in a pizza using Amazon Rekognition Custom Labels with a dataset labeled using Amazon SageMaker Ground Truth. We then show how to create your own private workforce and set up an Amazon A2I workflow definition to conditionally trigger human loops for review and augmenting tasks. You can use the annotations created by Amazon A2I for model retraining.

We walk you through the following steps using the accompanying Amazon SageMaker Jupyter Notebook:

  1. Complete prerequisites.
  2. Create an Amazon Rekognition custom model.
  3. Set up an Amazon A2I workflow and send predictions to an Amazon A2I human loop.
  4. Evaluate results and retrain the model.

Prerequisites

Before getting started, set up your Amazon SageMaker notebook. Follow the steps in the accompanying Amazon SageMaker Jupyter Notebook to create your human workforce and download the datasets.

  1. Create a notebook instance in Amazon SageMaker.

Make sure your Amazon SageMaker notebook has the necessary AWS Identity and Access Management (IAM) roles and permissions mentioned in the prerequisite section of the notebook.

  1. When the notebook is active, choose Open Jupyter.
  2. On the Jupyter dashboard, choose New, and choose Terminal.
  3. In the terminal, enter the following code:
cd SageMaker
git clone https://github.com/aws-samples/amazon-a2i-sample-jupyter-notebooks
  1. Open the notebook by choosing Amazon-A2I-Rekognition-Custom-Label.ipynb in the root folder.

For this post, you create a private work team and add one user (you) to it.

  1. Create your human workforce by following the appropriate section of the notebook.

Alternatively, you can create your private workforce using Amazon Cognito. For instructions, see Create an Amazon Cognito Workforce Using the Labeling Workforces Page.

  1. After you create the private workforce, find the workforce ARN and enter the ARN in step 4 of the notebook.

 The dataset is composed of 12 images for training that contain pepperoni pizza in the data/images folder and 3 images for testing in the data/testimages folder. We sourced our images from pexels.com. We labeled this dataset for this post using Ground Truth custom labeling workflows. A Ground Truth labeled manifest template is available in data/manifest.

  1. Download the dataset.
  2. Run the notebook steps Download the Amazon SageMaker GroundTruth object detection manifest to Amazon S3 to process and upload the manifest in your Amazon Simple Storage Service (Amazon S3) bucket.

Creating an Amazon Rekognition custom model

To create our custom model, we follow these steps:

  1. Create a project in Amazon Rekognition Custom Labels.
  2. Create a dataset with images containing one or more pizzas and label them by applying bounding boxes.

Because we already have a dataset labeled using Ground Truth, we just point to that labeled dataset in this step. Alternatively, you can label the images using the user interface provided by Amazon Rekognition Custom Labels.

  1. Train the model.
  2. Evaluate the model’s performance.
  3. Test the deployed model using a sample image.

Creating a project

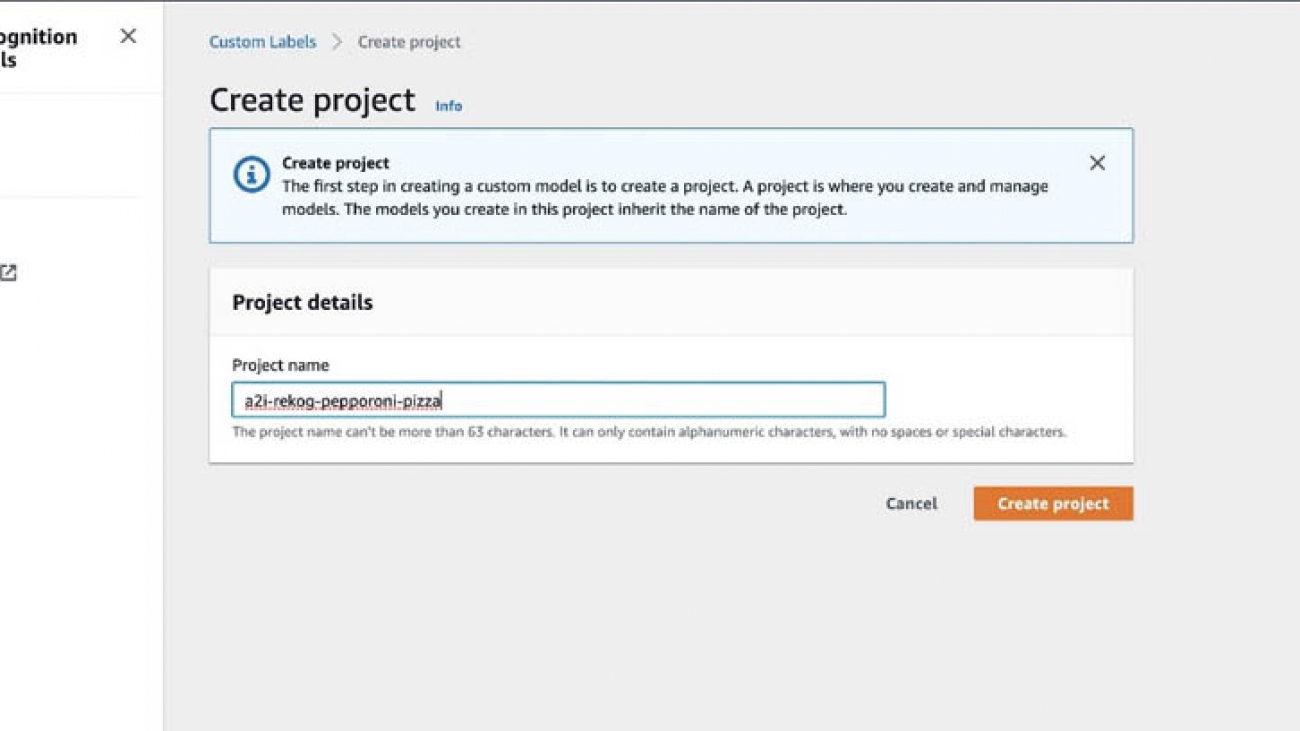
In this step, we create a project to detect peperoni pizza slices. For instructions on creating a project, see Creating an Amazon Rekognition Custom Labels Project.

  1. On the Amazon Rekognition console, choose Custom Labels.
  2. Choose Get started.
  3. For Project name, enter a2i-rekog-pepperoni-pizza.
  4. Choose Create project.

Creating a dataset

To create your dataset, complete the following steps:

  1. On the Amazon Rekognition Custom Labels console, choose Datasets.
  2. Choose Create dataset.
  3. For Dataset name, enter rekog-a2i-pizza-dataset.
  4. Select Import images labeled by Amazon SageMaker Ground Truth.
  5. For .manifest file location, enter the S3 bucket location of your .manifest file.

  1. Choose Submit.

You should get a prompt to provide the S3 bucket policy when you provide the S3 path. For more information about these steps, see SageMaker Ground Truth.

After you create the dataset, you should see the images with the bounding boxes and labels, as in the following screenshot.

Make sure to upload the images for our dataset (that you downloaded in the Prerequisites section) to the console S3 bucket for Amazon Rekognition Custom Labels.

Training an Amazon Rekognition custom model

You’re now ready to train your model.

  1. On the Amazon Rekognition console, choose Train model.
  2. For Choose project, choose your newly created project.
  3. For Choose training dataset, choose your newly created dataset.
  4. Select Split training dataset.
  5. Choose Train.

The training takes approximately 45 minutes to complete.

Checking training status

Run the following notebook cell to get information about the project you created using the describe-projects API:

!aws rekognition describe-projects

Use the accompanying Amazon SageMaker Jupyter notebook to follow the steps in this post.

To get the project ARN using the describe-project versions API, run the following cell:

#Replace the project-arn below with the project-arn of your project from the describe-projects output above
!aws rekognition describe-project-versions —project-arn "<project-arn>"

Enter the ARN in <project-version-arn-of-your-model> in the following code and run this cell to start running of the version of a model using the start-project-version API:

# Copy/paste the ProjectVersionArn for your model from the describe-project-versions cell output above to the --project-version-arn parameter here
!aws rekognition start-project-version 
--project-version-arn <project-version-arn-of-your-model> 
--min-inference-units 1 
--region us-east-1

Evaluating performance

When training is complete, you can evaluate the performance of the model. To help you, Amazon Rekognition Custom Labels provides summary metrics and evaluation metrics for each label. For information about the available metrics, see Metrics for Evaluating Your Model. To improve your model using metrics, see Improving an Amazon Rekognition Custom Labels Model.

The following screenshot shows our evaluation results and label performance.

Custom Labels determines the assumed threshold for each label based on maximum precision and recall achieved. Your model defaults to returning predictions above that threshold. You can reset this when you start your model. For information about adjusting your assumed threshold (such as looking at predictions either below or above your assumed threshold) and optimizing the model for your use case, see Training a custom single class object detection model with Amazon Rekognition Custom Labels.

For a demonstration of the Amazon Rekognition Custom Labels solution, see Custom Labels Demonstration. The demo shows you how you can analyze an image from your local computer.

Testing the deployed model

Run following notebook cell to load the test image. Use the accompanying Amazon SageMaker Jupyter Notebook to follow the steps in this post.

from PIL import Image, ImageDraw, ExifTags, ImageColor, ImageFont
image=Image.open('./data/images/pexels_brett_jordan_825661__1_.jpg')
display(image)

Enter the project version model ARN from previous notebook step aws rekognition start-project-version and run the following cell to analyze the response from the detect_custom_labels API:

model_arn = '<project-version-arn-of-your-model>'
min_confidence=40
#Call DetectCustomLabels
response = client.detect_custom_labels(Image={'S3Object': {'Bucket': BUCKET, 'Name': PREFIX + test_photo}},
MinConfidence=min_confidence,
ProjectVersionArn=model_arn)

Run the next cell in the notebook to display results (see the following screenshot).

The model detected the pepperoni pizza slices in our test image and drew bounding boxes. We can use Amazon A2I to send the prediction results from our model to a human loop consisting of our private workforce to review and audit the results.

Setting up an Amazon A2I human loop

In this section, you set up a human review loop for low-confidence detection in Amazon A2I. It includes the following steps:

  1. Create a human task UI.
  2. Create a worker task template and workflowflow definition.
  3. Send predictions to Amazon A2I human loops.
  4. Check the human loop status.

Use the accompanying Amazon SageMaker Jupyter notebook to follow the steps in this post.

Creating a human task UI

Create a human task UI resource with a UI template in liquid HTML. This template is used whenever a human loop is required.

For this post, we take an object detection UI and fill in the object categories in the labels variable in the template. Run the following template to create the human task AI for object detection:

def create_task_ui():
    '''
    Creates a Human Task UI resource.

    Returns:
    struct: HumanTaskUiArn
    '''
    response = sagemaker_client.create_human_task_ui(
        HumanTaskUiName=taskUIName,
        UiTemplate={'Content': template})
    return response
# Create task UI
humanTaskUiResponse = create_task_ui()
humanTaskUiArn = humanTaskUiResponse['HumanTaskUiArn']
print(humanTaskUiArn)

For over 70 pre-built UIs, see the Amazon Augmented AI Sample Task UIs GitHub repo.

Creating a worker task template and workflow definition

Workflow definitions allow you to specify the following:

  • The workforce that your tasks are sent to
  • The instructions that your workforce receives

This post uses the following API to create a workflow definition:

create_workflow_definition_response = sagemaker.create_flow_definition(
        FlowDefinitionName= flowDefinitionName,
        RoleArn= ROLE,
        HumanLoopConfig= {
            "WorkteamArn": WORKTEAM_ARN,
            "HumanTaskUiArn": humanTaskUiArn,
            "TaskCount": 1,
            "TaskDescription": "Identify custom labels in the image",
            "TaskTitle": "Identify custom image"
        },
        OutputConfig={
            "S3OutputPath" : OUTPUT_PATH
        }
    )
flowDefinitionArn = create_workflow_definition_response['FlowDefinitionArn'] # let's save this ARN for future use

Optionally, you can create this workflow definition on the Amazon A2I console. For instructions, see Create a Human Review Workflow.

Sending predictions to Amazon A2I human loops

We now loop through our test images and invoke the trained model endpoint to detect the custom label pepperoni pizza slice using the detect_custom_labels API. If the confidence score is less than 60% for the detected labels in our test dataset, we send that data for human review and start the human review A2I loop with the start-human-loop API. When using Amazon A2I for a custom task, a human loops starts when StartHumanLoop is called in your application. Use the accompanying Amazon SageMaker Jupyter notebook to follow the steps in this post.

You can change the value of the SCORE_THRESHOLD based on what confidence level you want to trigger the human review. See the following code:

import uuid

human_loops_started = []
SCORE_THRESHOLD = 60

folderpath = r"data/testimages" # make sure to put the 'r' in front and provide the folder where your files are
filepaths  = [os.path.join(folderpath, name) for name in os.listdir(folderpath) if not name.startswith('.')] # do not select hidden directories
for path in filepaths:
    # Call custom label endpoint and not display any object detected with probability lower than 0.01
    response = client.detect_custom_labels(Image={'S3Object': {'Bucket': BUCKET, 'Name': PREFIX+'/'+path}},
        MinConfidence=20,
        ProjectVersionArn=model_arn)    
  
    #Get the custom labels
    labels=response['CustomLabels']
    if labels and labels[0]['Confidence'] < SCORE_THRESHOLD: 
        s3_fname='s3://%s/%s' % (BUCKET, PREFIX+'/'+path)
        print("Images with labels less than 60% confidence score: " + s3_fname)
        humanLoopName = str(uuid.uuid4())
        inputContent = {
            "initialValue": 'null',
            "taskObject": s3_fname
        }
        start_loop_response = a2i.start_human_loop(
            HumanLoopName=humanLoopName,
            FlowDefinitionArn=flowDefinitionArn,
            HumanLoopInput={
                "InputContent": json.dumps(inputContent)
            }
        )
        human_loops_started.append(humanLoopName)
        print(f'Starting human loop with name: {humanLoopName}  n')

The following screenshot shows the output.

Checking the status of human loop

Run the steps in the notebook to check the status of the human loop. You can use the accompanying Amazon SageMaker Jupyter notebook to follow the steps in this post.

  1. Run the following notebook cell to get a login link to navigate to the private workforce portal:
workteamName = WORKTEAM_ARN[WORKTEAM_ARN.rfind('/') + 1:]
print("Navigate to the private worker portal and do the tasks. Make sure you've invited yourself to your workteam!")
print('https://' + sagemaker_client.describe_workteam(WorkteamName=workteamName)['Workteam']['SubDomain'])
  1. Choose the login link to the private worker portal.

After you log in, you can start working on the task assigned.

  1. Draw bounding boxes with respect to the label as required and choose Submit.

  1. To check if the workers have completed the labeling task, enter the following code:
completed_human_loops = []
for human_loop_name in human_loops_started:
    resp = a2i.describe_human_loop(HumanLoopName=human_loop_name)
    print(f'HumanLoop Name: {human_loop_name}')
    print(f'HumanLoop Status: {resp["HumanLoopStatus"]}')
    print(f'HumanLoop Output Destination: {resp["HumanLoopOutput"]}')
    print('n')
    
    if resp["HumanLoopStatus"] == "Completed":
        completed_human_loops.append(resp)

The following screenshot shows the output.

Evaluating the results and retraining your model

When the labeling work is complete, your results should be available in the Amazon S3 output path specified in the human review workflow definition. The human answer, label, and bounding box are returned and saved in the JSON file. Run the notebook cell to get the results from Amazon S3. The following screenshot shows the Amazon A2I annotation output JSON file.

Because we created our training set using Ground Truth, it’s in the form of an output.manifest file in the data/manifest folder. We need to do the following:

  1. Convert the Amazon A2I labeled JSON output to a .manifest file for retraining.
  2. Merge the output.manifest file with the existing training dataset .manifest file in data/manifest.
  3. Train the new model using the augmented file.

Converting the JSON output to an augmented .manifest file

You can loop through all the Amazon A2I output, convert the JSON file, and concatenate them into a JSON Lines file, in which each line represents the results of one image. Run the following code in the Amazon SageMaker Jupyter notebook to convert the Amazon A2I results into an augmented manifest:

object_categories = ['pepperoni pizza slice'] # if you have more labels, add them here
object_categories_dict = {str(i): j for i, j in enumerate(object_categories)}

dsname = 'pepperoni_pizza'

def convert_a2i_to_augmented_manifest(a2i_output):
    annotations = []
    confidence = []
    for i, bbox in enumerate(a2i_output['humanAnswers'][0]['answerContent']['annotatedResult']['boundingBoxes']):
        object_class_key = [key for (key, value) in object_categories_dict.items() if value == bbox['label']][0]
        obj = {'class_id': int(object_class_key), 
               'width': bbox['width'],
               'top': bbox['top'],
               'height': bbox['height'],
               'left': bbox['left']}
        annotations.append(obj)
        confidence.append({'confidence': 1})

    # Change the attribute name to the dataset-name_BB for this dataset. This will later be used in setting the training data
    augmented_manifest={'source-ref': a2i_output['inputContent']['taskObject'],
                        dsname+'_BB': {'annotations': annotations,
                                           'image_size': [{'width': a2i_output['humanAnswers'][0]['answerContent']['annotatedResult']['inputImageProperties']['width'],
                                                           'depth':3,
                                                           'height': a2i_output['humanAnswers'][0]['answerContent']['annotatedResult']['inputImageProperties']['height']}]},
                        dsname+'_BB-metadata': {'job-name': 'a2i/%s' % a2i_output['humanLoopName'],
                                                    'class-map': object_categories_dict,
                                                    'human-annotated':'yes',
                                                    'objects': confidence,
                                                    'creation-date': a2i_output['humanAnswers'][0]['submissionTime'],
                                                    'type':'groundtruth/object-detection'}}
    return augmented_manifest

Merging the augmented manifest with the existing training manifest

You now need to merge the output.manifest file, which consists of the existing training dataset manifest in data/manifest, with the Amazon A2I augmented .manifest file you generated from the JSON output.

Run the following notebook cell in the Amazon SageMaker Jupyter notebook to generate this file for training a new model:

f4 = open('./augmented-temp.manifest', 'r')
with open('augmented.manifest', 'w') as outfl:
    for lin1 in f4:
        z_json = json.loads(lin1)
        done_json = json.loads(lin1)
        done_json['source-ref'] = 'a'
        f3 = open('./data/manifest/output.manifest', 'r')
        for lin2 in f3:
            x_json = json.loads(lin2)
            if z_json['source-ref'] == x_json['source-ref']:
                print("replacing the annotations")
                x_json[dsname+'_BB'] = z_json[dsname+'_BB']
                x_json[dsname+'_BB-metadata'] = z_json[dsname+'_BB-metadata']
            elif done_json['source-ref'] != z_json['source-ref']:
                print("This is a net new annotation to augmented file")
                json.dump(z_json, outfl)
                outfl.write('n')
                print(str(z_json))
                done_json = z_json
            json.dump(x_json, outfl)
            outfl.write('n')         
        f3.close()       
f4.close()    

Training a new model

To train a new model with the augmented manifest, enter the following code:

# upload the manifest file to S3
s3r.meta.client.upload_file('./augmented.manifest', BUCKET, PREFIX+'/'+'data/manifest/augmented.manifest')

We uploaded the augmented .manifest file from Amazon A2I to the S3 bucket. You can train a new model by creating a new dataset by following the Creating a dataset step in this post using this augmented manifest. The following screenshot shows some of the results from the dataset.

Follow the instructions provided in the section Creating an Amazon Rekognition custom label model of this post. After you train a new model using this augmented dataset, you can inspect the model metrics for accuracy improvement.

The following screenshot shows the metrics for the trained model using the Amazon AI labeled dataset.

We noticed an overall improvement in the metrics after retraining using the augmented dataset. Moreover, we used only 12 images to achieve these performance metrics.

Cleaning up

To avoid incurring unnecessary charges, delete the resources used in this walkthrough when not in use. For instructions, see the following:

Conclusion

This post demonstrated how you can use Amazon Rekognition Custom Labels and Amazon A2I to train models to detect objects and images unique to your business and define conditions to send the predictions to a human workflow with labelers to review and update the results. You can use the human labeled output to augment the training dataset for retraining, which improves model accuracy, or you can send it to downstream applications for analytics and insights.


About the Authors

Mona Mona is an AI/ML Specialist Solutions Architect based out of Arlington, VA. She works with the World Wide Public Sector team and helps customers adopt machine learning on a large scale. She is passionate about NLP and ML Explainability areas in AI/ML.


Prem Ranga is an Enterprise Solutions Architect based out of Houston, Texas. He is part of the Machine Learning Technical Field Community and loves working with customers on their ML and AI journey. Prem is passionate about robotics, is an autonomous vehicles researcher, and also built the Alexa-controlled Beer Pours in Houston and other locations.


Neel Sendas is a Senior Technical Account Manager at Amazon Web Services. Neel works with enterprise customers to design, deploy, and scale cloud applications to achieve their business goals. He has worked on various ML use cases, ranging from anomaly detection to predictive product quality for manufacturing and logistics optimization. When he is not helping customers, he dabbles in golf and salsa dancing.

Read More

Say goodbye to hold music

Say goodbye to hold music

Sometimes, a phone call is the best way to get something done. We call retailers to locate missing packages, utilities to adjust our internet speeds, airlines to change our travel itineraries…the list goes on. But more often than not, we need to wait on hold during these calls—listening closely to hold music and repetitive messages—before we reach a customer support representative who can help. In fact, people in the United States spent over 10 million hours on hold with businesses last week.

Save time with Hold for Me

Hold for Me, our latest Phone app feature, helps you get that time back, starting with an early preview on Pixel 5 and Pixel 4a (5G) in the U.S. Now, when you call a toll-free number and a business puts you on hold, Google Assistant can wait on the line for you. You can go back to your day, and Google Assistant will notify you with sound, vibration and a prompt on your screen once someone is on the line and ready to talk. That means you’ll spend more time doing what’s important to you, and less time listening to hold music.

Hold for me call

Tap “Hold for me” in Google’s Phone app after you’re placed on hold by a business.

Hold for Me is our latest effort to make phone calls better and save you time. Last year, we introduced an update to Call Screen that helps you avoid interruptions from spam calls once and for all, and last month, we launched Verified Calls to help you know why a business is calling before you answer. Hold for Me is now another way we’re making it simpler to say hello.

Powered by Google AI

Every business’s hold loop is different and simple algorithms can’t accurately detect when a customer support representative comes onto the call. Hold for Me is powered by Google’s Duplex technology, which not only recognizes hold music but also understands the difference between a recorded message (like “Hello, thank you for waiting”) and a representative on the line. Once a representative is identified, Google Assistant will notify you that someone’s ready to talk and ask the representative to hold for a moment while you return to the call. We gathered feedback from a number of companies, including Dell and United, as well as from studies with customer support representatives, to help us design these interactions and make the feature as helpful as possible to the people on both sides of the call.

While Google Assistant waits on hold for you, Google’s natural language understanding also keeps you informed. Your call will be muted to let you focus on something else, but at any time, you can check real-time captions on your screen to know what’s happening on the call.

Keeping your data safe

Hold for Me is an optional feature you can enable in settings and choose to activate during each call to a toll-free number. To determine when a representative is on the line, audio is processed entirely on your device and does not require a Wi-Fi or data connection. This makes the experience fast and also protects your privacy—no audio from the call will be shared with Google or saved to your Google account unless you explicitly decide to share it and help improve the feature. When you return to the call after Google Assistant was on hold for you, audio stops being processed altogether.

We’re excited to bring an early preview of Hold for Me to our latest Pixel devices and continue making the experience better over time. Your feedback will help us bring the feature to more people over the coming months, so they too can say goodbye to hold music and say hello to more free time.

Read More

Building custom language models to supercharge speech-to-text performance for Amazon Transcribe

Building custom language models to supercharge speech-to-text performance for Amazon Transcribe

Amazon Transcribe is a fully-managed automatic speech recognition service (ASR) that makes it easy to add speech-to-text capabilities to voice-enabled applications. As our service grows, so does the diversity of our customer base, which now spans domains such as insurance, finance, law, real estate, media, hospitality, and more. Naturally, customers in different market segments have asked Amazon Transcribe for more customization options to further enhance transcription performance.

We’re excited to introduce Custom Language Models (CLM). The new feature allows you to submit a corpus of text data to train custom language models that target domain-specific use cases. Using CLM is easy because it capitalizes on existing data that you already possess (such as marketing assets, website content, and training manuals).

In this post, we show you how to best use your available data to train a custom language model tailored for your speech-to-text use case. Although our walkthrough uses a transcription example from the video gaming industry, you can use CLM to enhance custom speech recognition for any domain of your choosing. This post assumes that you’re already familiar with how to use Amazon Transcribe, and focuses on demonstrating how to use the new CLM feature. Additional resources for using the service are available at the end.

Establishing context for evaluating CLM transcription performance

To evaluate how powerful CLM can be in terms of enhancing transcription accuracy, there are few steps we want to take. First we need to establish a baseline. To do that, we recorded an audio sample that contains speech content and lingo commonly found in video game chats. We also have a human-generated transcription to benchmark the ground truth. This ground truth transcript serves as the reference transcript we use to compare the general transcription output of Amazon Transcribe and the output of CLM. The following is a partial snippet of this reference transcript.

The 2020 holiday season is right around the corner. And with the way that the year’s been going, we can all hope for a little excitement around the next-gen video game consoles coming out soon. So, what’s the difference in hardware specs between the upcoming Playstation 5 and Xbox Series X? Well, let’s take a look under the hoods of each next-gen gaming console. The PS5 features an AMD Zen 2 CPU with up to 3.5 GHz frequency. It sports an AMD Radeon GPU that touts 10.3 teraflops, running up to 2.23 GHz. Memory and storage respectively dial in at 16 GB and 825 GB. The PS5 supports both PS The PS5 supports both 4K and 8K resolution screens. The Xbox Series X also features an AMD Zen 2 CPU, but clocks in at 3.8 GHz instead. The console boasts a similar AMD custom GPU with 12 teraflops and 1.825 GHz.

Memory is the same as that of the PS5’s, coming in at 16 GB. But the default storage is where the system has an edge, bringing out a massive 1 TB hard drive. Like the PS5, the Series X also supports 4K and 8K resolution screens as well. Those of course, are just the numbers. Therefore, it remains to be seen exactly how the performance plays out in practice. It’s worth noting that both systems have incorporated ray-tracing technology, something that’s used to make light and shadows look better in-game. Both systems also offer 3D audio output for immersive experiences.

Next, we want to run the sample audio through Amazon Transcribe using its generic speech engine and compare the text output to the ground truth transcript. We’ve produced a partial snippet of the side-by-side comparison and highlighted errors for visibility. Compared to the ground truth transcript, the default Amazon Transcribe transcript showed a Word Error Rate (WER) of 31.87%. This WER shouldn’t be interpreted as a full representation of the Amazon Transcribe service performance. It is just one instance for a very specific example audio. Note that accuracy is a measure of 100 minus WER. So the lower the WER, the higher the accuracy. For more information about calculating WER, see Word Error Rate on Wikipedia.

*Note that this WER is not a representation of the Amazon Transcribe service performance. It is just one instance for a very specific and limited test example. All figures are for single-case and limited scope illustration purposes.

The following text is the human-generated ground-truth reference transcript:

The 2020 holiday season is right around the corner. And with the way that the year’s been going, we can all hope for a little excitement around the next-gen video game consoles coming out soon. So, what’s the difference in hardware specs between the upcoming Playstation 5 and Xbox Series X? Well, let’s take a look under the hoods of each next-gen gaming console. The PS5 features an AMD Zen 2 CPU with up to 3.5 GHz frequency. It sports an AMD Radeon GPU that touts 10.3 teraflops, running up to 2.23 GHz. Memory and storage respectively dial in at 16 GB and 825 GB. The PS5 supports both PS The PS5 supports both 4K and 8K resolution screens. Meanwhile, the Xbox Series X also features an AMD Zen 2 CPU, but clocks in at 3.8 GHz instead. The console boasts a similar AMD custom GPU with 12 teraflops and 1.825 GHz. Memory is the same as that of the PS5’s, coming in at 16 GB. But the default storage is where the system has an edge, bringing out a massive 1 TB hard drive. Like the PS5, the Series X also supports 4K and 8K resolution screens as well. Those of course, are just the numbers. Therefore, it remains to be seen exactly how the performance plays out in practice. It’s worth noting that both systems have incorporated ray-tracing technology, something that’s used to make light and shadows look better in-game. Both systems also offer 3D audio output for immersive experiences.

The following text is the machine-generated transcript by the Amazon Transcribe generic speech engine:

the 2020 holiday season is right around the corner. And with the way that the years been going, we can all hope for a little excitement around the next Gen video game consoles coming out soon. So what’s the difference in heart respects between the upcoming PlayStation five and Xbox Series X? Well, let’s take a look under the hood of each of these Consul’s. The PS five features in a M descend to CPU with up to 3.5 gigahertz frequency is sports and AM the radio on GPU that tells 10.3 teraflops running up to 2.23 gigahertz memory and storage, respectively. Dahlin at 16 gigabytes in 825 gigabytes. The PS five supports both PS. The PS five supports both four K and A K resolutions. Meanwhile, the Xbox Series X also features an AM descend to CPU, but clocks in at three point take. It hurts instead, the cost. Almost a similar AMG custom GPU, with 12 teraflops and 1.825 gigahertz memory, is the same as out of the PS. Fives come in at 16 gigabytes, but the default storage is where the system has an edge. Bring out a massive one terabyte hard drive. Like the PS five. The Siri’s X also supports four K and eight K resolution screens as well. Those, of course, are just the numbers. Therefore, it remains to be seen exactly how the performance plays out. In practice. It’s worth noting that both systems have incorporated Ray tracing technology, something that’s used to make light and shadows look better in game. Both systems also offer three D audio output for immersive experiences.

Although the Amazon Transcribe generic speech model has done a decent job of transcribing the audio, it’s more likely that a tailored custom model can yield higher transcription accuracy.

Solution overview

In this post, we walk you through how to train a custom language model and evaluate how its transcription output compares to the reference transcript. You complete the following high-level steps:

  1. Prepare your training data.
  2. Train your CLM.
  3. Use your CLM to transcribe audio.
  4. Evaluate the results by comparing the CLM transcript against the generic model transcript’s accuracy.

Preparing your training data

Before we begin, it’s important to distinguish between training data and tuning data.

Training data for CLM typically includes text data that is specific to your domain. Some examples of training data could include relevant text content from your website, training manuals, sales and marketing collateral, or other text sources.

Meanwhile, human-annotated audio transcripts of actual phone calls or media content that are directly relevant to your use case can be used as tuning data. Ideally, both training and tuning data ought to be domain-specific, but in practice you may only have a small amount of audio transcriptions available. In that case, transcriptions should be used as tuning data. If more transcription data is available, it can and should be used as part of the training set as well. For more information about the difference between training and tuning data, see Improving Domain-Specific Transcription Accuracy with Custom Language Models.

Like many domains, video gaming has its own set of technical jargon, syntax, and speech dynamics that may make the use of a general speech recognition engine suboptimal. To build a custom model, we first need data that’s representative of the domain. For this use case, we want free form text from the video gaming industry. We use a variety of publicly available information from a variety of sources about video gaming. For convenience, we’ve compiled that training and tuning set, which you can download to follow along. Keep in mind that the nature, quality, and quantity of your training data has a dramatic impact on the resultant custom model you build. All else equal, it’s better to have more data than less.

As a general guideline, your training and tuning datasets should meet the following parameters:

  • Is in plain text (it’s not a file such as a Microsoft Word document, CSV file, or PDF).
  • Has a single sentence per line.
  • Is encoded in UTF-8.
  • Doesn’t contain any formatting characters, such as HTML tags.
  • Is less than 2 GB in size if you intend to use the file as training data. You can provide a maximum of 2 GB of training data.
  • Is less than 200 MB in size if you intend to use the file as tuning data. You can provide a maximum of 200 MB of optional tuning data.

The following test is a partial snippet of our example training set:

The PS5 will feature a custom eight-core AMD Zen 2 CPU clocked at 3.5GHz (variable frequency) and a custom GPU based on AMD’s RDNA 2 architecture hardware that promises 10.28 teraflops and 36 compute units clocked at 2.23GHz (also variable frequency).

It’ll also have 16GB of GDDR6 RAM and a custom 825GB SSD that Sony has previously promised will offer super-fast loading times in gameplay, via Eurogamer.

One of the biggest technical updates in the PS5 was already announced last year: a switch to SSD storage for the console’s main hard drive, which Sony says will result in dramatically faster load times.

A previous demo showed Spider-Man loading levels in less than a second on the PS5, compared to the roughly eight seconds it took on a PS4.PlayStation hardware lead Mark Cerny dove into some of the details about those SSD goals at the announcement.

Where it took a PS4 around 20 seconds to load a single gigabyte of data, the goal with the PS5’s SSD was to enable loading

five gigabytes of data in a single second.

Training your custom language model

In the following steps, we show you how to train a CLM using base training data and a tuning split. Using a tuning split is entirely optional. If you prefer not to train a CLM using a tuning split, you can skip step 5.

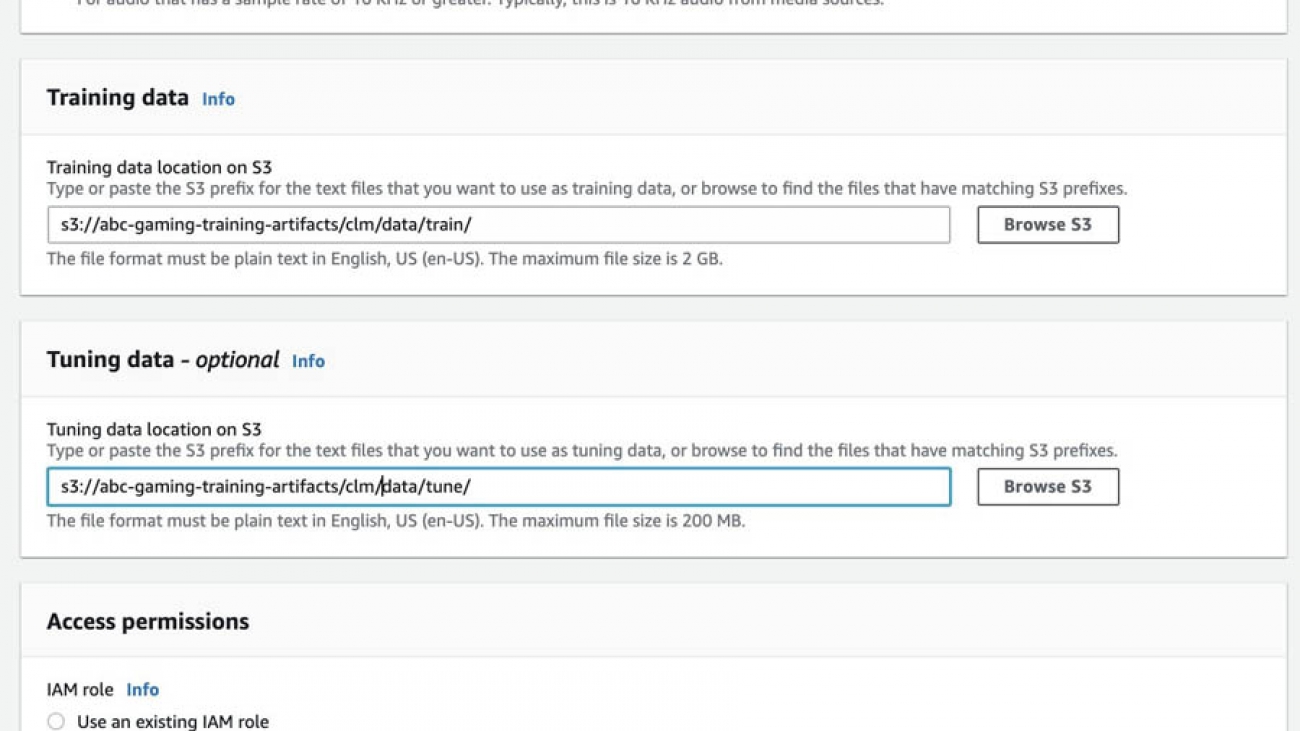
  1. Upload your training data (and/or tuning data) to their respective Amazon Simple Storage Service (Amazon S3) buckets.
  2. On the Amazon Transcribe console, for Name, enter a name for your custom model so you can reference it for later use.
  3. For Base model, choose a model type that matches your use case, based on audio sample rate.
  4. For Training data, enter the appropriate S3 bucket where you previously uploaded your training data.
  5. For Tuning data, enter the appropriate S3 bucket where you uploaded your tuning data. (This step is optional)
  6. For Access permissions, designate the appropriate access permissions.
  7. Choose Train model.

Amazon Transcribe service does the heavy lifting of automatically training a custom model for you.

To track the progress of the model training, go to the Custom language models page on the Amazon Transcribe console. The status indicates if the training is in progress, complete, or failed.

Using your custom language model to transcribe audio

When your custom model training is complete, you’re ready to use it. Simply start a typical transcription job as you would using Amazon Transcribe. However, this time, we want to invoke the custom language model we just trained, as opposed to using the default speech engine. For this post, we assume you already have familiarity with how to run a typical transcription job, so we only call out the new component: for Model type, select Custom language model.

Evaluating the results

When your transcription job is complete, it’s time to see how well the CLM performed. We can evaluate the output transcript against the human-annotated reference transcript, just as we had compared the generic Amazon Transcribe machine output against the human-annotated reference transcript. We actually made two CLMs (one without tuning split and one with tuning split), which we showcase as a full summary in the following table.

Transcription Type WER (%) Accuracy (100-WER)
Amazon Transcribe generic model 31.34% 68.66%
Amazon Transcribe CLM with no tuning split 26.19% 73.81%
Amazon Transcribe CLM with tuning split 20.23% 79.77%

 A lower WER is better. These WERs aren’t representative of overall Amazon Transcribe performance. All numbers are relative to demonstrate the point of using custom models over generic models, and are specific only to this singular audio sample.

The WER reductions are pretty significant! As you can see, although AmazonTranscribe’s generic engine performed decently in transcribing the sample audio from the video gaming domain, the CLM we built using training data performed 5% better. And the CLM built using training data and a tuning split performed approximately 11% better. These comparative results are unsurprising because the more relevant training and tuning that a model experiences, the more tailored it is to the specific domain and use case.

To give a qualitative visual comparison, we’ve taken a snippet of the transcript from each CLM’s output and put it against the original human annotated reference transcript to share a qualitative comparison of the different terms that were recognized by each model. We used green highlights to show the progressive accuracy improvements in each iteration.

The following text is the human-generated ground truth reference transcript:

The 2020 holiday season is right around the corner. And with the way that the year’s been going, we can all hope for a little excitement around the next-gen video game consoles coming out soon. So, what’s the difference in hardware specs between the upcoming Playstation 5 and Xbox Series X? Well, let’s take a look under the hoods of each next-gen gaming console. The PS5 features an AMD Zen 2 CPU with up to 3.5 GHz frequency. It sports an AMD Radeon GPU that touts 10.3 teraflops, running up to 2.23 GHz. Memory and storage respectively dial in at 16 GB and 825 GB. The PS5 supports both PS The PS5 supports both 4K and 8K resolution screens. Meanwhile, the Xbox Series X also features an AMD Zen 2 CPU, but clocks in at 3.8 GHz instead. The console boasts a similar AMD custom GPU with 12 teraflops and 1.825 GHz. Memory is the same as that of the PS5’s, coming in at 16 GB. But the default storage is where the system has an edge, bringing out a massive 1 TB hard drive. Like the PS5, the Series X also supports 4K and 8K resolution screens as well. Those of course, are just the numbers. Therefore, it remains to be seen exactly how the performance plays out in practice. It’s worth noting that both systems have incorporated ray-tracing technology, something that’s used to make light and shadows look better in-game. Both systems alsooffer 3D audio output for immersive experiences.

The following text is the machine transcription output by Amazon Transcribe’s generic speech engine:

the 2020 holiday season is right around the corner. And with the way that the years been going, we can all hope for a little excitement around the next Gen video game consoles coming out soon. So what’s the difference in heart respects between the upcoming PlayStation five and Xbox Series X? Well, let’s take a look under the hood of each of these Consul’s. The PS five features in a M descend to CPU with up to 3.5 gigahertz frequency is sports and AM the radio on GPU that tells 10.3 teraflops running up to 2.23 gigahertz memory and storage, respectively. Dahlin at 16 gigabytes in 825 gigabytes. The PS five supports both PS. The PS five supports both four K and A K resolutions. Meanwhile, the Xbox Series X also features an AM descend to CPU, but clocks in at three point take. It hurts instead, the cost. Almost a similar AMG custom GPU, with 12 teraflops and 1.825 gigahertz memory, is the same as out of the PS. Fives come in at 16 gigabytes, but the default storage is where the system has an edge. Bring out a massive one terabyte hard drive. Like the PS five. The Siri’s X also supports four K and eight K resolution screens as well. Those, of course, are just the numbers. Therefore, it remains to be seen exactly how the performance plays out. In practice. It’s worth noting that both systems have incorporated Ray tracing technology, something that’s used to make light and shadows look better in game. Both systems also offer three D audio output for immersive experiences.

The following text is the machine transcription output by CLM (base training, no tuning split):

the 2020 holiday season is right around the corner. And with the way that the years been going, we can all hope for a little excitement around the next Gen videogame consoles coming out soon. So what’s the difference in hardware specs between the upcoming PlayStation five and Xbox Series X? Well, let’s take a look under the hood of each of these consoles. The PS five features an A M D Zen two CPU with up to 3.5 gigahertz frequency it sports and am the radio GPU. That tells 10.3 teraflops running up to 2.23 gigahertz memory and storage, respectively, Dahlin at 16 gigabytes and 825 gigabytes, The PS five supports both PS. The PS five supports both four K and eight K resolutions. Meanwhile, the Xbox Series X also features an A M D Zen two CPU, but clocks in at 3.8 hertz. Instead. The console boasts a similar a AMD custom GPU, with 12 teraflops and 1.825 hertz. Memory is the same as out of the PS five’s come in at 16 gigabytes, but the default storage is where the system has an edge. Bring out a massive one terabyte hard drive. Like the PS five, the Series X also supports four K and eight K resolution screens as well. Those, of course, are just the numbers. Therefore, it remains to be seen exactly how the performance plays out. In practice. It’s worth noting that both systems have incorporated Ray tracing technology, something that’s used to make light and shadows look better in game. Both systems also offer three D audio output for immersive experiences

The following text is the machine transcription output by CLM (base training, with tuning split):

the 2020 holiday season is right around the corner. And with the way that the year’s been going, we can all hope for a little excitement around the next Gen video game consoles coming out soon. So what’s the difference in hardware specs between the upcoming PlayStation five and Xbox Series X? Well, let’s take a look under the hoods of each of these consoles. The PS five features an AMG Zen two CPU with up to 3.5 givers frequency it sports an AMD Radeon GPU that touts 10.3 teraflops running up to 2.23 gigahertz memory and storage, respectively. Dial in at 16 gigabytes and 825 gigabytes. The PS five supports both PS. The PS five supports both four K and eight K resolutions. Meanwhile, the Xbox Series X also features an AMG Zen two CPU, but clocks in at 3.8 had hurts. Instead, the console boasts a similar AMD custom. GPU, with 12 teraflops and 1.825 gigahertz memory is the same as out of the PS five’s coming in at 16 gigabytes. But the default storage is where the system has an edge, bringing out a massive one terabyte hard drive. Like the PS five, the Series X also supports four K and eight K resolution screens as well. Those, of course, are just the numbers. Therefore, it remains to be seen exactly how the performance plays out. In practice. It’s worth noting that both systems have incorporated Ray tracing technology, something that’s used to make light and shadows look better in game. Both systems also offer three D audio output for immersive experiences.

The difference in improvement varies according to your use case and the quality of your training data and tuning set. Experimentation is encouraged. In general, the more training and tuning that your custom model undergoes, the better the performance. CLM doesn’t guarantee 100% accuracy, but it can offer significant performance improvements over generic speech recognition models.

Best practices

It’s important to note that the resultant custom language model depends directly on what you use as your training dataset. All else equal, the closer the representation of your training data to real use cases, the more performant your custom model is. Moreover, more data is always preferred. For more information about the general guidelines, see Improving Domain-Specific Transcription Accuracy with Custom Language Models.

The Amazon Transcribe CLM doesn’t charge for model training, so feel free to experiment. In a single AWS account, you can train up to 10 custom models to address different domains, use cases, or new training datasets. After you have your CLM, you can choose which transcription jobs to utilize your CLM. You only incur an additional CLM charge for the transcription jobs in which you apply a custom language model.

Conclusion

CLMs can be a powerful capability when it comes to improving transcription accuracy for domain-specific use cases. The new feature is available in all AWS Regions where Amazon Transcribe already operates. At the time of this writing, the feature only supports US English. Additional language support will come with time. Start training your own custom models by visiting Amazon Transcribe and checking out Improving Domain-Specific Transcription Accuracy with Custom Language Models.

Related Resources

For additional resources, see the following:


About the Authors

Paul Zhao is Lead Product Manager at AWS Machine Learning. He manages speech recognition services like Amazon Transcribe and Amazon Transcribe Medical. He was formerly a serial entrepreneur, having launched, operated, and exited two successful businesses in the areas of IoT and FinTech, respectively.


Vivek Govindan is Senior Software Development engineer at AWS Machine Learning. Outside of work, Vivek is an ardent soccer fan.


Read More

Milo Phillips-Brown receives inaugural MAC3 Society and Ethics in Computing Research Award

Milo Phillips-Brown, a postdoc in MIT Philosophy, was recently named the inaugural recipient of the MAC3 Society and Ethics in Computing Research Award, which provides support to promising PhD candidates or postdocs conducting interdisciplinary research on the societal and ethical dimensions of computing.

Phillips-Brown, the Distinguished Postdoctoral Scholar in Ethics and Technology within the MIT Stephen A. Schwarzman College of Computing — a position that is supported, in part, by the MIT Quest for Intelligence — is being recognized for his work teaching responsible engineering practices to computer scientists. He teaches two courses, 24.131 (Ethics of Technology) and 24.133 (Experiential Ethics), and has been an active participant in the activities of the Social and Ethical Responsibilities of Computing (SERC), a new cross-cutting area in the MIT Stephen A. Schwarzman College of Computing that aims to actively weave social, ethical, and policy considerations into the teaching, research, and implementation of computing.

“We are delighted to be able to work so closely with Milo,” says Julie Shah, an associate professor in the Department of Aeronautics and Astronautics, who along with David Kaiser, the Germeshausen Professor of the History of Science and professor of physics, serves as associate dean of SERC. “Over this past spring semester, Milo was a great thought partner in the design of SERC-related materials, including original homework assignments and in-class demonstrations for instructors to embed into a wide variety of courses at MIT,” says Shah.

“We knew we had an exceptional colleague when we selected Milo as our inaugural postdoc. We look forward to collaborating with him and his continued contributions to SERC,” adds Kaiser.

In addition to active learning projects, Phillips-Brown has been working with Shah and Kaiser on preparing the first set of original case studies on social and ethical responsibilities of computing for release in the coming months. Commissioned and curated by SERC, each case study will be brief and appropriate for use in undergraduate instruction and will also be available to the public via MIT’s open access channels.

“I’m thrilled to be the inaugural recipient of the MAC3 Society and Ethics in Computing Research Award. This is a time when we need to be exploring all possible avenues for how to teach MIT students to build technologies ethically, and the award is enabling me to help just do that: work with professors and students across the Institute to develop new models for ethical engineering pedagogy,” says Phillips-Brown.

Phillips-Brown PhD ’19 received his doctorate in philosophy from MIT and his bachelor’s in philosophy from Reed College. He is a research fellow in digital ethics and governance at the Jain Family Institute and a member of the Society for Philosophy and Disability. From 2015 to 2018, he directed the Philosophy in an Inclusive Key (PIKSI) Boston, a summer program for undergraduates from underrepresented groups. In January 2021, he will begin an appointment at Oxford University as an associate professor of philosophy in the Faculty of Philosophy and the Department of Computer Science.

The MAC3 Society and Ethics in Computing Research Award was established through the MAC3 Impact Philanthropies which provides targeted support to organizations and initiatives that impact early childhood, health and education, as well as the environment and the oceans.

Read More

How AI Startup BroadBridge Networks Helps Security Teams Make Sense of Data Chaos

How AI Startup BroadBridge Networks Helps Security Teams Make Sense of Data Chaos

Cybersecurity has grown into a morass.

With increasingly hybrid computing environments, dispersed users accessing networks around the clock, and the Internet of Things creating more data than security teams have ever seen, organizations are throwing more security tools than ever at the problem.

In fact, Jonathan Flack, principal systems architect at BroadBridge Networks, said it’s not unusual for a company with a big network and a large volume of intellectual property to have 50 to 75 vendor solutions deployed within their networks.

“That’s insanity to me,” said Flack. “How can you converge all the information in a single space in order to effectively to act upon it in context?”

That’s precisely the problem BroadBridge, based in Fremont, Calif., is looking to solve. The three-year-old company is a member of NVIDIA Inception, a program that provides AI startups go-to-market support, expertise and technology.

It’s applying AI, powered by NVIDIA GPUs, to security data such that varying data sources can be aligned temporally, essentially connecting all the dots for any moment in time.

A company might have active directory logs, Windows event logs and firewall logs, with events occurring within microseconds of each other. Overworked security staff don’t have time to fish through all those logs trying to align events.

Instead, BroadBridge does it for them, automatically collecting the data, correlating it and presenting it as a single slice of time, with precision down to the millisecond.

The company’s software effectively pinpoints the causes of events and suggests potential actions to be taken. And given that most security teams are understaffed amid a global shortage of qualified cybersecurity employees, they can use all the help they can get.

“Our objective is to lighten the workload so those people can go home after an eight-hour shift, spend time with their families and have some down time,” said Flack. “If you find an intrusion six months ago, you shouldn’t have to go mine through logs from all the affected systems to reassemble a picture of what  happened. With all that data properly aggregated, aligned, and archived you simply run a BlazingSQL query against all of your network data for that specific timeframe.”

Organic Approach to Data

While BroadBridge’s original models were trained on open-source data from the security community, the company’s AI approach is different from other companies in that providing a more mature model out of the gate isn’t necessary. Instead, BroadBridge’s system is designed to be trained by each customer’s network.

“GM is going to have a different threat environment than some DoD office inside the Pentagon,” said Flack. “We provide a good initial starting point, and then we retrain the model using the customer’s own network data over time. The system is 100 percent self-reinforcing.”

The initial AI model provides security analysts with the ability to work through events that need to be investigated. They can triage and tag events as nominal or deserving of more investigation.

That metadata then gets stored, providing a record of what the inference server identified, what the analyst looked at, and what other events are worthy of analysis. All of that is then funneled into a deep learning pipeline that improves the model.

BroadBridge uses Kubernetes and Docker to provide dynamic scaling. Flack said the software can run real-time analytics on a 100GB network. The customer’s deep learning process is uploaded to an NVIDIA GPU instance on AWS, Azure, Google or Oracle clouds, where the AI is trained on the specifics of the customer’s network.

The company’s internal development has unfolded on NVIDIA DGX systems, which are purpose-built for the unique demands of AI. The first wave of development was conducted on DGX-1, and more recently on DGX A100, which Flack said has improved performance significantly.

“Four or five years ago, none of what we’re doing was at all possible,” he said. “Now we have a way to run multiple concurrent GPU-based workloads on systems that are as affordable as some 1U appliances.”

More to Come

Down the line, Flack said he envisions exposing an API to third-party vendors so they can use BroadBridge’s data to dynamically reconfigure device security postures. He also foresees the arrival of 5G as boosting the need for a tool that can parse through the increased data flows.

More immediately, Flack said the company has been looking to address the limitations of virtual private networks in the wake of the huge increase in working from home due to the COVID-19 pandemic.

Flack was careful to note that BroadBridge has no interest in replacing any of the sensors, logs or assessment tools companies are deploying in their security operations centers, or SOCs. Rather, it’s simply trying to create a platform to help security analysts make sense of all the data coming from all of these sources.

“Most of what you’re paying your SOC analysts for is herding cats,” he said. “Our objective is to stop them from herding cats so they can perform actual analysis.”

See BroadBridge Networks present in the NVIDIA Inception Premier Showcase at the GPU Technology Conference on Tuesday, October 6. Register for GTC here.

The post How AI Startup BroadBridge Networks Helps Security Teams Make Sense of Data Chaos appeared first on The Official NVIDIA Blog.

Read More

How The Trevor Project continues to support LGBTQ youth

How The Trevor Project continues to support LGBTQ youth

This September, National Suicide Prevention Awareness Month feels different. Over the past nine months, LGBTQ youth have experienced unique challenges in relation to COVID-19.The pandemic has amplified existing mental health disparities and created new problems that have impacted the daily lives of many LGBTQ youth. 

As the world’s largest suicide prevention and crisis intervention organization for LGBTQ young people, The Trevor Project has seen the volume of youth reaching out to our crisis services for support increase significantly, at times double our pre-COVID volume. We’ve heard from a great number of youth who no longer have access to their usual support systems, including many who have been forced to confine in unsupportive home environments. The unprecedented crisis of 2020 has reaffirmed the need for increased mental health support for LGBTQ youth, particularly as we’ve ventured into a more virtual world. 

From transitioning our physical call center operations to be fully remote to publishing aresource to help LGBTQ youth explore conversations around the intersection of their racial and LGBTQ identities—The Trevor Project has remained open and responsive to the needs of the young people we serve despite the onslaught of challenges. Technological advancement has been essential as Trevor adapts to meet this moment. In particular, artificial intelligence (AI) is a crucial component for scaling our services to support the increase of youth reaching out. 

IMG_7791.jpg

Kendra Gaunt joined The Trevor Project nine months ago as a Data and AI product owner.  

I joined The Trevor Project as the Data and AI product owner nine months ago, and started working alongside our AI and engineering team and 11 Google.org Fellows who were doing six months of full-time pro bono work with us. With the support of $2.7 million in Google.org grant funding and two teams of pro bono Google.org Fellows, we have introduced new AI applications to scale our impact. We built an AI system that helps us identify which LGBTQ individuals reaching out to us for support are at the highest risk of suicide so that we can quickly connect them to counselors who are ready to help at that moment. And now, we’re leveraging AI to ensure the safety of our TrevorSpace forums through auto-moderation, and to train more volunteer counselors through a conversation simulator.  It’s projects like these that have enabled The Trevor Project to directly serve more than 150,000 crisis contacts from LGBTQ youth in the past year. 

And we’re just getting started. With the guidance of best practices from Google, we’re significantly growing our in-house AI team. As we grow and develop a long-term product strategy around our use of data and AI, we acknowledge our responsibility to create a values-based system to guide how we use and develop AI. By applying learnings from Google’s Responsible Innovation team, we created a set of principles to ensure that we develop models that avoid reinforcing unfair bias that impacts people based on their ethnicity, sexual orientation, gender identity, race, and the intersection of these identities. 

I joined The Trevor Project because it’s an organization driven by values, and our use of technology reflects this. I noticed an opportunity to leverage my years of experience and partner with people who are committed to employing technology for social good. Through the thoughtful and ethical use of AI, we can overcome obstacles of scale and complexity as we pursue our mission to end suicide among LGBTQ youth.

To learn more about National Suicide Prevention Awareness Month and the work The Trevor Project is doing, check out ourCARE campaign. This includes actionable steps anyone can take to support their community and prevent suicide, as well as technological innovations that help us serve more young people, faster.

If you or someone you know needs help or support, contact The Trevor Project’s TrevorLifeline 24/7 at 1-866-488-7386. Counseling is also available 24/7 via chat every day at TheTrevorProject.org/help or by texting 678-678.

Read More

Friendship across Europe: How geography and history shape social networks

Social connections shape many aspects of global society. While understanding the geographic structure of these connections is important for a wide range of social science and public policy issues, researchers have traditionally been limited by a lack of large-scale representative data on connectedness. Using the Social Connectedness Index (SCI), an aggregated measure constructed from the friendship networks of Facebook’s more than 2.5 billion monthly active users, we study social connections between European regions. Our results suggest that geographic distance and political borders are important determinants of European connectedness. In fact, we find that the relationship between borders and connectedness persists even long after boundaries change (for example, within former Czechoslovakia and the Austro-Hungarian Empire). We also find that social connections in Europe are stronger between regions with residents of similar ages and education levels, as well as between regions that share a language and religion. In contrast, European region-pairs with dissimilar incomes tend to be more connected, likely due to patterns of migration.

Social Connectedness Index

The SCI uses aggregated friendship connections on Facebook to measure the intensity of connectedness between locations. Locations are assigned to users based on information they provide, connection information, and location services they have opted into. These friendships are used to estimate the probability that a pair of users in these geographies are Facebook friends and mapped to an index score called the Social Connectedness Index. If the SCI is twice as large between two pairs of geographies, it means users in the first geography-pair are about twice as likely to be connected compared with users in the second geography-pair.

More details on the methodology can be found here and in the paper Social Connectedness: Measurement, Determinants, and Effects, published in the Journal of Economic Perspectives.

Analysis

To explore the factors that shape social connectedness in Europe, we looked at SCI between NUTS2 regions, which have between 800,000 and 3 million inhabitants. Using this data, we first constructed a number of case studies. For example, we plotted the social connectedness of the Limburg and Namur regions in Belgium. We found the strongest social connections for both were to other areas nearby within Belgium. Yet, while the capitals of the two regions (Hasselt and Namur, respectively) are less than 70 km apart, the two regions’ connections outside Belgium differ substantially. The official and most commonly spoken language in Limburg is Dutch, whereas in Namur it is French. Accordingly, Limburg is more strongly connected to the entire Netherlands to the north, and Namur is more strongly connected to areas throughout all of France to the south. This suggests that language has an important relationship with patterns of connectedness.

We then sought to understand how patterns of connectedness would be reflected if we created communities of 20 and 50 regions with strong connections to each other (instead of the existing 37 countries). To do so, we created clusters that maximize within-cluster pairwise social connectedness using hierarchical agglomerative linkage clustering.

In the 20-unit map, nearly all the community borders (denoted by a change in area color) line up with country borders (denoted by large black lines). This suggests that individuals are more likely to be connected to distant individuals within their own country than equally distant or closer individuals in other countries. Furthermore, cross-country communities mostly line up with historical borders: For example, every region in the countries that made up Yugoslavia until the early 1990s (NUTS2 regions are defined for Slovenia, Croatia, Serbia, North Macedonia, and Montenegro) are grouped together in one community. We also see the importance of migration in shaping connectedness: Outer London West and North West, which have welcomed a large number of Romanian immigrants in recent years, are grouped together with Romania.

In the 50-unit map, countries begin to break apart internally. Most of these resulting subcountry communities are spatially contiguous, consistent with distance being an important determinant of social connections. We also see linguistic communities form: Belgium splits into French- and Dutch-speaking communities, and Catalan and Andalusian Spanish communities emerge in Spain.

Finally, we used a formal regression approach to assess the relationship between certain factors and European connectedness. Consistent with our exploration, we found that connections are strongest between areas that are physically close to each other: A 10 percent increase in distance is associated with a 13 percent decline in social connectedness. Social connectedness also drops off sharply at country borders. Controlling for geographic distance, the probability of friendship between two individuals living in the same country is five to 18 times as large as it is for two individuals living in different countries.

Using a number of 20th-century European border changes, we also found that this relationship between political borders and connectedness can persist decades after boundary changes. For example, we found higher social connectedness across regions that were originally part of the Austro-Hungarian Empire, even after controlling for distance, current country borders, and a number of other relevant factors.

In addition to distance and political borders, we found that regions that are more similar along demographic measures such as language, religion, education, and age are more socially connected. In particular, social connectedness between two regions with the same most common language is about 4.5 times larger than for two regions without a common language (again controlling for same and border country effects, distance, and other factors). In contrast, we saw that pairs of regions with dissimilar incomes are more connected. Our exploratory analyses suggest this trend may be explained by patterns of migration from regions with lower average incomes to regions with higher average incomes.

A full version of our working paper with additional details on our methodology is available here.

The social connectedness data used is available here.

The post Friendship across Europe: How geography and history shape social networks appeared first on Facebook Research.

Read More

AI for Every Enterprise: NVIDIA, VMware CEOs Discuss Broad New Partnership

AI for Every Enterprise: NVIDIA, VMware CEOs Discuss Broad New Partnership

Promising to bring AI to every enterprise, VMware CEO Pat Gelsinger and NVIDIA CEO Jensen Huang kicked off VMworld 2020 Tuesday with a conversation detailing the companies’ broad new partnership.

VMware and NVIDIA announced that, together, they will deliver an end-to-end enterprise platform for AI as well as a new architecture for data center, cloud and edge that uses NVIDIA DPUs to support existing and next-generation applications.

“We’re going to bring the power of AI to every enterprise. We’re going to bring the NVIDIA AI computing platform and our AI application frameworks onto VMware,” Huang said.

View today’s VMworld 2020 CEO discussion featuring Pat Gelsinger and Jensen Huang, and join us at GTC 2020 on October 5 to learn more.

Through this collaboration, the rich set of AI software available on the NVIDIA NGC hub will be integrated into VMware vSphere, VMware Cloud Foundation and VMware Tanzu.

“For every virtual infrastructure admin, we have millions of people that know how to run the vSphere stack,” Gelsinger said. “They’re running it every day, all day long, it’s now the same tools, the same processes, the same networks, the same security, is now fully being made available on the GPU infrastructure.”

VMware CEO Pat Gelsinger

This will help accelerate AI adoption, enabling enterprises to extend existing infrastructure for AI, manage all applications with a single set of operations, and deploy AI-ready infrastructure where the data resides, across the data center, cloud and edge.

Additionally, as part of VMware’s Project Monterey, also announced Tuesday, the companies will partner to deliver an architecture for the hybrid cloud based on SmartNIC technology, including NVIDIA’s programmable BlueField-2 DPU.

“The characteristics, the pillars of Project Monterey of offloading the operating system, the data center operating system, onto the SmartNIC, isolating the applications from the control plane and the data plane, and accelerating the data processing and the security processing to line speed is going to make the data center so much more powerful, so much more performant,” Huang said.

Among the organizations integrating their VMware and NVIDIA ecosystems is the UCSF Center for Intelligent Imaging.

“I can’t imagine a more impactful use of AI than healthcare,” Huang said. “The intersection of people, disease and treatments is one of the greatest challenges of humanity, and one where AI will be needed to move the needle.”

A leader in the development of AI and analysis tools in medical imaging, the center uses the NVIDIA Clara healthcare application framework for AI-powered imaging and VMware Cloud Foundation to support a broad range of mission-critical workloads.

“This way of doing computing is going to be the way that the future data centers are built. It’s going to allow us to essentially turn every enterprise into an AI,” Huang said. “Every company will become AI-driven.”

“Our audience is so excited to see how we’re coming together, to see how everything they’ve done for the past two decades with VMware now it’s going to be even further expanded,” Gelsinger said.

The post AI for Every Enterprise: NVIDIA, VMware CEOs Discuss Broad New Partnership appeared first on The Official NVIDIA Blog.

Read More

Running on-demand, serverless Apache Spark data processing jobs using Amazon SageMaker managed Spark containers and the Amazon SageMaker SDK

Running on-demand, serverless Apache Spark data processing jobs using Amazon SageMaker managed Spark containers and the Amazon SageMaker SDK

Apache Spark is a unified analytics engine for large scale, distributed data processing. Typically, businesses with Spark-based workloads on AWS use their own stack built on top of Amazon Elastic Compute Cloud (Amazon EC2), or Amazon EMR to run and scale Apache Spark, Hive, Presto, and other big data frameworks. This is useful for persistent workloads, in which you want these Spark clusters to be up and running 24/7, or at best, would have to come up with an architecture to spin up and spin down the cluster on a schedule or on demand.

Amazon SageMaker Processing lets you easily run preprocessing, postprocessing, model evaluation or other fairly generic transform workloads on a fully managed infrastructure. Previously, Amazon SageMaker Processing included a built-in container for Scikit-learn style preprocessing. For using other libraries like Spark, you have the flexibility to bring in your own Docker containers. Amazon SageMaker Processing jobs can also be part of your Step Functions workflow for ML involving pre- and post-processing steps. For more information, see AWS Step Functions adds support for Amazon SageMaker Processing.

Several machine learning(ML) workflows involve preprocessing data with Spark (or other libraries) and then passing in training data to a training step. The following workflow shows an Extract, Transform and Load (ETL) step that leads to model training and finally to model endpoint deployment using AWS Step Functions.

Including Spark steps in such workflows requires additional steps to provision and set up these clusters. Alternatively, you can do using AWS Glue, a fully managed ETL service that makes it easy for customers to write Python or Scala based scripts to preprocess data for ML training.

We’re happy to add a managed Spark container and associated SDK enhancements to Amazon SageMaker Processing, which lets you perform large scale, distributed processing on Spark by simply submitting a PySpark or Java/Scala Spark application. You can use this feature in Amazon SageMaker Studio and Amazon SageMaker notebook instances.

To demonstrate, the following code example runs a PySpark script on Amazon SageMaker Processing by using the PySparkProcessor:

from sagemaker.spark.processing import PySparkProcessor

spark_processor = PySparkProcessor(
    base_job_name="sm-spark",
    framework_version="2.4",
    role=role,
    instance_count=2,
    instance_type="ml.c5.xlarge",
    max_runtime_in_seconds=1200,
) 

spark_processor.run(
    submit_app_py="./path/to/your/preprocess.py",
    arguments=['s3_input_bucket', bucket,
               's3_input_key_prefix', input_prefix,
               's3_output_bucket', bucket,
               's3_output_key_prefix', input_preprocessed_prefix],
    spark_event_logs_s3_uri='s3://' + bucket + '/' + prefix + '/spark_event_logs',
    logs=False
)

We can look at this example in some more detail. The PySpark script name ‘preprocess.py’ such as the one shown below, that loads a large CSV file from Amazon Simple Storage Service (Amazon S3) into a Spark dataframe, fits and transforms this dataframe into an output dataframe, and converts and saves a CSV back to Amazon S3:

import time
import sys
import os
import shutil
import csv

import pyspark
from pyspark.sql import SparkSession
from pyspark.ml import Pipeline
from pyspark.sql.types import StructField, StructType, StringType, DoubleType
from pyspark.ml.feature import StringIndexer, VectorIndexer, OneHotEncoder, VectorAssembler
from pyspark.sql.functions import *


def csv_line(data):
    r = ','.join(str(d) for d in data[1])
    return str(data[0]) + "," + r


def main():
    spark = SparkSession.builder.appName("PySparkApp").getOrCreate()
    
    # Convert command line args into a map of args
    args_iter = iter(sys.argv[1:])
    args = dict(zip(args_iter, args_iter))

    spark.sparkContext._jsc.hadoopConfiguration().set("mapred.output.committer.class",
                                                      "org.apache.hadoop.mapred.FileOutputCommitter")
    
    # Defining the schema corresponding to the input data. The input data does not contain the headers
    schema = StructType([StructField("sex", StringType(), True), 
                         StructField("length", DoubleType(), True),
                         StructField("diameter", DoubleType(), True),
                         StructField("height", DoubleType(), True),
                         StructField("whole_weight", DoubleType(), True),
                         StructField("shucked_weight", DoubleType(), True),
                         StructField("viscera_weight", DoubleType(), True), 
                         StructField("shell_weight", DoubleType(), True), 
                         StructField("rings", DoubleType(), True)])

    # Downloading the data from S3 into a Dataframe
    total_df = spark.read.csv(('s3://' + os.path.join(args['s3_input_bucket'], args['s3_input_key_prefix'],'abalone.csv')), header=False, schema=schema)

    #StringIndexer on the sex column which has categorical value
    sex_indexer = StringIndexer(inputCol="sex", outputCol="indexed_sex")
    
    #one-hot-encoding is being performed on the string-indexed sex column (indexed_sex)
    sex_encoder = OneHotEncoder(inputCol="indexed_sex", outputCol="sex_vec")

    #vector-assembler will bring all the features to a 1D vector for us to save easily into CSV format
    assembler = VectorAssembler(inputCols=["sex_vec", 
                                           "length", 
                                           "diameter", 
                                           "height", 
                                           "whole_weight", 
                                           "shucked_weight", 
                                           "viscera_weight", 
                                           "shell_weight"], 
                                outputCol="features")
    
    # The pipeline comprises of the steps added above
    pipeline = Pipeline(stages=[sex_indexer, sex_encoder, assembler])
    
    # This step trains the feature transformers
    model = pipeline.fit(total_df)
    
    # This step transforms the dataset with information obtained from the previous fit
    transformed_total_df = model.transform(total_df)
    
    # Split the overall dataset into 80-20 training and validation
    (train_df, validation_df) = transformed_total_df.randomSplit([0.8, 0.2])
    
    # Convert the train dataframe to RDD to save in CSV format and upload to S3
    train_rdd = train_df.rdd.map(lambda x: (x.rings, x.features))
    train_lines = train_rdd.map(csv_line)
    train_lines.saveAsTextFile('s3://' + os.path.join(args['s3_output_bucket'], args['s3_output_key_prefix'], 'train'))
    
    # Convert the validation dataframe to RDD to save in CSV format and upload to S3
    validation_rdd = validation_df.rdd.map(lambda x: (x.rings, x.features))
    validation_lines = validation_rdd.map(csv_line)
    validation_lines.saveAsTextFile('s3://' + os.path.join(args['s3_output_bucket'], args['s3_output_key_prefix'], 'validation'))


if __name__ == "__main__":
    main()

You can easily start a Spark based processing job by using the PySparkProcessor() class as shown below:

from sagemaker.spark.processing import PySparkProcessor

# Upload the raw input dataset to S3
timestamp_prefix = strftime("%Y-%m-%d-%H-%M-%S", gmtime())
prefix = 'sagemaker/spark-preprocess-demo/' + timestamp_prefix
input_prefix_abalone = prefix + '/input/raw/abalone'
input_preprocessed_prefix_abalone = prefix + '/input/preprocessed/abalone'
model_prefix = prefix + '/model'

sagemaker_session.upload_data(path='./data/abalone.csv', bucket=bucket, key_prefix=input_prefix_abalone)

# Run the processing job
spark_processor = PySparkProcessor(
    base_job_name="sm-spark",
    framework_version="2.4",
    role=role,
    instance_count=2,
    instance_type="ml.c5.xlarge",
    max_runtime_in_seconds=1200,
)

spark_processor.run(
    submit_app_py="./code/preprocess.py",
    arguments=['s3_input_bucket', bucket,
               's3_input_key_prefix', input_prefix_abalone,
               's3_output_bucket', bucket,
               's3_output_key_prefix', input_preprocessed_prefix_abalone],
    spark_event_logs_s3_uri='s3://' + bucket + '/' + prefix + '/spark_event_logs',
    logs=False
)

When running this in Amazon SageMaker Studio or Amazon SageMaker notebook instance, the output shows the job’s progress:

Job Name:  sm-spark-<...>
Inputs:  [{'InputName': 'code', 'S3Input': {'S3Uri': 's3://<bucketname>/<prefix>/preprocess.py', 'LocalPath': '/opt/ml/processing/input/code', 'S3DataType': 'S3Prefix', 'S3InputMode': 'File', 'S3DataDistributionType': 'FullyReplicated', 'S3CompressionType': 'None'}}]
Outputs:  [{'OutputName': 'output-1', 'S3Output': {'S3Uri': 's3://<bucketname>/<prefix>', 'LocalPath': '/opt/ml/processing/spark-events/', 'S3UploadMode': 'Continuous'}}]

In Amazon SageMaker Studio, you can describe your processing jobs and view relevant details by choosing the processing job name (right-click), and choosing Open in trial details.

You can also track the processing job’s settings, logs, and metrics on the Amazon SageMaker console as shown in the following screenshot.

After a job completes, if the spark_event_logs_s3_uri was specified in the run() function, the Spark UI can be viewed by running the history server:

spark_processor.start_history_server()

If run from an Amazon SageMaker Notebook instance, the output will include a proxy URL where the history server can be accessed:

Starting history server...
History server is up on https://<your-notebook>.notebook.us-west-2.sagemaker.aws/proxy/15050

Visiting this URL will bring you to the history server web interface as shown in the screenshot below:

Additional python and jar file dependencies can also be specified in your Spark jobs. For example, if you want to serialize an MLeap model, you can specify these additional dependencies by modifying the call to the run() function of PySparkProcessor:

spark_processor.run(
    submit_app_py="./code/preprocess-mleap.py",
    submit_py_files=["./spark-mleap/mleap-0.15.0.zip"],
    submit_jars=["./spark-mleap/mleap-spark-assembly.jar"],
    arguments=['s3_input_bucket', bucket,
               's3_input_key_prefix', input_prefix_abalone,
               's3_output_bucket', bucket,
               's3_output_key_prefix', input_preprocessed_prefix_abalone],
    logs=False
)

Finally, overriding Spark configuration is crucial for several tasks such as tuning your Spark application or configuring the Hive metastore. You can override Spark, Hive, Hadoop configurations using our Python SDK.

For example, the following code overrides spark.executor.memory and spark.executor.cores:

spark_processor = PySparkProcessor(
    base_job_name="sm-spark",
    framework_version="2.4",
    role=role,
    instance_count=2,
    instance_type="ml.c5.xlarge",
    max_runtime_in_seconds=1200,
)

configuration = [{
  "Classification": "spark-defaults",
  "Properties": {"spark.executor.memory": "2g", "spark.executor.cores": "1"},
}]

spark_processor.run(
    submit_app_py="./code/preprocess.py",
    arguments=['s3_input_bucket', bucket,
               's3_input_key_prefix', input_prefix_abalone,
               's3_output_bucket', bucket,
               's3_output_key_prefix', input_preprocessed_prefix_abalone],
    configuration=configuration,
    logs=False
)

Try out this example on your own by navigating to the examples tab in your Amazon SageMaker notebook instance, or by cloning the Amazon SageMaker examples directory and navigating to the folder with Amazon SageMaker Processing examples.

Additionally, you can set up an end-to-end Spark workflow for your use cases using Amazon SageMaker and other AWS services:

Conclusion

Amazon SageMaker makes extensive use of Docker containers to allow users to build a runtime environment for data preparation, training, and inference code. Amazon SageMaker’s built-in Spark container for Amazon SageMaker Processing provides a managed Spark runtime including all library components and dependencies needed to run distributed data processing workloads. The example discussed in the blog shows how developers and data scientists can take advantage of the built-in Spark container on Amazon SageMaker to focus on more important aspects of preparing and preprocessing data. Instead of spending time tuning, scaling, or managing Spark infrastructure, developers can focus on core implementation.


About the Authors

 Shreyas Subramanian is a AI/ML specialist Solutions Architect, and helps customers by using Machine Learning to solve their business challenges using the AWS platform.


Andrew Packer is a Software Engineer in Amazon AI where he is excited about building scalable, distributed machine learning infrastructure for the masses. In his spare time, he likes playing guitar and exploring the PNW.


Vidhi Kastuar is a Sr. Product Manager for Amazon SageMaker, focusing on making machine learning and artificial intelligence simple, easy to use and scalable for all users and businesses. Prior to AWS, Vidhi was Director of Product Management at Veritas Technologies. For fun outside work, Vidhi loves to sketch and paint, work as a career coach, and spend time with her family and friends.

Read More