This paper was accepted at the NeurIPS Datasets and Benchmarks Workshop at NeurIPS 2024
We introduce DataComp for Language Models (DCLM), a testbed for controlled dataset experiments with the goal of improving language models. As part of DCLM, we provide a standardized corpus of 240T tokens extracted from Common Crawl, effective pretraining recipes based on the OpenLM framework, and a broad suite of 53 downstream evaluations. Participants in the DCLM benchmark can experiment with data curation strategies such as deduplication, filtering, and data mixing at model scales ranging from 412M to 7B…Apple Machine Learning Research

Amazon SageMaker inference launches faster auto scaling for generative AI models
Today, we are excited to announce a new capability in Amazon SageMaker inference that can help you reduce the time it takes for your generative artificial intelligence (AI) models to scale automatically. You can now use sub-minute metrics and significantly reduce overall scaling latency for generative AI models. With this enhancement, you can improve the responsiveness of your generative AI applications as demand fluctuates.
The rise of foundation models (FMs) and large language models (LLMs) has brought new challenges to generative AI inference deployment. These advanced models often take seconds to process, while sometimes handling only a limited number of concurrent requests. This creates a critical need for rapid detection and auto scaling to maintain business continuity. Organizations implementing generative AI seek comprehensive solutions that address multiple concerns: reducing infrastructure costs, minimizing latency, and maximizing throughput to meet the demands of these sophisticated models. However, they prefer to focus on solving business problems rather than doing the undifferentiated heavy lifting to build complex inference platforms from the ground up.
SageMaker provides industry-leading capabilities to address these inference challenges. It offers endpoints for generative AI inference that reduce FM deployment costs by 50% on average and latency by 20% on average by optimizing the use of accelerators. The SageMaker inference optimization toolkit, a fully managed model optimization feature in SageMaker, can deliver up to two times higher throughput while reducing costs by approximately 50% for generative AI performance on SageMaker. Besides optimization, SageMaker inference also provides streaming support for LLMs, enabling you to stream tokens in real time rather than waiting for the entire response. This allows for lower perceived latency and more responsive generative AI experiences, which are crucial for use cases like conversational AI assistants. Lastly, SageMaker inference provides the ability to deploy a single model or multiple models using SageMaker inference components on the same endpoint using advanced routing strategies to effectively load balance to the underlying instances backing an endpoint.
Faster auto scaling metrics
To optimize real-time inference workloads, SageMaker employs Application Auto Scaling. This feature dynamically adjusts the number of instances in use and the quantity of model copies deployed, responding to real-time changes in demand. When in-flight requests surpass a predefined threshold, auto scaling increases the available instances and deploys additional model copies to meet the heightened demand. Similarly, as the number of in-flight requests decreases, the system automatically removes unnecessary instances and model copies, effectively reducing costs. This adaptive scaling makes sure resources are optimally utilized, balancing performance needs with cost considerations in real time.
With today’s launch, SageMaker real-time endpoints now emit two new sub-minute Amazon CloudWatch metrics: ConcurrentRequestsPerModel and ConcurrentRequestsPerCopy. ConcurrentRequestsPerModel is the metric used for SageMaker real-time endpoints; ConcurrentRequestsPerCopy is used when SageMaker real-time inference components are used.
These metrics provide a more direct and accurate representation of the load on the system by tracking the actual concurrency or the number of simultaneous requests being handled by the containers (in-flight requests), including the requests queued inside the containers. The concurrency-based target tracking and step scaling policies focus on monitoring these new metrics. When the concurrency levels increase, the auto scaling mechanism can respond by scaling out the deployment, adding more container copies or instances to handle the increased workload. By taking advantage of these high-resolution metrics, you can now achieve significantly faster auto scaling, reducing detection time and improving the overall scale-out time of generative AI models. You can use these new metrics for endpoints created with accelerator instances like AWS Trainium, AWS Inferentia, and NVIDIA GPUs.
In addition, you can enable streaming responses back to the client on models deployed on SageMaker. Many current solutions track a session or concurrency metric only until the first token is sent to the client and then mark the target instance as available. SageMaker can track a request until the last token is streamed to the client instead of until the first token. This way, clients can be directed to instances to GPUs that are less busy, avoiding hotspots. Additionally, tracking concurrency also helps you make sure requests that are in-flight and queued are treated alike for alerting on the need for auto scaling. With this capability, you can make sure your model deployment scales proactively, accommodating fluctuations in request volumes and maintaining optimal performance by minimizing queuing delays.
In this post, we detail how the new ConcurrentRequestsPerModel and ConcurrentRequestsPerCopy CloudWatch metrics work, explain why you should use them, and walk you through the process of implementing them for your workloads. These new metrics allow you to scale your LLM deployments more effectively, providing optimal performance and cost-efficiency as the demand for your models fluctuates.
Components of auto scaling
The following figure illustrates a typical scenario of how a SageMaker real-time inference endpoint scales out to handle an increase in concurrent requests. This demonstrates the automated and responsive nature of scaling in SageMaker. In this example, we walk through the key steps that occur when the inference traffic to a SageMaker real-time endpoint starts to increase and concurrency to the model deployed on every instance goes up. We show how the system monitors the traffic, invokes an auto scaling action, provisions new instances, and ultimately load balances the requests across the scaled-out resources. Understanding this scaling process is crucial for making sure your generative AI models can handle fluctuations in demand and provide a seamless experience for your customers. By the end of this walkthrough, you’ll have a clear picture of how SageMaker real-time inference endpoints can automatically scale to meet your application’s needs.
Let’s dive into the details of this scaling scenario using the provided figure.

The key steps are as follows:
- Increased inference traffic (t0) – At some point, the traffic to the SageMaker real-time inference endpoint starts to increase, indicating a potential need for additional resources. The increase in traffic leads to a higher number of concurrent requests required for each model copy or instance.
- CloudWatch alarm monitoring (t0 → t1) – An auto scaling policy uses CloudWatch to monitor metrics, sampling it over a few data points within a predefined time frame. This makes sure the increased traffic is a sustained change in demand, not a temporary spike.
- Auto scaling trigger (t1) – If the metric crosses the predefined threshold, the CloudWatch alarm goes into an
InAlarmstate, invoking an auto scaling action to scale up the resources. - New instance provisioning and container startup (t1 → t2) – During the scale-up action, new instances are provisioned if required. The model server and container are started on the new instances. When the instance provisioning is complete, the model container initialization process begins. After the server successfully starts and passes the health checks, the instances are registered with the endpoint, enabling them to serve incoming traffic requests.
- Load balancing (t2) – After the container health checks pass and the container reports as healthy, the new instances are ready to serve inference requests. All requests are now automatically load balanced between the two instances using the pre-built routing strategies in SageMaker.
This approach allows the SageMaker real-time inference endpoint to react quickly and handle the increased traffic with minimal impact to the clients.
Application Auto Scaling supports target tracking and step scaling policies. Each have their own logic to handle scale-in and scale-out:
- Target tracking works to scale out by adding capacity to reduce the difference between the metric value (
ConcurrentRequestsPerModel/Copy) and the target value set. When the metric (ConcurrentRequestsPerModel/Copy) is below the target value, Application Auto Scaling scales in by removing capacity. - Step scaling works to scales capacity using a set of adjustments, known as step adjustments. The size of the adjustment varies based on the magnitude of the metric value (
ConcurrentRequestsPerModel/Copy)/alarm breach.
By using these new metrics, auto scaling can now be invoked and scale out significantly faster compared to the older SageMakerVariantInvocationsPerInstance predefined metric type. This decrease in the time to measure and invoke a scale-out allows you to react to increased demand significantly faster than before (under 1 minute). This works especially well for generative AI models, which are typically concurrency-bound and can take many seconds to complete each inference request.
Using the new high-resolution metrics allow you to greatly decrease the time it takes to scale up an endpoint using Application Auto Scaling. These high-resolution metrics are emitted at 10-second intervals, allowing for faster invoking of scale-out procedures. For models with less than 10 billion parameters, this can be a significant percentage of the time it takes for an end-to-end scaling event. For larger model deployments, this can be up to 5 minutes shorter before a new copy of your FM or LLM is ready to service traffic.

Get started with faster auto scaling
Getting started with using the metrics is straightforward. You can use the following steps to create a new scaling policy to benefit from faster auto scaling. In this example, we deploy a Meta Llama 3 model that has 8 billion parameters on a G5 instance type, which uses NVIDIA A10G GPUs. In this example, the model can fit entirely on a single GPU and we can use auto scaling to scale up the number of inference components and G5 instances based on our traffic. The full notebook can be found on the GitHub for SageMaker Single Model Endpoints and SageMaker with inference components.
- After you create your SageMaker endpoint, you define a new auto scaling target for Application Auto Scaling. In the following code block, you set
as_min_capacityandas_max_capacityto the minimum and maximum number of instances you want to set for your endpoint, respectively. If you’re using inference components (shown later), you can use instance auto scaling and skip this step. - After you create your new scalable target, you can define your policy. You can choose between using a target tracking policy or step scaling policy. In the following target tracking policy, we have set
TargetValueto 5. This means we’re asking auto scaling to scale up if the number of concurrent requests per model is equal to or greater than five.
If you would like to configure a step scaling policy, refer to the following notebook.
That’s it! Traffic now invoking your endpoint will be monitored with concurrency tracked and evaluated against the policy you specified. Your endpoint will scale up and down based on the minimum and maximum values you provided. In the preceding example, we set a cooldown period for scaling in and out to 180 seconds, but you can change this based on what works best for your workload.
SageMaker inference components
If you’re using inference components to deploy multiple generative AI models on a SageMaker endpoint, you can complete the following steps:
- After you create your SageMaker endpoint and inference components, you define a new auto scaling target for Application Auto Scaling:
- After you create your new scalable target, you can define your policy. In the following code, we set
TargetValueto 5. By doing so, we’re asking auto scaling to scale up if the number of concurrent requests per model is equal to or greater than five.
You can use the new concurrency-based target tracking auto scaling policies in tandem with existing invocation-based target tracking policies. When a container experiences a crash or failure, the resulting requests are typically short-lived and may be responded to with error messages. In such scenarios, the concurrency-based auto scaling policy can detect the sudden drop in concurrent requests, potentially causing an unintentional scale-in of the container fleet. However, the invocation-based policy can act as a safeguard, avoiding the scale-in if there is still sufficient traffic being directed to the remaining containers. With this hybrid approach, container-based applications can achieve a more efficient and adaptive scaling behavior. The balance between concurrency-based and invocation-based policies allows the system to respond appropriately to various operational conditions, such as container failures, sudden spikes in traffic, or gradual changes in workload patterns. This enables the container infrastructure to scale up and down more effectively, optimizing resource utilization and providing reliable application performance.
Sample runs and results
With the new metrics, we have observed improvements in the time required to invoke scale-out events. To test the effectiveness of this solution, we completed some sample runs with Meta Llama models (Llama 2 7B and Llama 3 8B). Prior to this feature, detecting the need for auto scaling could take over 6 minutes, but with this new feature, we were able to reduce that time to less than 45 seconds. For generative AI models such as Meta Llama 2 7B and Llama 3 8B, we have been able to reduce the overall end-to-end scale-out time by approximately 40%.
The following figures illustrate the results of sample runs for Meta Llama 3 8B.

The following figures illustrate the results of sample runs for Meta Llama 2 7B.

As a best practice, it’s important to optimize your container, model artifacts, and bootstrapping processes to be as efficient as possible. Doing so can help minimize deployment times and improve the responsiveness of AI services.
Conclusion
In this post, we detailed how the ConcurrentRequestsPerModel and ConcurrentRequestsPerCopy metrics work, explained why you should use them, and walked you through the process of implementing them for your workloads. We encourage you to try out these new metrics and evaluate whether they improve your FM and LLM workloads on SageMaker endpoints. You can find the notebooks on GitHub.
Special thanks to our partners from Application Auto Scaling for making this launch happen: Ankur Sethi, Vasanth Kumararajan, Jaysinh Parmar Mona Zhao, Miranda Liu, Fatih Tekin, and Martin Wang.
About the Authors
 James Park is a Solutions Architect at Amazon Web Services. He works with Amazon.com to design, build, and deploy technology solutions on AWS, and has a particular interest in AI and machine learning. In h is spare time he enjoys seeking out new cultures, new experiences, and staying up to date with the latest technology trends. You can find him on LinkedIn.
 Praveen Chamarthi is a Senior AI/ML Specialist with Amazon Web Services. He is passionate about AI/ML and all things AWS. He helps customers across the Americas scale, innovate, and operate ML workloads efficiently on AWS. In his spare time, Praveen loves to read and enjoys sci-fi movies.
 Dr. Changsha Ma is an AI/ML Specialist at AWS. She is a technologist with a PhD in Computer Science, a master’s degree in Education Psychology, and years of experience in data science and independent consulting in AI/ML. She is passionate about researching methodological approaches for machine and human intelligence. Outside of work, she loves hiking, cooking, hunting food, and spending time with friends and families.
 Saurabh Trikande is a Senior Product Manager for Amazon SageMaker Inference. He is passionate about working with customers and is motivated by the goal of democratizing machine learning. He focuses on core challenges related to deploying complex ML applications, multi-tenant ML models, cost optimizations, and making deployment of deep learning models more accessible. In his spare time, Saurabh enjoys hiking, learning about innovative technologies, following TechCrunch and spending time with his family.
 Kunal Shah is a software development engineer at Amazon Web Services (AWS) with 7+ years of industry experience. His passion lies in deploying machine learning (ML) models for inference, and he is driven by a strong desire to learn and contribute to the development of AI-powered tools that can create real-world impact. Beyond his professional pursuits, he enjoys watching historical movies, traveling and adventure sports.
 Marc Karp is an ML Architect with the Amazon SageMaker Service team. He focuses on helping customers design, deploy, and manage ML workloads at scale. In his spare time, he enjoys traveling and exploring new places.
Tracing the path to self-adapting AI agents

The games industry has long been a frontier of innovation for AI. In the early 2000s, programmers hand-coded neural networks to breathe life into virtual worlds (opens in new tab), creating engaging AI characters (opens in new tab) that interact with players. Fast forward two decades, neural networks have grown from their humble beginnings to colossal architectures with billions of parameters, powering real-world applications like ChatGPT (opens in new tab) and Microsoft Copilots (opens in new tab). The catalyst for this seismic shift in AI scale and capability is the advent of automatic optimization. AutoDiff frameworks like PyTorch (opens in new tab) and Tensorflow (opens in new tab) have democratized scalable gradient-based end-to-end optimization. This breakthrough has been instrumental in the development of Large Foundation Models (LFMs) that now sit at the core of AI.
Today, the AI systems we interact with are more than just neural network models. They contain intricate workflows that seamlessly integrate customized machine learning models, orchestration code, retrieval modules, and various tools and functions. These components work in concert to create the sophisticated AI experiences that have become an integral part of our digital lives. Nonetheless, up to now, we do not have tools to automatically train these extra components. They are handcrafted through extensive engineering, just like how neural networks were engineered in the early 2000s.
End-to-end automatic optimization of AI systems
The latest research from Microsoft and Stanford University introduces Trace (opens in new tab), a groundbreaking framework poised to revolutionize the automatic optimization of AI systems. Here are three highlights of the transformative potential of Trace:
- End-to-end optimization: Trace treats AI systems as computational graphs, akin to neural networks, and optimizes them end-to-end through a generalized back-propagation approach.
- Dynamic adaptation: It handles the dynamic nature of AI systems, where the graph can change with varying inputs and parameters and needs to adapt to various kinds of feedback.
- Versatile applications: Trace can optimize heterogenous parameters (such as prompts and codes) in AI systems. Empirical studies showcase Trace’s ability to optimize diverse problems, including hyperparameter tuning, large language model (LLM) agents, and robot control, often outperforming specialized optimizers.
In a nutshell, Trace is a new AutoDiff-like tool for training AI systems without using gradients. This generalization is made possible by a new mathematical formulation of optimization, Optimization with Trace Oracle (OPTO), which can describe end-to-end optimization of AI systems with general feedback (such as numerical losses, natural language, and errors). Instead of propagating gradients, which are not well-defined for AI systems beyond neural networks, Trace propagates Minimal Subgraphs which can then be used to also recover gradients where applicable. Trace is implemented as a PyTorch-like Python library with which users can easily create AI systems and refine them, akin to training neural networks.
In this blog post, we are excited to announce the release of the Trace Python library (opens in new tab). With the help of demos, we’ll show you how this powerful tool can be used to build AI agents that learn and adapt from their experiences, eliminating the need for specialized engineering.
Microsoft Research blog

Microsoft at FAccT 2024: Advancing responsible AI research and practice
From studying how to identify gender bias in Hindi to uncovering AI-related risks for workers, Microsoft is making key contributions towards advancing the state of the art in responsible AI research. Check out their work at ACM FAccT 2024.
Warm up: Building a Battleship game AI agent through learning
To start, consider building an AI agent for the classic Battleship board game. In Battleship, a player needs to devise strategies to cleverly locate and attack the opponent’s ships on a hidden board as fast as possible. To build an AI agent with Trace, one simply needs to program the workflow and declare the parameters, like programming a neural network architecture. Here we will design an agent with two components: a reason function and an act function, as illustrated in Figure 1a. We provide a basic description of what these two functions should do as docstrings. We leave the functions’ content to be blank and set them to be trainable. At this point, the agent doesn’t know how the Battleship API works. It must not only learn how to play the game, but also learn how to use the unknown API.


We iteratively train this AI agent to play the game through a simple Python for loop, seen in Figure 1b. In each iteration, the agent (that is, policy) sees the board configuration and tries to shoot at a target location on a training board. The environment returns in text whether it’s a hit or a miss. Then, we run Trace to propagate this environment feedback through agent’s decision logic to update the parameters (for example, the policy is like a two-layer network with a reason layer and an act layer). These iterations mimic how a human programmer might approach the problem. They run the policy and change the code based on the observed feedback, try different heuristics to solve this problem, and may rewrite the code a few times to fix any execution errors by using stack traces.
In Figure 2, we show the results of this learning agent, where the agent is trained by an LLM-based optimizer OptoPrime in Trace. The performance is measured as the scores of the agent playing on new randomly generated games (different from the training board). We see that the agent understands the Battleship game and proposes the enumeration strategy after one iteration; then, after a few more tries, it starts to develop complex strategies for playing the game.

Super-fast reinforcement learning agent for robot control
We can extend the same idea of end-to-end optimization to train more complicated AI systems. In this example, we want to learn a policy code to control a robotic manipulator. Compared to the Battleship example, the problem here has a longer horizon, since the policy would need to drive the robot for multiple time steps before receiving any feedback. Traditionally, such a problem is framed as a reinforcement learning (RL) problem, and usually learning a policy with RL requires tens of thousands of training episodes. We show Trace can be used to effectively solve such a problem, with just dozens of episodes — a 1,000 times speed-up. We trace an entire episode and perform end-to-end updates through these steps (using the same OptoPrime optimizer). In this way, effectively, Trace performs back-propagation through time (BPTT (opens in new tab)).
We conduct experiments using a simulated Sawyer robot arm in the Meta-World (opens in new tab) environment of LLF-Bench (opens in new tab), as shown in Figure 3. The agent needs to decide a target pose for the robot, which will then be used as a set point for a position controller, to perform a pick-and-place task. Each episode has 10 timesteps, which results in a graph of depth around 30. The agent receives language feedback as intermediate observations (from LLF-Bench) and finally feedback about success and episode return (i.e. cumulative reward for RL) in texts at the end. Like the Battleship example, we initialize the policy code to be a dummy function and let it adapt through interactions, demonstrated in Figure 4. We repetitively train the agent starting from one initial condition, then test it on 10 new held-out initial conditions for generalization. Very quickly, after 13 episodes, we see that the agent learns complex rules to solve the problem, as shown in Figure 3 and Figure 4.


Figure 3: Trace rapidly learns a robot controller in the MetaWorld simulated environment, that generalizes to new initial conditions. The video shows Trace learns a policy to successfully perform the pick-place task after 13 episodes.From left to right, iteration 0, iteration 1, iteration 3, iteration 9, iteration 13.


Figure 4. Trace adapts an initial dummy control policy into a complex, generalizable control policy.
Finale: Self-adapting multi-agent LLM systems
Trace is not limited to code optimization. The Trace framework supports optimizing heterogenous parameters, including codes, prompts, and hyperparameters. Here we demonstrate Trace’s ability to optimize prompts of multiple LLM agents in solving complex household tasks in the VirtualHome (opens in new tab) simulated environment.
Many tasks require multi-agent collaboration to solve efficiently. But crafting the right prompts for multiple LLM agents requires careful engineering. Trace can seamlessly optimize agents’ behaviors based on environmental feedback. Trace automatically constructs the interaction graph of agents and updates each agent’s behavior factoring in the behavior of other agents. Then the agents can automatically evolve to acquire specialized capabilities such as behavioral roles, freeing system designers from the painstaking process of hand-tuning multiple LLM prompts.
We use Trace and OptoPrime to improve ReAct agents that have been carefully orchestrated (opens in new tab) to complete the VirtualHome tasks. IIn each step, the agent can interact with the environment (like opening a cabinet) or send a message to another agent when they see each other. We declare the plan of each LLM-based agent (a part of their prompt) as a trainable parameter and use reward as feedback. The experimental results are shown in Figure 5 where agents optimized by Trace can complete the tasks using fewer actions and environment interactions. We observed fascinating emergent pro-social behaviors from agents without being explicitly told to communicate as illustrated in Figure 6. This pro-social interaction behavior changes with different tasks. For example, agents did not communicate with each other for the task of “book reading,” but they collaborated when asked to “put forks and plates into a dishwasher,” which we show in Figure 7. We also observed other patterns such as role specialization, where one agent became the lead in a given task, and was followed by another agent to assist.


Figure 6: Demo videos of how Trace agents behave to finish each of the three tasks.
[send_message]  to : I am handing you the . Please grab another piece of cutlery or plate to help!
[send_message]  to : Can you also hand me the  you are holding?
[send_message]  to : Here's the . I'll go grab the  now.
...
[send_message]  to : Let's head to the kitchen and put the  and  into the dishwasher.
Figure 7: Trace learns pro-social behavior in the Dishwasher task. Trace optimized agents send messages to attempt to collaborate while simple ReAct agent will only carry out the tasks.
Trace heralds a new era of interactive agents that adapt automatically using various feedback types. This innovation could be the key to unlocking the full potential of AI systems, making them more efficient and responsive than ever before. After witnessing the awesome power of Deep Neural Networks, stay tuned for the next revolution in AI design — Deep Agent Networks!
The post Tracing the path to self-adapting AI agents appeared first on Microsoft Research.
Find answers accurately and quickly using Amazon Q Business with the SharePoint Online connector
Amazon Q Business is a fully managed, generative artificial intelligence (AI)-powered assistant that helps enterprises unlock the value of their data and knowledge. With Amazon Q, you can quickly find answers to questions, generate summaries and content, and complete tasks by using the information and expertise stored across your company’s various data sources and enterprise systems. At the core of this capability are native data source connectors that seamlessly integrate and index content from multiple repositories into a unified index. This enables the Amazon Q large language model (LLM) to provide accurate, well-written answers by drawing from the consolidated data and information. The data source connectors act as a bridge, synchronizing content from disparate systems like Salesforce, Jira, and SharePoint into a centralized index that powers the natural language understanding and generative abilities of Amazon Q.
To make this integration process as seamless as possible, Amazon Q Business offers multiple pre-built connectors to a wide range of data sources, including Atlassian Jira, Atlassian Confluence, Amazon Simple Storage Service (Amazon S3), Microsoft SharePoint, Salesforce, and many more. This allows you to create your generative AI solution with minimal configuration. For a full list of Amazon Q supported data source connectors, see Supported connectors.
One of the key integrations for Amazon Q is with Microsoft SharePoint Online. SharePoint is a widely used collaborative platform that allows organizations to manage and share content, knowledge, and applications to improve productivity and decision-making. By integrating Amazon Q with SharePoint, businesses can empower their employees to access information and insights from SharePoint more efficiently and effectively.
With the Amazon Q and SharePoint Online integration, business users can do the following:
- Get instant answers – Users can ask natural language questions and Amazon Q will provide accurate, up-to-date answers by searching and synthesizing information from across the organization’s SharePoint sites and content.
- Accelerate research and analysis – Instead of manually searching through SharePoint documents, users can use Amazon Q to quickly find relevant information, summaries, and insights to support their research and decision-making.
- Streamline content creation – Amazon Q can assist in generating drafts, outlines, and even complete content pieces (such as reports, articles, or presentations) by drawing on the knowledge and data stored in SharePoint.
- Automate workflows and tasks – Amazon Q can be configured to complete routine tasks and queries (such as generating status reports, answering FAQs, or requesting information) by interacting with the relevant SharePoint data and applications.
- Enhance collaboration – By making SharePoint content more accessible and actionable through Amazon Q, the integration facilitates better knowledge sharing, problem-solving, and collaboration across the organization.
In this post, we guide you through the process of setting up the SharePoint Online connector in Amazon Q Business. This will enable your organization to use the power of generative AI to unlock the full value of your SharePoint investment and empower your workforce to work smarter and more efficiently.
Find accurate answers from content in Microsoft SharePoint using Amazon Q Business
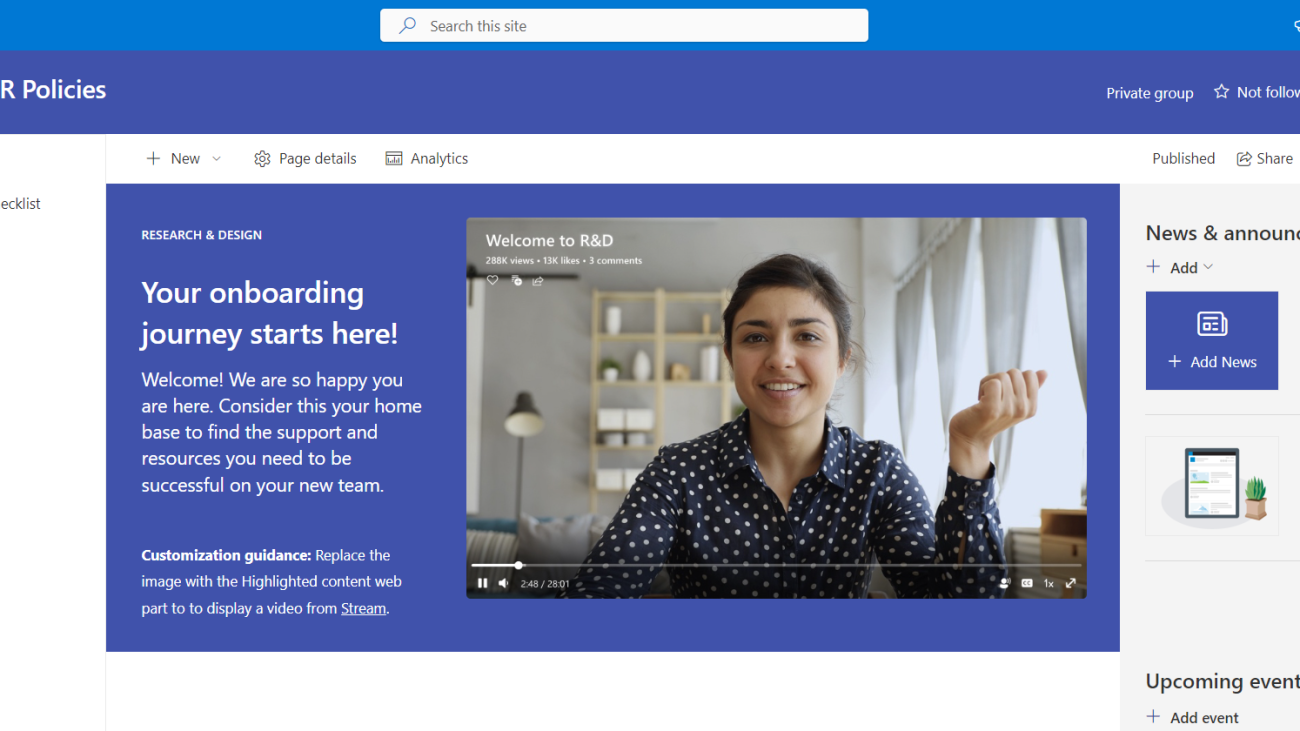
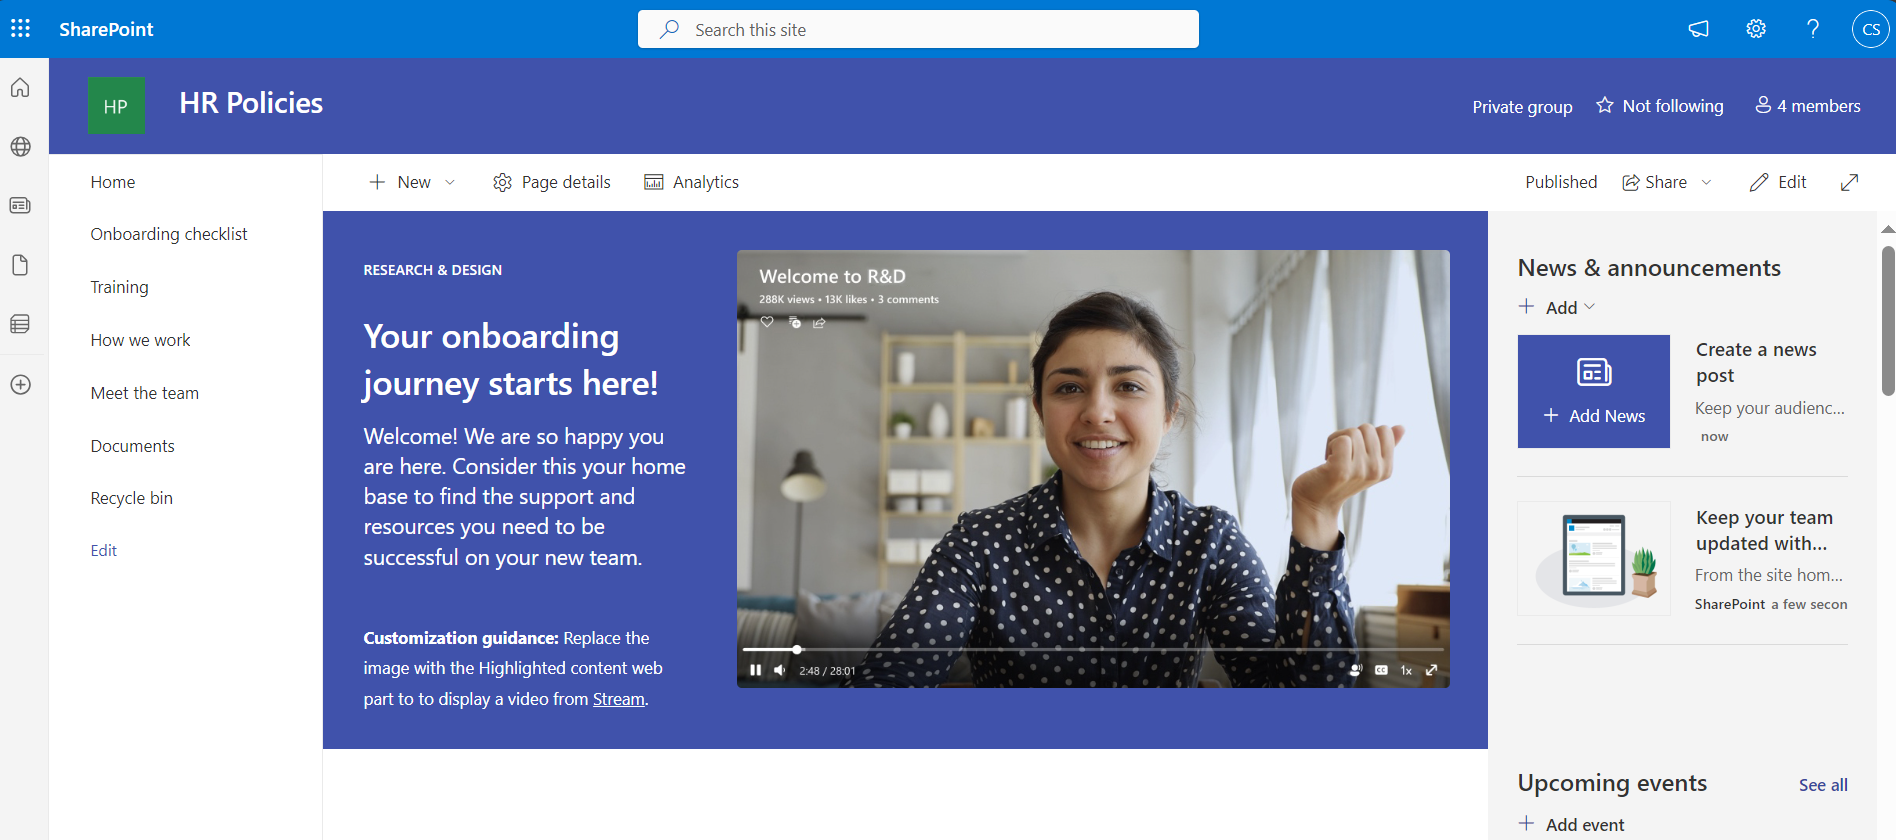
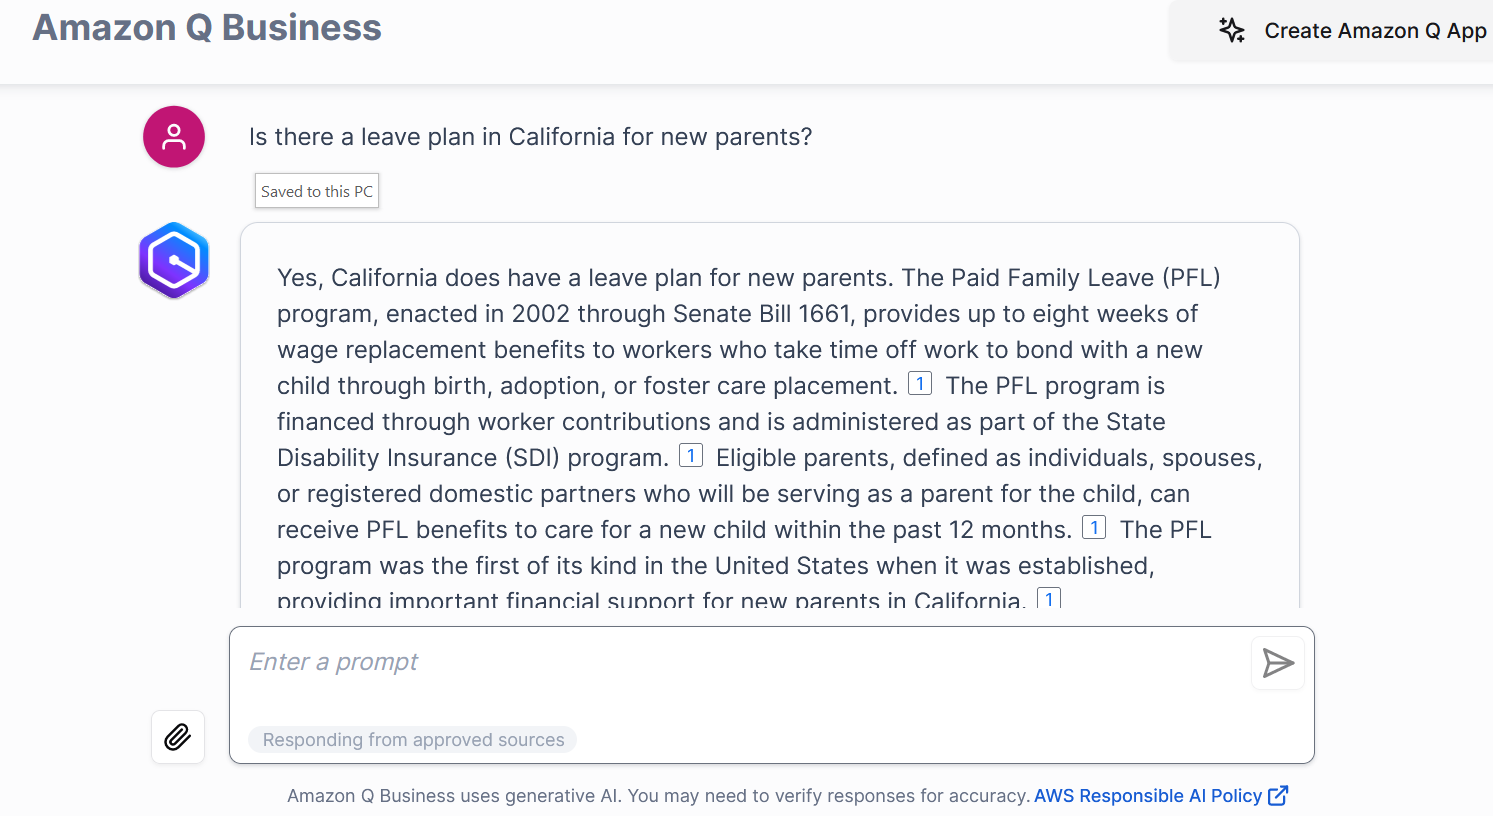
After you integrate Amazon Q Business with Microsoft SharePoint, users can ask questions from the body of the document. For this post, we use a SharePoint Online site named HR Policies that has information about the travel policy, state disability insurance policy, payroll taxes, and paid family leave program for California stored in document libraries. Some of the questions you can ask Amazon Q Business might include the following:
- Is there a leave plan in California for new parents?
- Can I claim disability insurance during this time?
- Before applying for leave, I want to submit my submit expense report, how can I do it?
- Is there any limit on spending on a business trip?
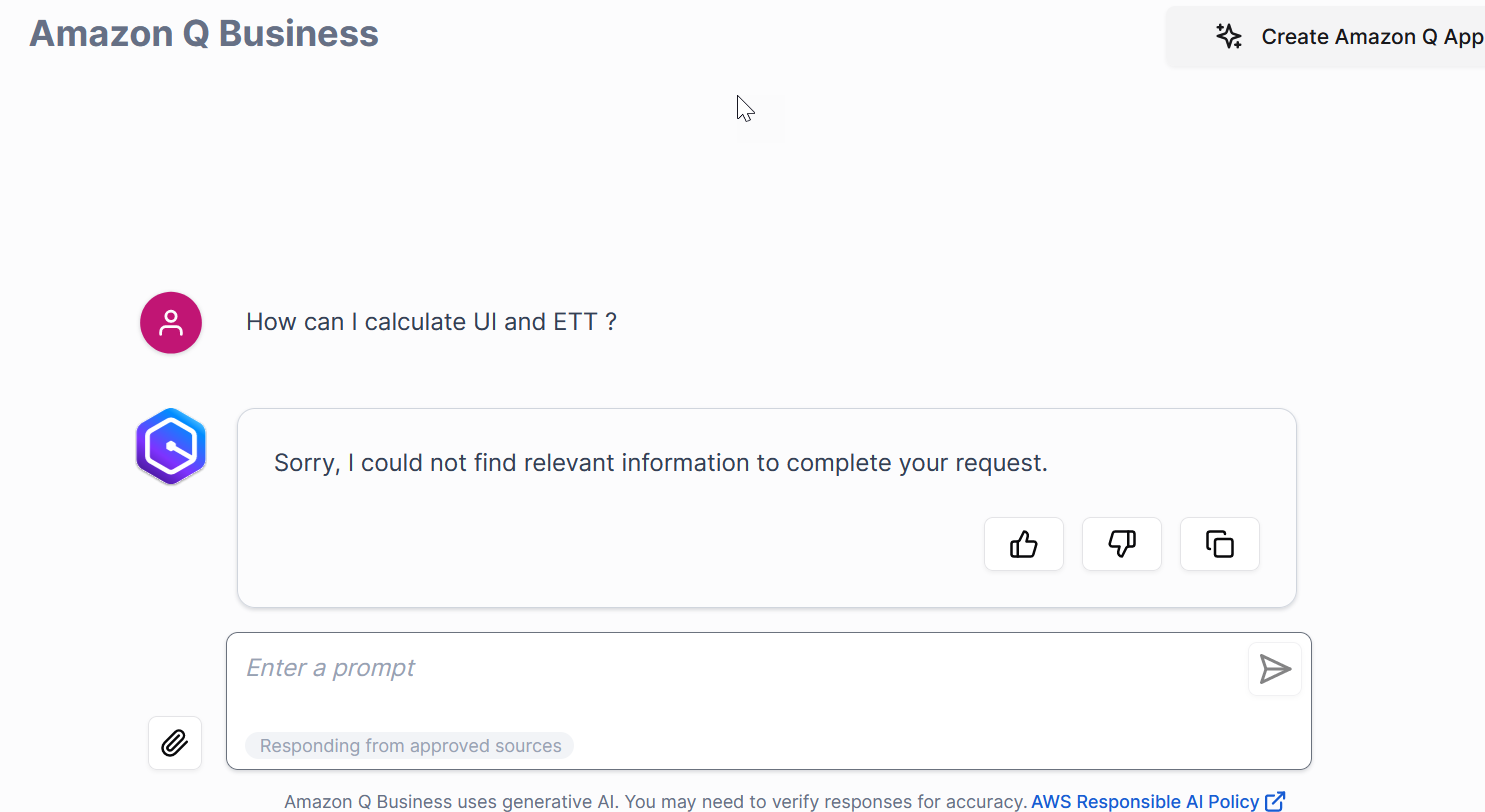
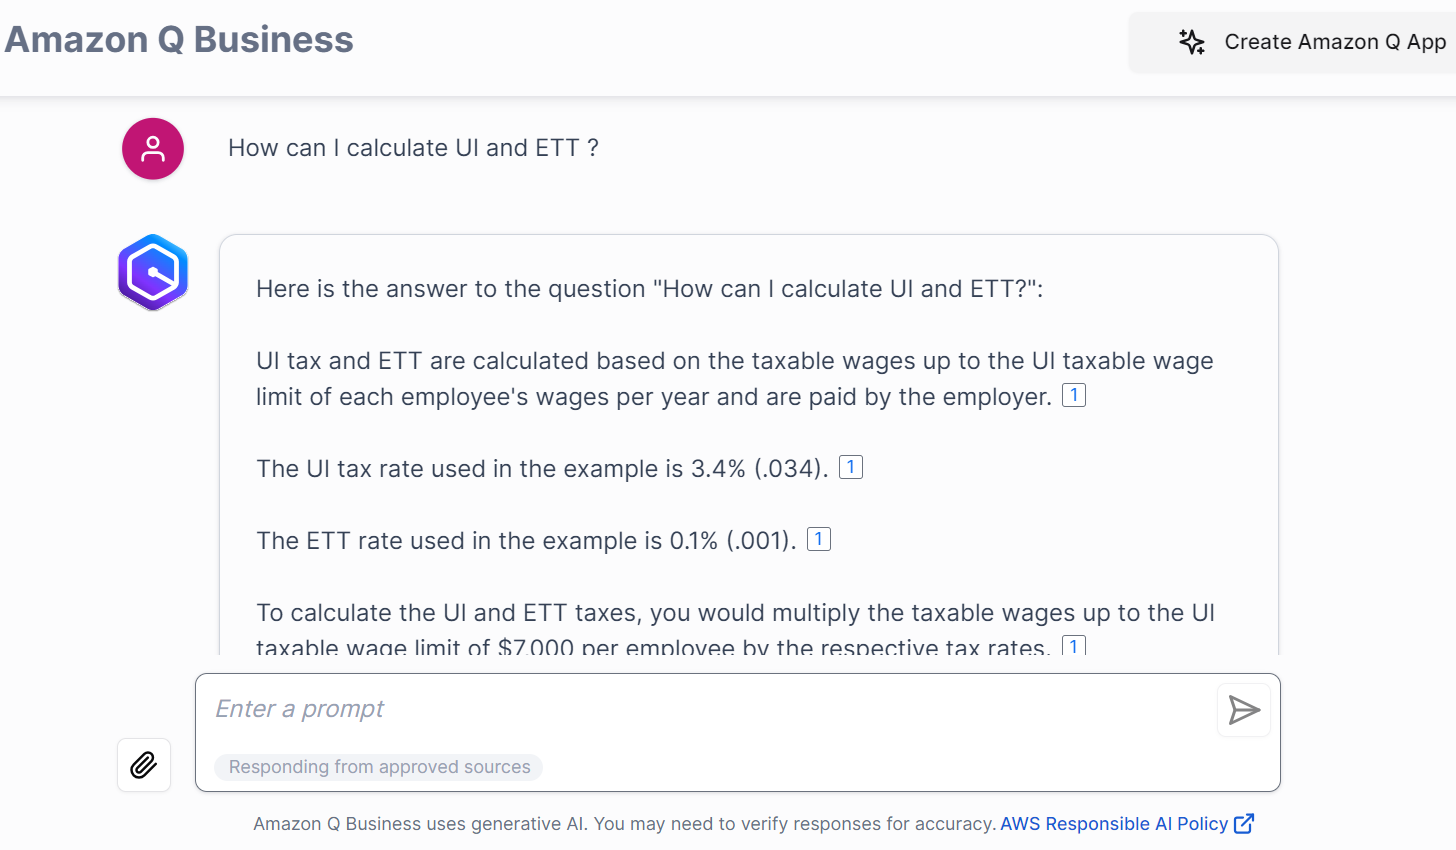
- How can I calculate UI and ETT?
Overview of the data source
SharePoint is a website-based collaboration system that is used as a secure place to store, organize, share, and access information from any device. SharePoint empowers teamwork with dynamic and productive team sites for every project team, department, and division.
SharePoint is available in two options: SharePoint Server and SharePoint Online. SharePoint Server is a locally hosted platform that your company owns and operates. You’re responsible for everything from server architecture, active directory, to file storage. SharePoint Server 2016, SharePoint Server 2019, and SharePoint Server Subscription Edition are the active SharePoint Server releases. SharePoint Online is a cloud-based service provided directly from Microsoft. They take care of identity management architecture, and site management. SharePoint Sever and SharePoint Online contain pages, files, attachments, links, events, and comments that can be crawled by Amazon Q SharePoint connectors for SharePoint Server and SharePoint Online.
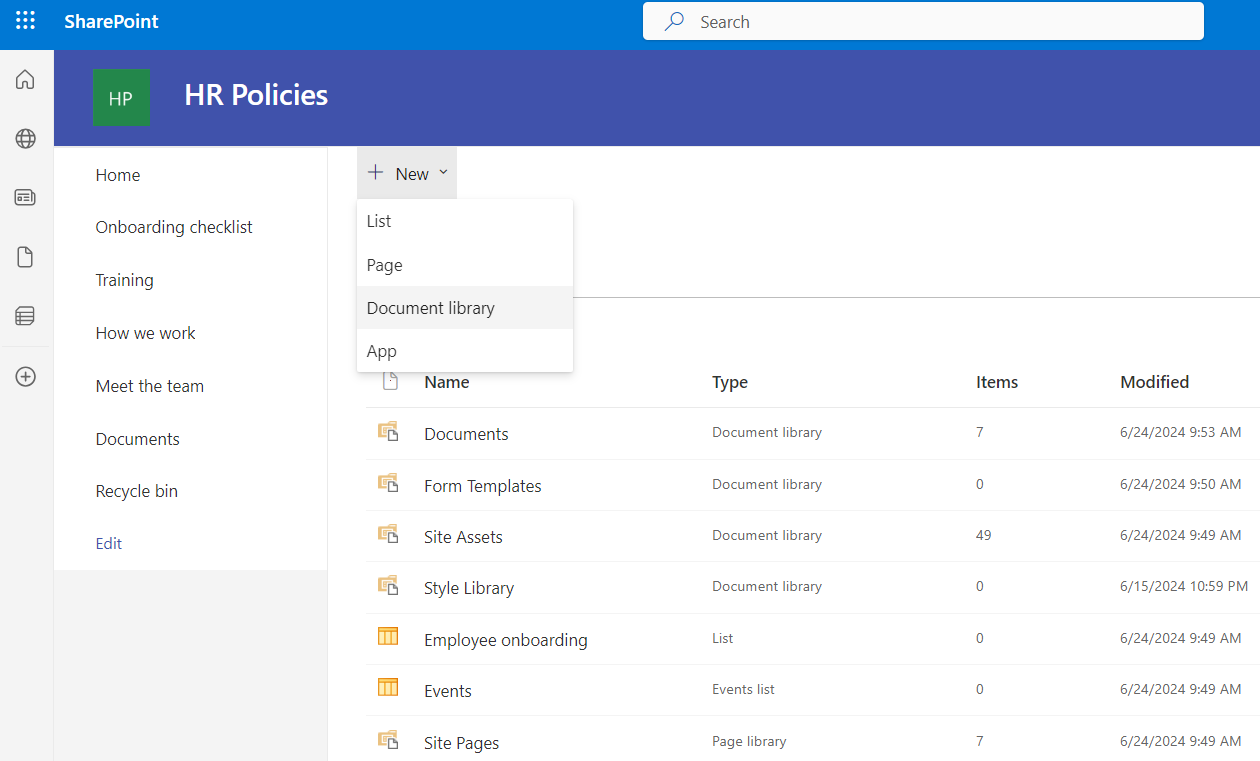
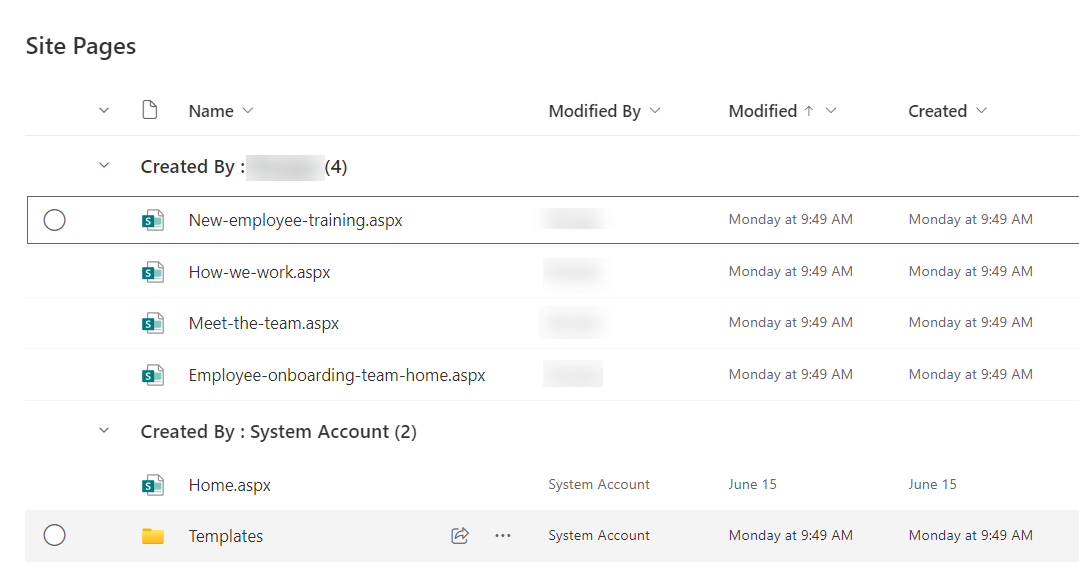
SharePoint Online and SharePoint Server offer a site content space where site owners can view a list of all pages, libraries, and lists for their site. The site content space also provides access to add lists, pages, document libraries, and more.
Pages are the contents stored on webpages; these are meant to display information to the end-user.
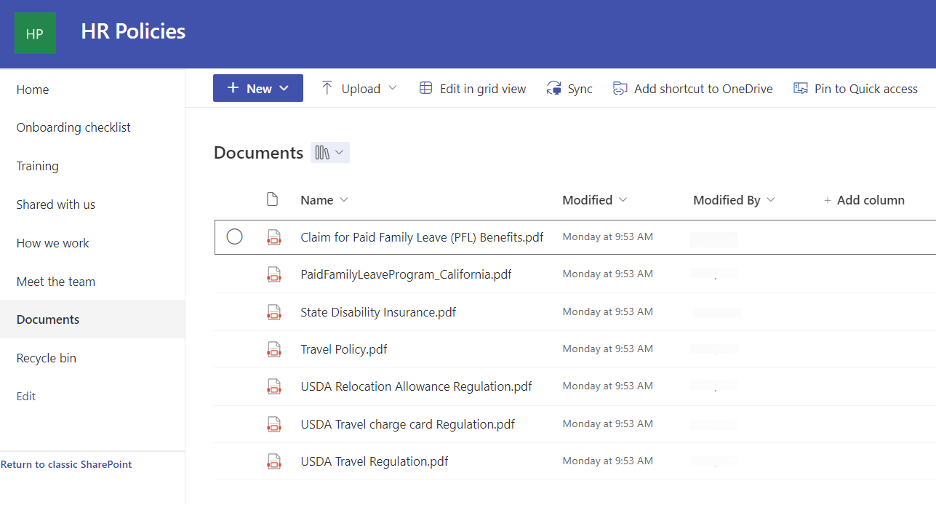
A document library provides a secure place to store files where you and your coworkers can find them easily. You can work on them together and access them from any device at any time.
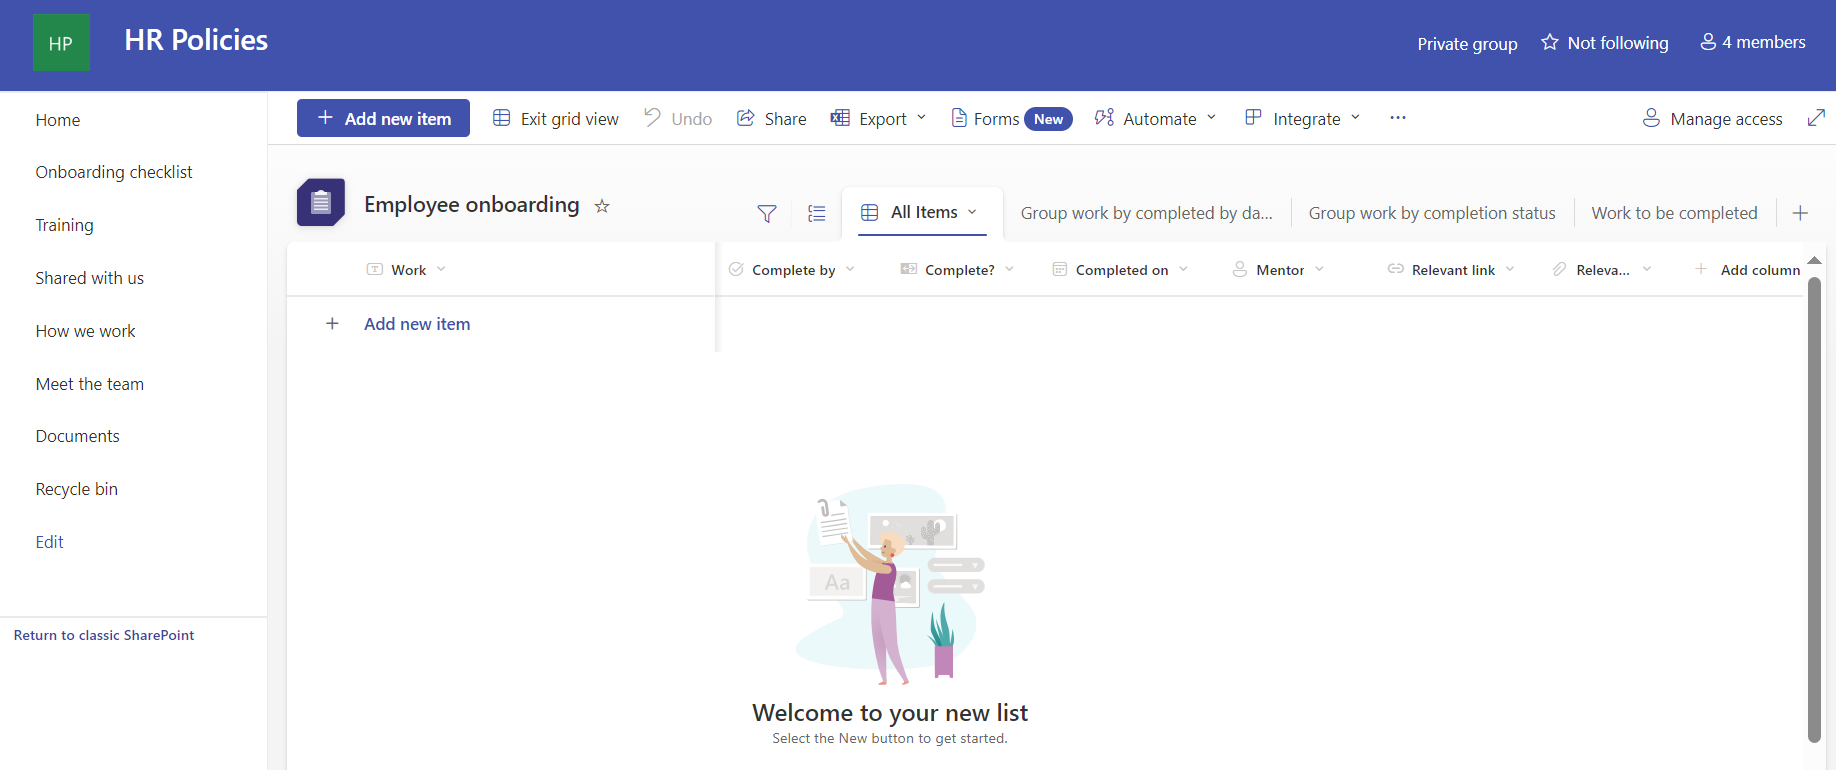
A list is one of the data storage mechanisms within SharePoint. It provides the UI to view the items in a list. You can add, edit, and delete items or view individual items.
Overview of the SharePoint Online connector for Amazon Q Business
To crawl and index contents from SharePoint Online, you can configure the Amazon Q Business SharePoint Online connector as a data source in your Amazon Q business application. When you connect Amazon Q Business to a data source and initiate the sync process, Amazon Q Business crawls and indexes documents from the data source into its index.
Let’s look at what are considered as documents in the context of Amazon Q business SharePoint Online connector. A document is a collection of information that consists of a title, the content (or the body), metadata (data about the document), and access control list (ACL) information to make sure answers are provided from documents that the user has access to.
The following entities in SharePoint are crawled and indexed as documents along with their metadata and access control information:
- Files
- Events
- Pages
- Links
- Attachments
- Comments
Amazon Q Business crawls data source document attributes or metadata and maps them to fields in your Amazon Q index. Refer to Amazon Q Business SharePoint Online data source connector field mappings for more details.
Configure and prepare the Amazon Q connector
Before you index the content from Microsoft SharePoint online, your need to first establish a secure connection between the Amazon Q Business connector for SharePoint Online with your SharePoint Online instance. To establish a secure connection, you need to authenticate with the data source.
The following are the supported authentication mechanisms for the SharePoint connector:
- Basic Authentication
- OAuth 2.0 with Resource Owner Password Credentials Flow
- Azure AD App-Only (OAuth 2.0 Certificate)
- SharePoint App-Only with Client Credentials Flow
- OAuth 2.0 with Refresh Token Flow
Secure querying with ACL crawling, identity crawling, and user store
Secure querying is when a user runs a query and is returned answers from documents that the user has access to and not from documents that the user does not have access to. To enable users to do secure querying, Amazon Q Business honors ACLs of the documents. Amazon Q Business does this by first supporting the indexing of ACLs. Indexing documents with ACLs is crucial for maintaining data security, because documents without ACLs are considered public. At query time, the user’s credentials (email address) are passed along with the query so that answers from documents that are relevant to the query and which the user is authorized to access are displayed.
A document’s ACL contains information such as the user’s email address and the local groups or federated groups (if Microsoft SharePoint is integrated with an identity provider (IdP) such as Azure Active Directory/Entra ID) that have access to the document. The SharePoint online data source can be optionally connected to an IdP such as Okta or Microsoft Entra ID. In this case, the documents in SharePoint Online can have the federated group information.
When a user logs in to a web application to conduct a search, the user’s credentials (such as an email address) need to match that’s in the ACL of the document to return results from that document. The web application that the user uses to retrieve answers would be connected to an IdP or AWS IAM Identity Center. The user’s credentials from the IdP or IAM Identity Center are referred to here as the federated user credentials. The federated user credentials such as the email address are passed along with the query so that Amazon Q can return the answers from the documents that this user has access to. However, sometimes this user’s federated credentials may not be present in the SharePoint Online data source or the SharePoint document’s ACLs. Instead, the user’s local user alias, local groups that this local user alias is a part of, or the federated groups that the federated user is a part of are available in the document’s ACL. Therefore, there is a need to map the federated user credential to the local user alias, local groups, or federated groups in the document ACL.
To map this federated user’s email address to the local user aliases, local groups, or federated groups, certain Amazon Q Business connectors, including the SharePoint Online connector, provide an identity crawler to load the identity information (local user alias, local groups, federated groups, and their mappings, along with any other mappings to a federated user) from the connected data sources into a user store. At query time, Amazon Q Business retrieves the associated local user aliases, local groups, and any federated groups from the user store and uses that along with the query for securely retrieving passages from documents that the user has access to.
If you need to index documents without ACLs, you must make sure they’re explicitly marked as public in your data source.
Refer to How Amazon Q Business connector crawls SharePoint (Online) ACLs for more details.
Amazon Q indexes the documents with ACLs and sets the user’s email address or user principal name for the user and the group name [site URL hash value | group name] for the local group in the ACL. If the SharePoint Online data source is connected to an IdP such as Azure AD/Entra ID or Okta, the AD group name visible in the SharePoint site is set as the federated group ACL. The identity crawler sets these the same as the principals along with the available mappings in the user store. Any additional mappings need to be set in the user store using the user store APIs.
Overview of solution
This post presents the steps to create a certificate and private key, configure Azure AD (either using the Azure AD console or a PowerShell script), and configure Amazon Q Business.
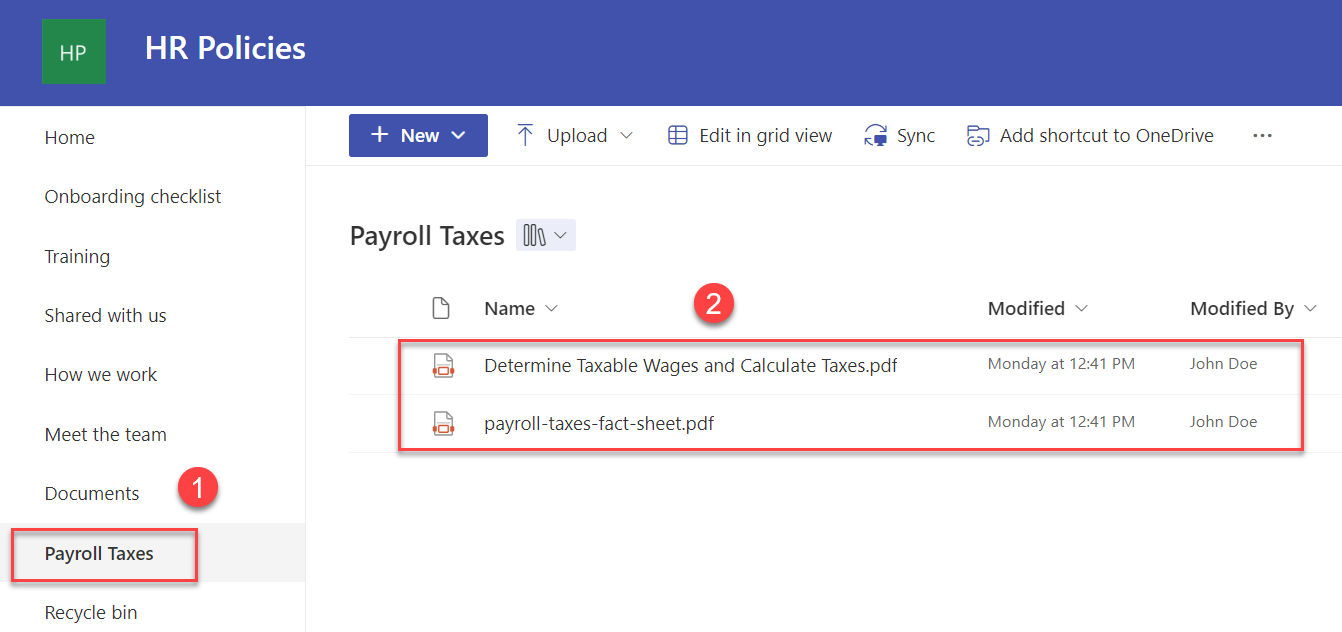
For this post, we use a SharePoint Online site named HR Policies that hosts policy documents in a Documents library and payroll tax documents in a Payroll Taxes library to walk you through the solution.
In one of the scenarios that we validate, a SharePoint user (Carlos Salazar) is part of the SharePoint site members group, and he has access only to policy documents in the Documents library.
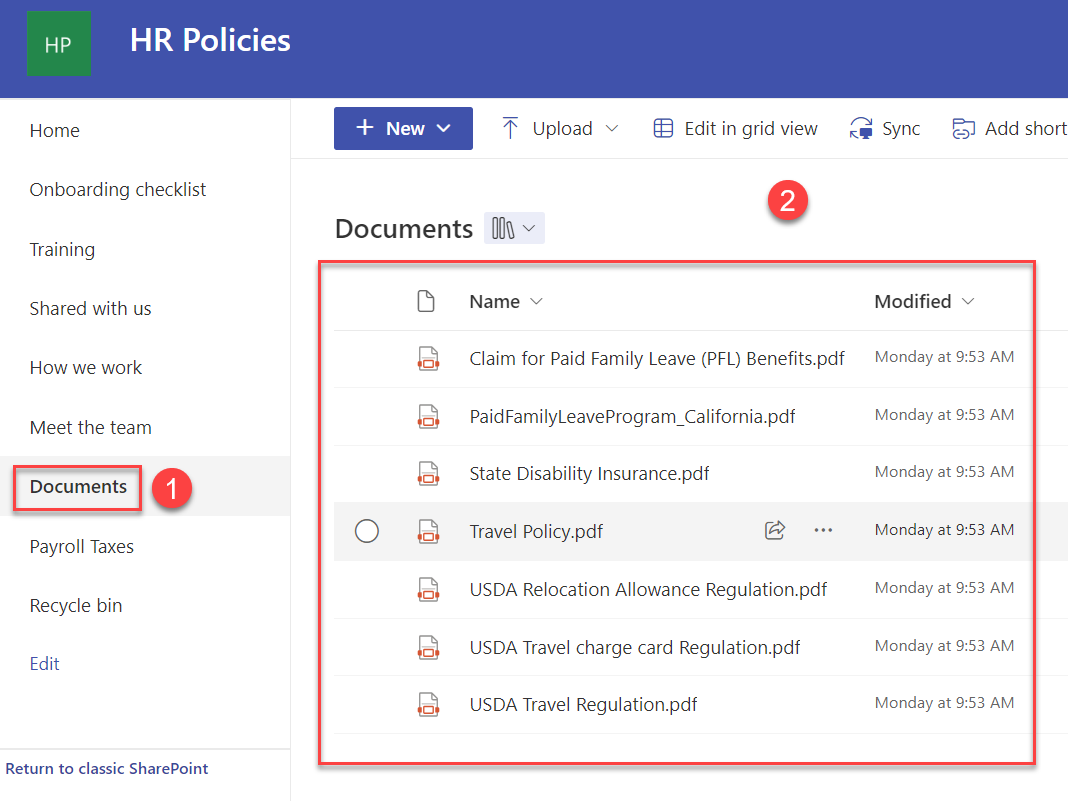
Carlos Salazar can receive responses for queries related to HR policies, as shown in the following example.
However, for questions related to payroll tax, he did not receive any response.
Another SharePoint user (John Doe) is part of the SharePoint site owners group and has access to both the Documents and Payroll Taxes libraries.
John Doe receives responses for queries related to payroll taxes, as shown in the following example.
Prerequisites
You should meet the following prerequisites:
- The user performing these steps should be a global administrator on Azure AD/Entra ID.
- Configure Microsoft Entra ID and IAM Identity Center integration.
- You need a Microsoft Windows instance to run PowerShell scripts and commands with PowerShell 7.4.1+. Details of the required PowerShell modules are described later in this post.
- The user should have administrator permissions on the Windows instance.
- Make sure that the user running these PowerShell commands has the right M365 license (for example, M365 E3).
Create the certificate and private key
In Azure AD, when configuring App-Only authentication, you typically use a certificate to request access. Anyone with the certificate’s private key can use the app and the permissions granted to the app. We create and configure a self-signed X.509 certificate that will be used to authenticate Amazon Q against Azure AD, while requesting the App-Only access token. The following steps walk you through the setup of this model.
For this post, we use Windows PowerShell to run a few PowerShell commands. You can use an existing Windows instance or spin up a Windows EC2 instance or Windows workstation to run the PowerShell commands.
You can use the following PowerShell script to create a self-signed certificate. You can also generate the self-signed certificate through the New-PnPAzureCertificate command.
- Run the following command:
You will be asked to give a password to encrypt your private key, and both the .PFX file and the .CER file will be exported to the current folder (where you ran the PowerShell script from). Verify that you now have a .cer and .pfx file.
- Upload this .cer file to an S3 location that your Amazon Q IAM role has GetObject permissions for. You can let Amazon Q create this role for you in future steps outlined later in this post, and the correct permissions will be added for you if you choose.
Now you extract the private key contents from the .pfx file and save it for Amazon Q connector configuration. This .pfx file will be present in the folder where you have saved the certificate.
- Run the following command to extract the private key:
You will be prompted for the import password. Enter the password that you used to protect your key pair when you created the .pfx file (client ID, in our case). You will be prompted again to provide a new password to protect the .key file that you are creating. Store the password to your key file in a secure place to avoid misuse. (When you enter a password, the window shows nothing if you’re using the Windows CMD window. Enter your password and choose Enter.)
- Run the following command to decrypt the private key:
- Run the following command to extract the certificate:
This decrypted key and certificate will be used by the connector for authentication purposes.
- Upload the X.509 certificate (ending with .crt) to an S3 bucket. This will be used when configuring the SharePoint Online connector for Amazon Q.
- Verify the contents of the file
amazonqbusinessdemo-decrypted.keystarts with the standardBEGIN PRIVATE KEYheader. - Copy and paste the contents of the
amazonqbusinessdemo-decrypted.keyfor use later in our Amazon Q setup.
- Verify the contents of the file
Configure Azure AD
You can configure Azure AD using either of the following methods:
- Using the Azure AD console GUI. This is a manual step-by-step process.
- Using the provided PowerShell script. This is an automated process that takes in the inputs and configures the required permissions.
Follow the steps for either option to complete the Azure AD configuration.
Configure Azure AD using the Azure AD console
To configure Azure AD using the GUI, you first register an Azure AD application in the Azure AD tenant that is linked to the SharePoint Online/O365 tenant. For more details, see Granting access via Azure AD App-Only.
- Open the Office 365 Admin Center using the account of a user member of the Tenant Global Admins group.
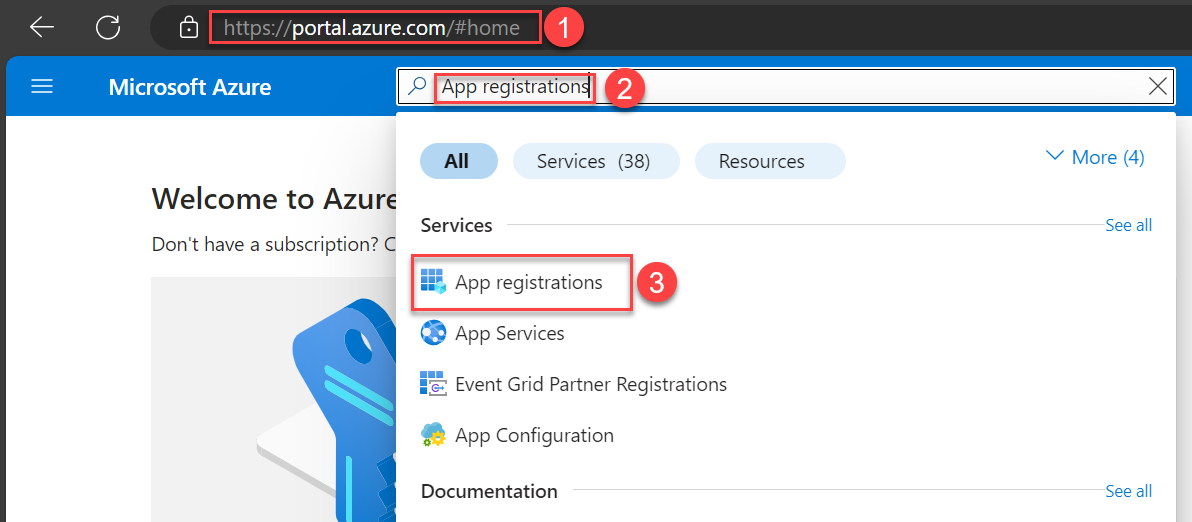
- Navigate to Microsoft Azure Portal.
- Search for and choose App registrations.
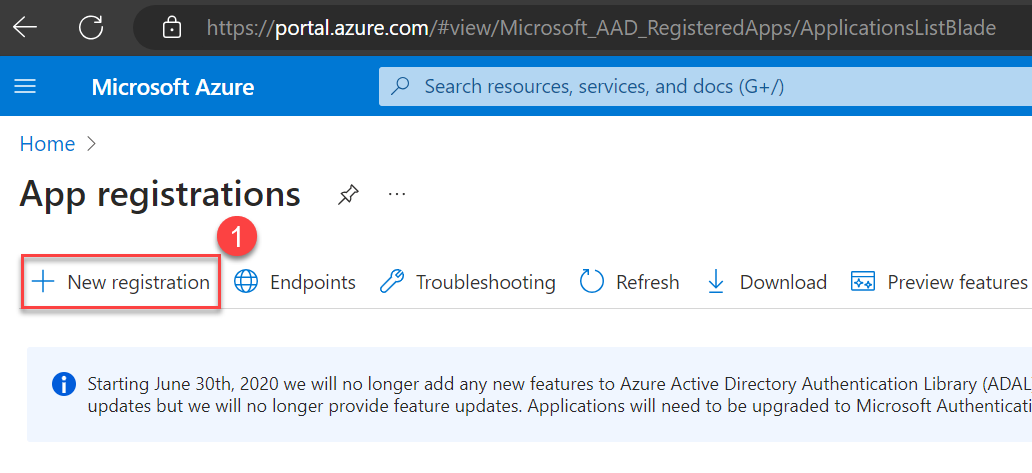
- Choose New registration.
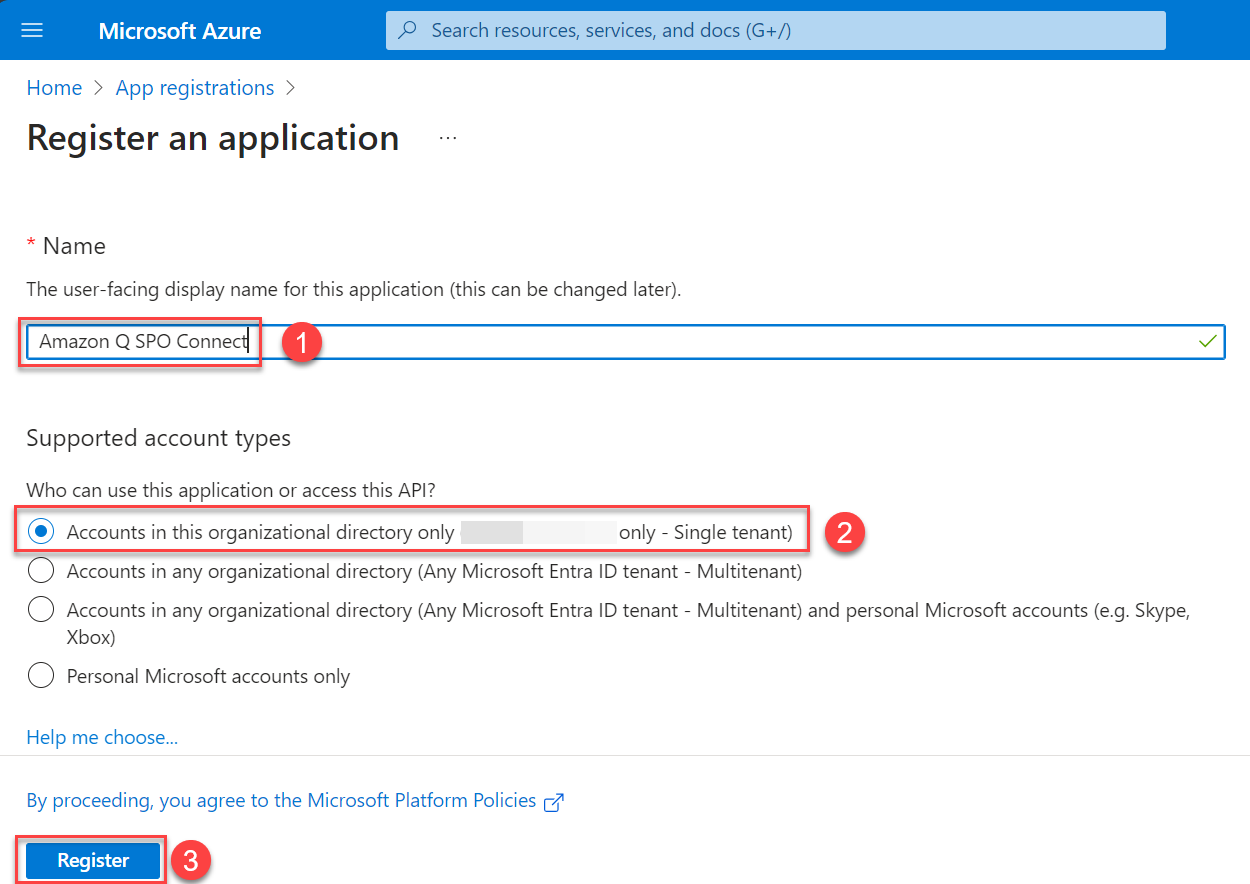
- Enter a name for your application, select who can use this application, and choose Register.
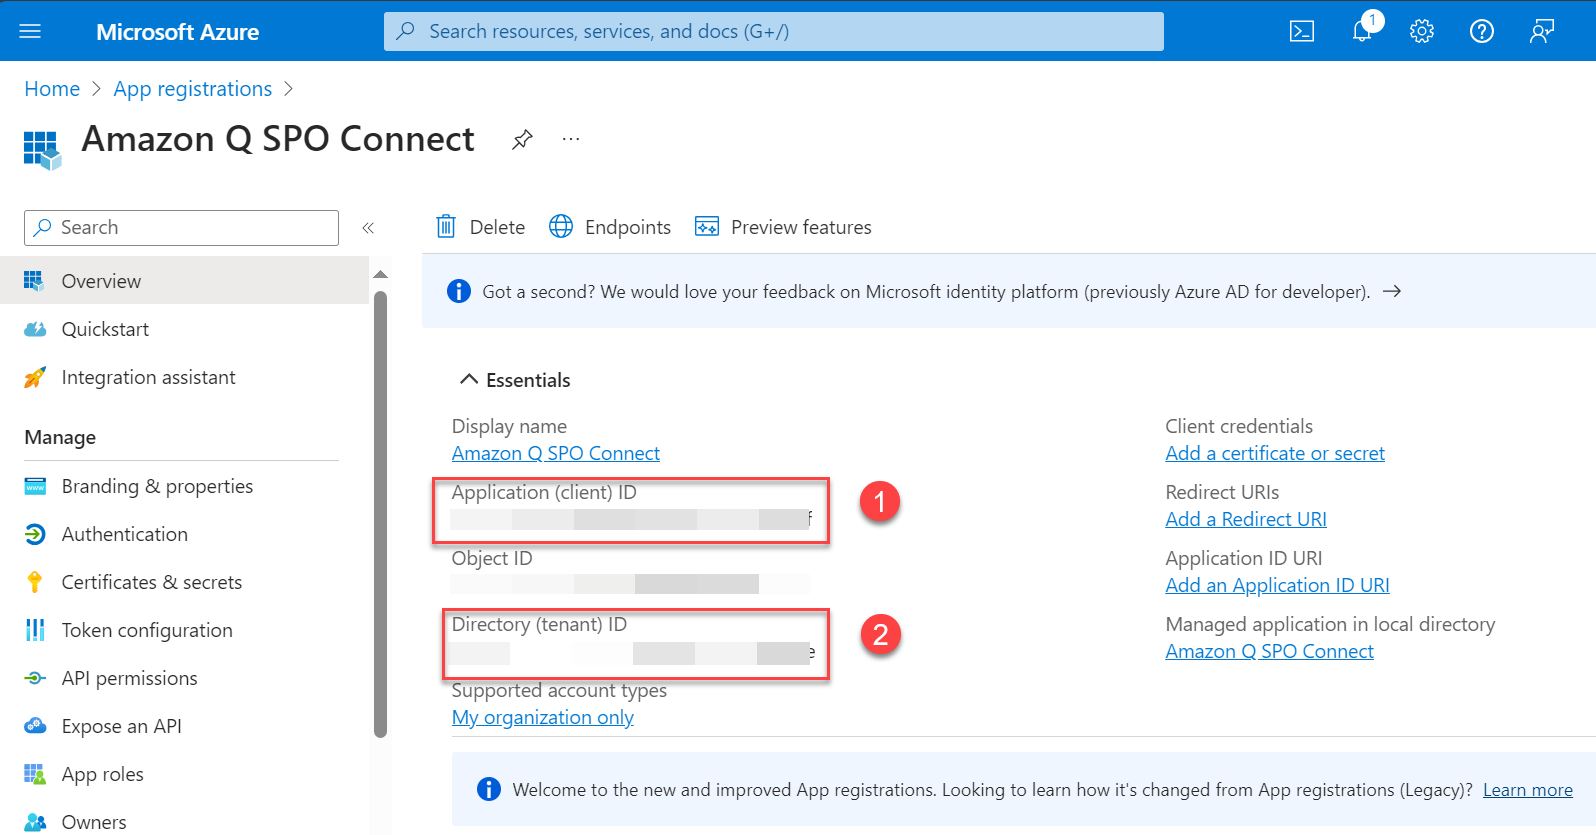
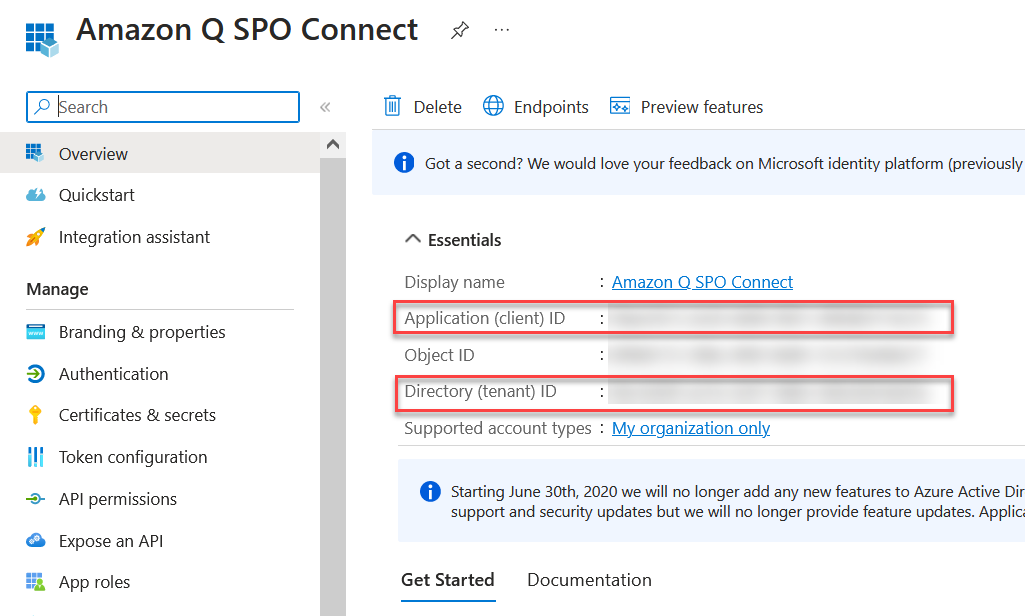
An application will be created. You will see a page like the following screenshot.
- Note the application (client) ID and the directory (tenant) ID.
These IDs will be different than what is shown in the screenshot.
Now you can configure the newly registered application for SharePoint permissions.
- Choose API permissions in the navigation pane.
- Choose Add a permission to add the permissions to your application.
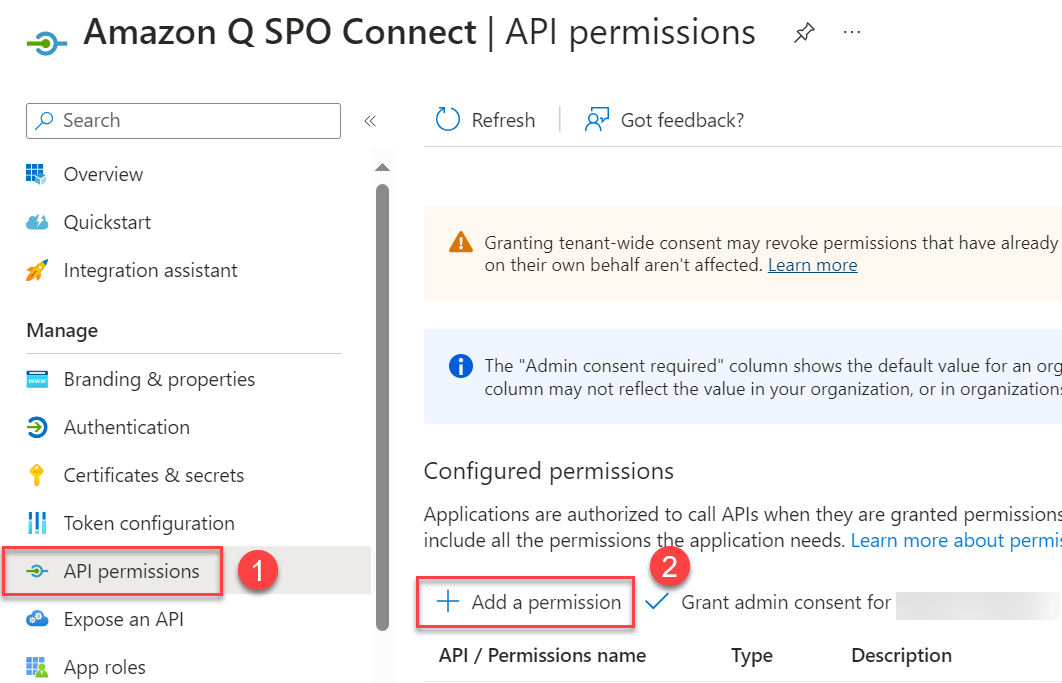
- Choose SharePoint from the list of applications.
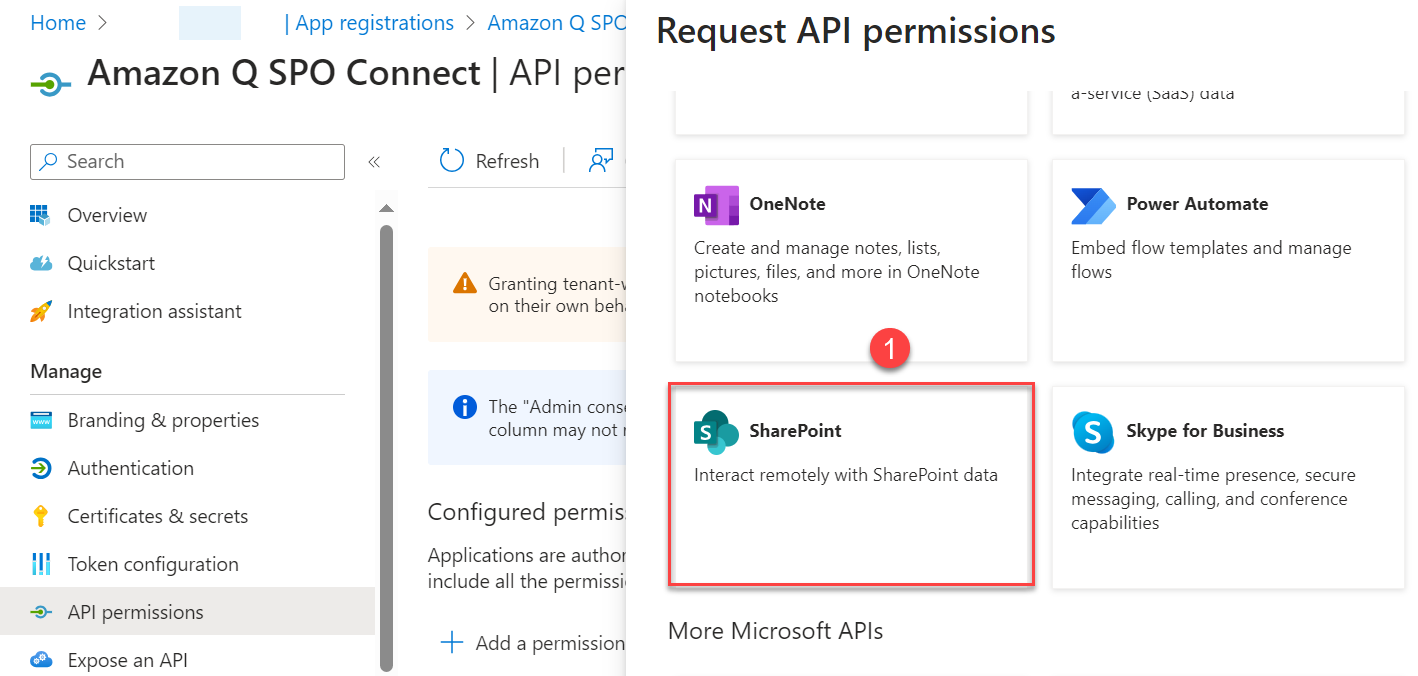
- Configure permissions.
There are two different ways to configure SharePoint permissions.
To configure permissions to access multiple SharePoint Site collections (using Azure AD App-Only permissions), select Site.FullControl.All to allow full control permissions to all the SharePoint site collections and to read the ACLs from these site collections.
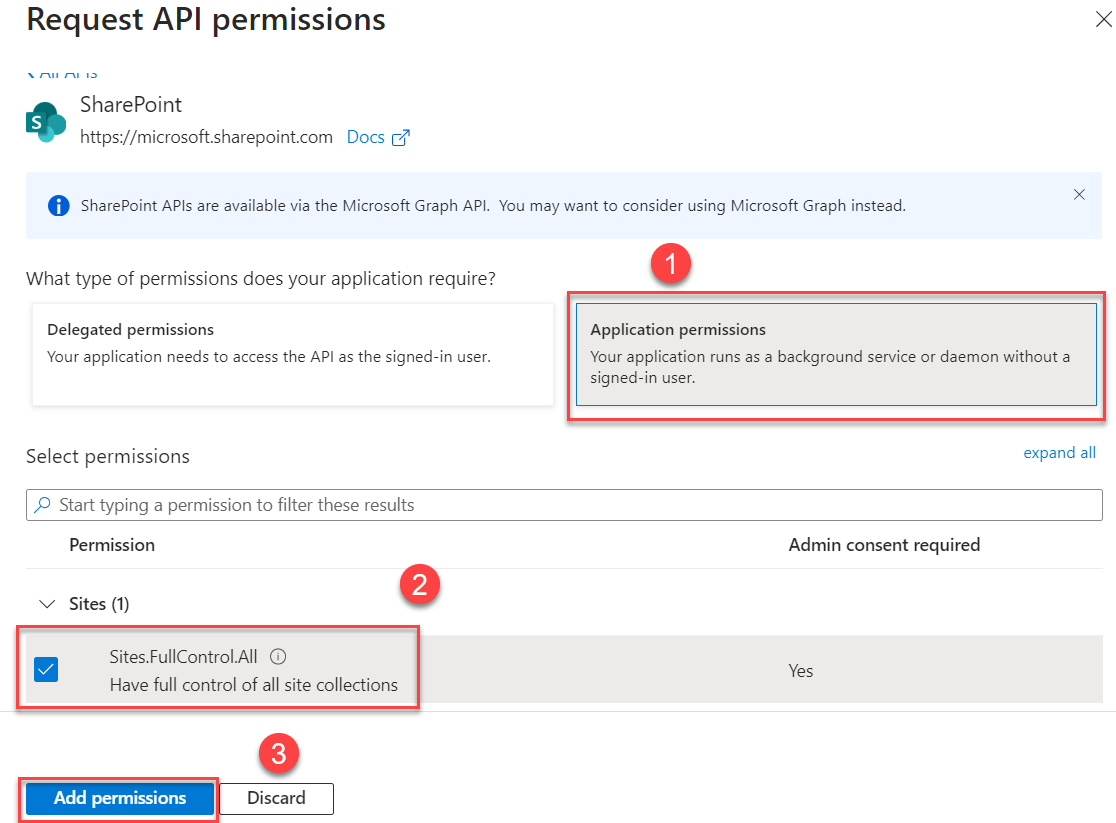
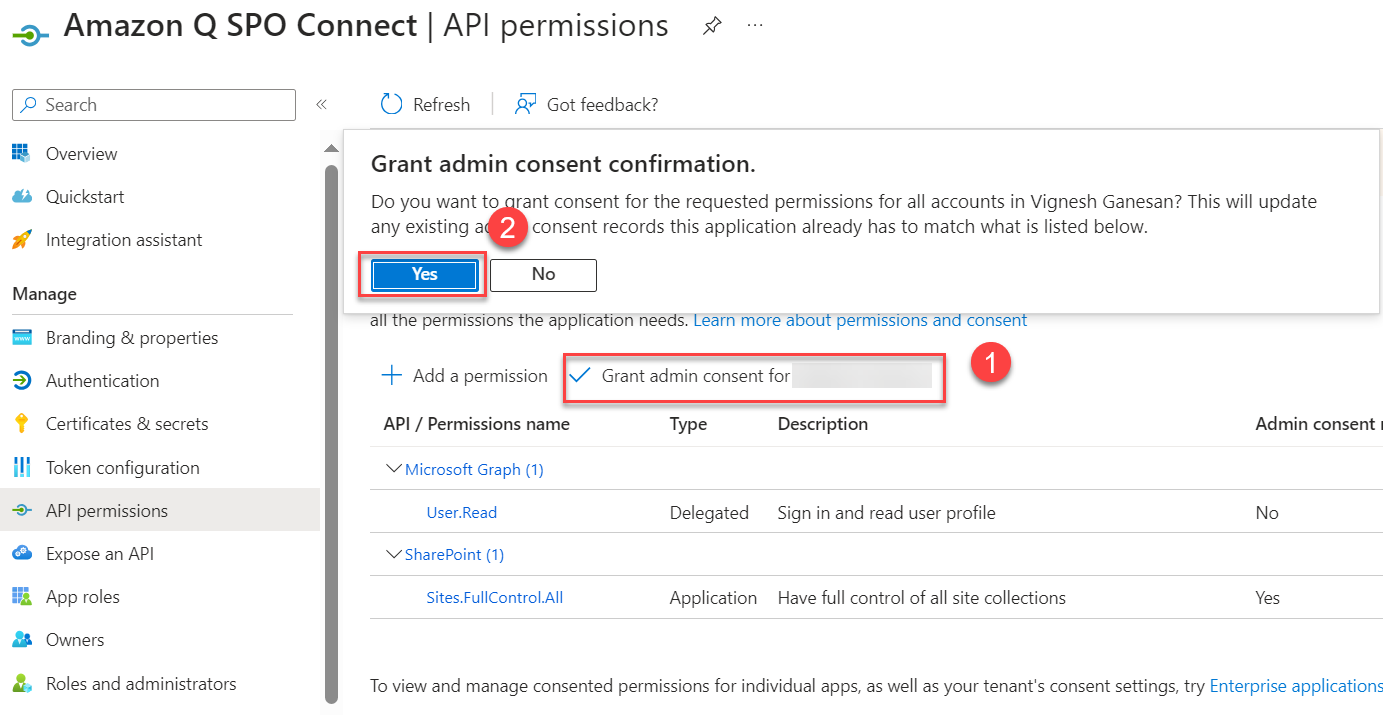
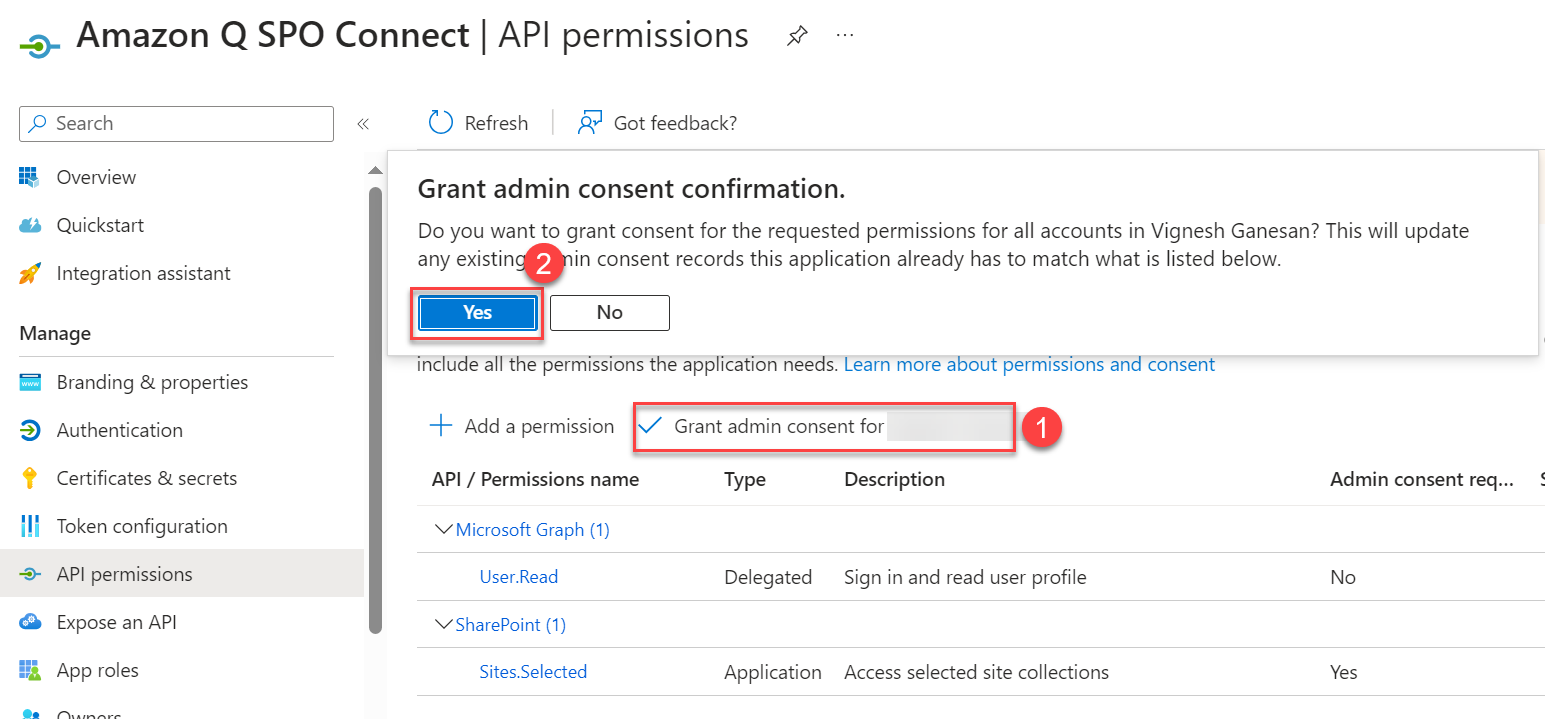
This permission requires admin consent in a tenant before it can be used. To do so, choose Grant admin consent for <organization name> and choose Yes to confirm.
Alternatively, to configure permissions to access specific SharePoint site collections, select Sites.Selected to allow access to a subset of site collections without a signed-in user. The specific site collections and the permissions granted will be configured in SharePoint Online.
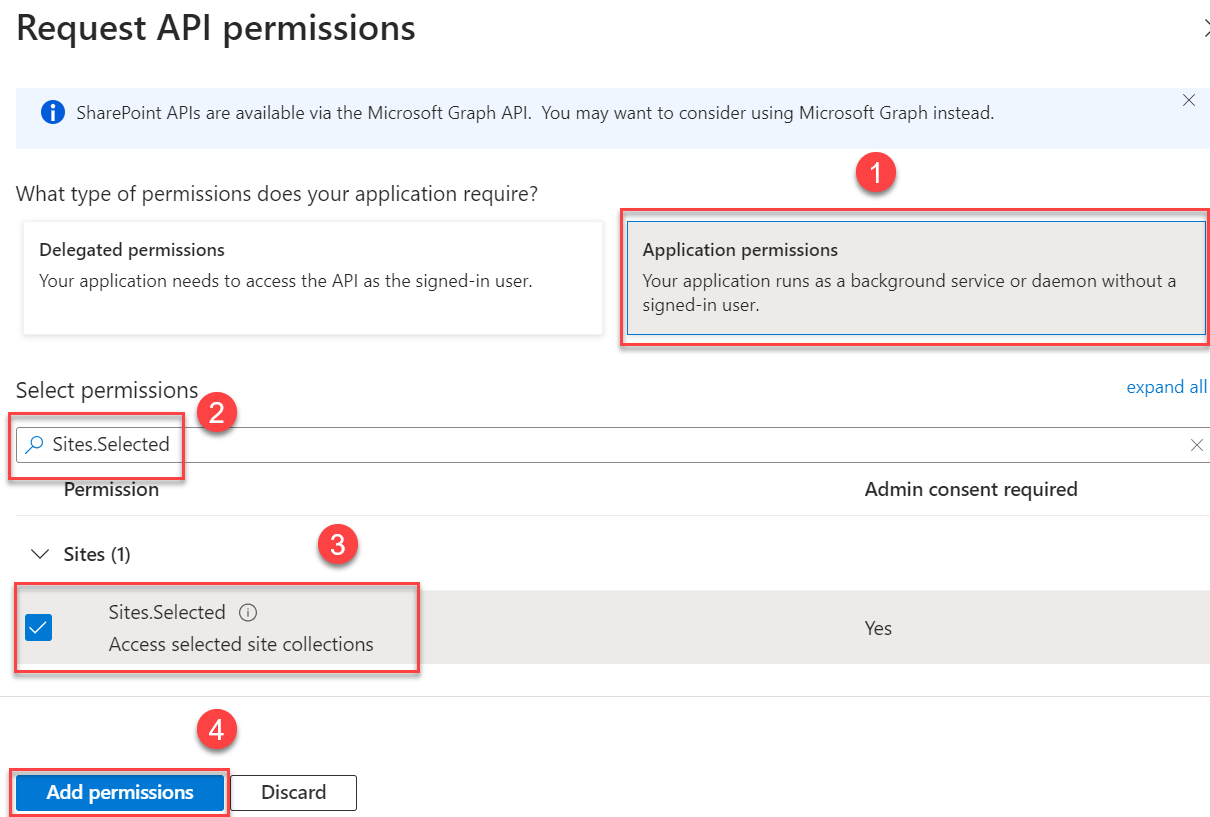
This permission requires admin consent in a tenant before it can be used. To do so, choose Grant admin consent for <organization name> and choose Yes to confirm.
Next, you grant Azure AD app permissions to one or more SharePoint site collections. Make sure the following prerequisites are in place:
- You must have Windows Server/Workstation with PowerShell 7.4.1+.
- The user running these PowerShell commands must have the right M365 license (for example, M365 E3).
- Install the PowerShell modules using
Install-Module -Name PnP.PowerShell -AllPreRelease. - If this is your first-time running PowerShell commands, run the
Connect-PnPOnline -Url <site collection url> -PnPManagementShellPowerShell command and complete the consent process to use PnP cmdlets. Alternatively, run theRegister-PnPManagementShellAccesscmdlet, which grants access to the tenant for the PnP management shell multi-tenant Azure AD application.
- Open PowerShell and connect to SharePoint Online using the Connect-PnPOnline command:
- Add the Azure AD app to one or more specific site collection permissions using Grant-PnPAzureADAppSitePermission:
If you want to configure permissions to more than one SharePoint Online site collection, then you must repeat the preceding PowerShell commands for every collection.
Now you’re ready to connect the certificate.
- Choose Certificates & secrets in the navigation pane.
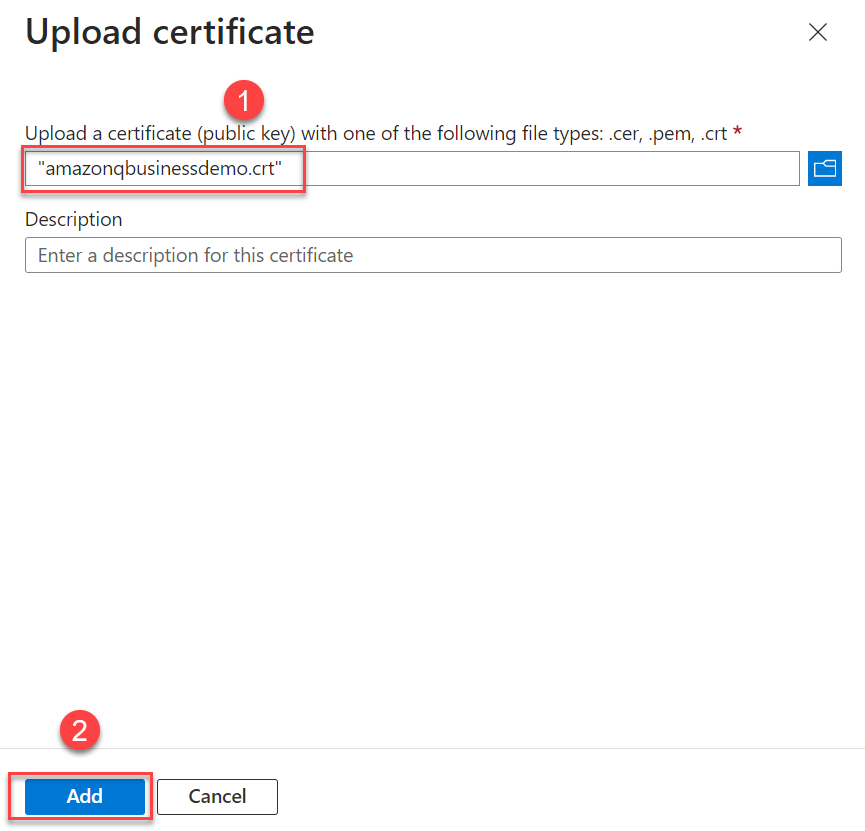
- On the Certificates tab, choose Upload certificate.
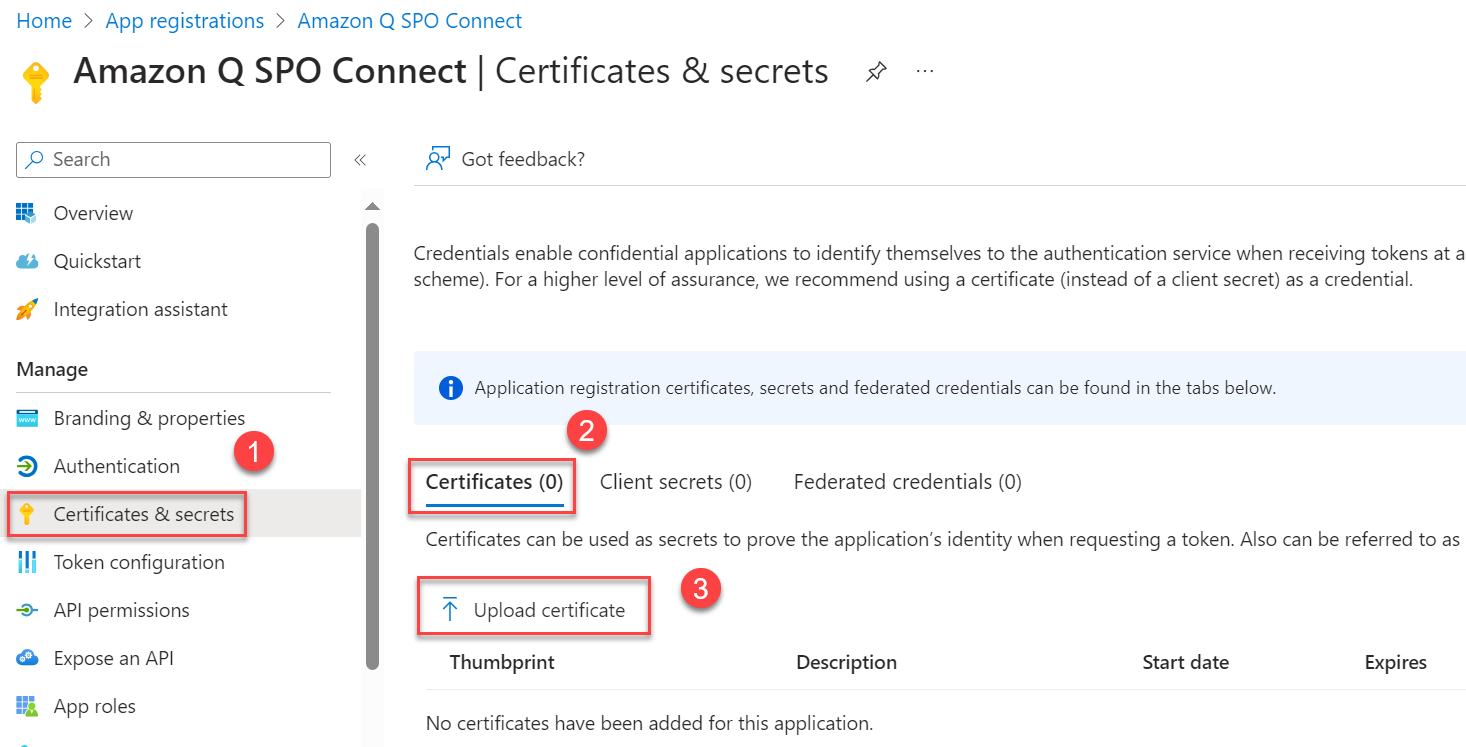
- Choose the .cer file you generated earlier and choose Add to upload it.
This completes the configuration on the Azure AD side.
Configure Azure AD using the provided PowerShell script
The user running this PowerShell script should be an Azure AD tenant admin or have tenant admin permissions. Additionally, as a prerequisite, install the MS Graph PowerShell SDK.
Complete the following steps to run the PowerShell script:
- Run the PowerShell script and follow the instructions.
This script will do the following:
- Register a new application in Azure AD/Entra ID
- Configure the required SharePoint permissions
- Provide admin consent for the permissions
The output from the PowerShell script will look like the following screenshot.

- If you chose Selected as the permission to target a specific SharePoint Site collection, continue with the steps to configure a specific SharePoint Site collection as mentioned earlier.
- If you have more than one SharePoint site collection to be crawled, repeat the previous step to configure each collection.
Configure Amazon Q
Make sure you have set up Amazon Q Business with Entra ID as IdP as mentioned in the prerequisites. Also, make sure the email ID is in lowercase letters while creating the users in Entra ID.
Follow the instructions in Connecting Amazon Q Business to SharePoint (Online) using the console.
For Step 9 (Authentication), we choose Azure AD App-Only authentication and configure it as follows:
- For Tenant ID, enter the tenant ID of your SharePoint account. This will be directory (tenant) ID in your registered Azure application, in the Azure Portal, as shown in the following screenshot (the IDs will be different for your setup).
- For Certificate path, enter the full S3 path to your certificate (for example,
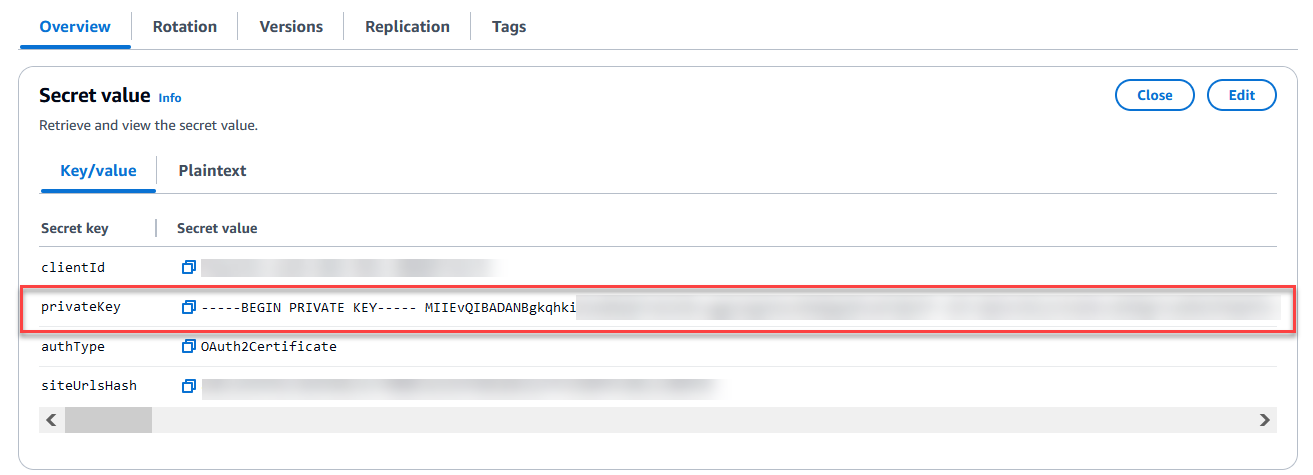
s3://certBucket/azuread.crt). This is the Azure AD self-signed X.509 certificate to authenticate the connector for Azure AD. This certificate was created earlier. - For AWS Secrets Manager secret, create a secret in AWS Secrets Manager to store your SharePoint authentication credentials:
- For Secret name, enter a name for your secret.
- For Client ID, enter the Azure AD client ID generated when you registered SharePoint in Azure AD. This is the application (client) ID created in the Azure Portal when registering the SharePoint application in Azure, as described earlier.
- For Private key, enter a private key to authenticate the connector for Azure AD. This is the contents of the .pfx file you created when registering your Azure SharePoint application, as described earlier. Enter the decrypted contents of that .pfx file in its entirety. Choose Show private key to verify it matches the contents for your .pfx file.
Continue with the rest of the steps in Connecting Amazon Q Business to SharePoint (Online) using the console.
Access the web experience on Amazon Q
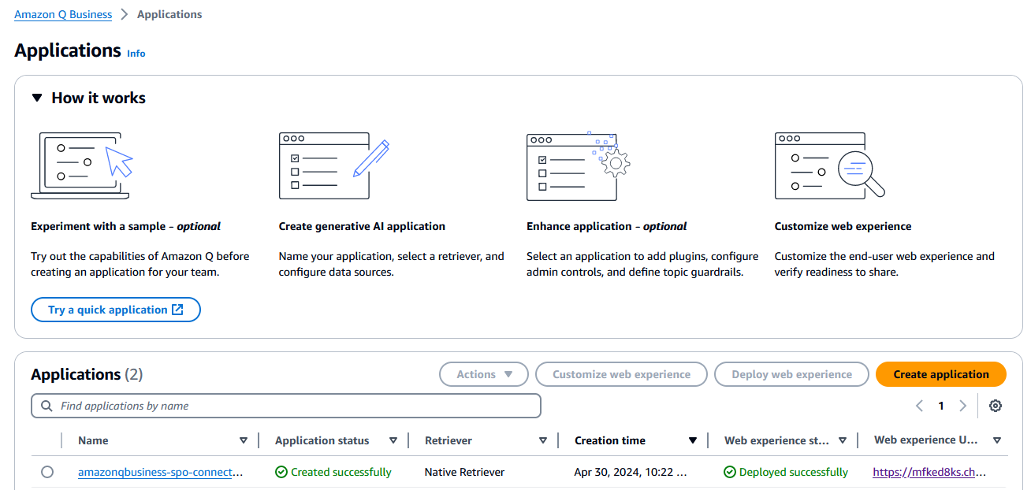
To access the web experience, complete the following steps:
- On the Amazon Q Business console, choose Applications in the navigation pane.
- Choose the application you created.
- Choose the link under Web experience URL to browse Amazon Q.
- When prompted, authenticate with Entra ID/Azure AD.
After you’re authenticated, you can access Amazon Q. You can ask Amazon Q a question and get a response based on the permissions of the logged-in user.
References
- For instructions on how to create an Amazon Q Business application with IAM Identity Center, refer to Configure SAML and SCIM with Microsoft Entra ID and IAM Identity Center.
- Use the following PowerShell script to configure Azure AD:
- You can test if the
Grant-PnPAzureADAppSitePermissioncmdlet worked by connecting to the SharePoint site using the Azure AD app that has the SharePoint.Sites.Selected permission and run a few SharePoint API calls:
-
- Make a note of the certificate thumbprint as shown earlier.
- Install the certificate for the current user in the Windows Certificate Management Store.
- Run the following PowerShell cmdlet to connect to the SharePoint site collection using
PnPOnline:
-
- Run
Get-PnPListto list all the SharePoint lists in the site collection and confirm that the permissions are configured correctly:
- Run
Troubleshooting
For troubleshooting guidance, refer to Troubleshooting your SharePoint (Online) connector.
Clean up
Complete the following steps to clean up your resources:
- Open the Office 365 Admin Center using the account of a user member of the Tenant Global Admins group.
- Navigate to the Microsoft Azure Portal.
- Search for and choose App registrations.
- Select the app you created earlier, then choose Delete.
- On the Amazon Q Business console, choose Applications in the navigation pane.
- Select the application you created, and on the Actions menu, choose Delete.
Conclusion
In this post, we explored how Amazon Q Business can seamlessly integrate with SharePoint Online to help enterprises unlock the value of their data and knowledge. With the SharePoint Online connector, organizations can empower their employees to find answers quickly, accelerate research and analysis, streamline content creation, automate workflows, and enhance collaboration.
We walked you through the process of setting up the SharePoint Online connector, including configuring the necessary Azure AD integration and authentication mechanisms. With these foundations in place, you can start unlocking the full potential of your SharePoint investment and drive greater productivity, efficiency, and innovation across your business.
Now that you’ve learned how to integrate Amazon Q Business with your Microsoft SharePoint Online content, it’s time to unlock the full potential of your organization’s knowledge and data. To get started, sign up for an Amazon Q Business account and follow the steps in this post to set up the SharePoint Online connector. Then you can start asking Amazon Q natural language questions and watch as it surfaces the most relevant information from your company’s SharePoint sites and documents.
Don’t miss out on the transformative power of generative AI and the Amazon Q Business platform. Sign up today and experience the difference that Amazon Q can make for your organization’s SharePoint-powered knowledge and content management.
About the Authors
 Vijai Gandikota is a Principal Product Manager on the Amazon Q and Amazon Kendra team of Amazon Web Services. He is responsible for the Amazon Q and Amazon Kendra connectors, ingestion, security, and other aspects of Amazon Q and Amazon Kendra.
 Satveer Khurpa is a Senior Solutions Architect on the GenAI Labs team at Amazon Web Services. In this role, he uses his expertise in cloud-based architectures to develop innovative generative AI solutions for clients across diverse industries. Satveer’s deep understanding of generative AI technologies enables him to design scalable, secure, and responsible applications that unlock new business opportunities and drive tangible value.
 Vijai Anand Ramalingam is a Senior Modernization Architect at Amazon Web Services, specialized in enabling and accelerating customers’ application modernization, transitioning from legacy monolith applications to microservices.
 Ramesh Jatiya is a Senior Solutions Architect in the Independent Software Vendor (ISV) team at Amazon Web Services. He is passionate about working with ISV customers to design, deploy, and scale their applications in the cloud to derive business value. He is also pursuing an MBA in Machine Learning and Business Analytics from Babson College, Boston. Outside of work, he enjoys running, playing tennis, and cooking.
 Neelam Rana is a Software Development Engineer on the Amazon Q and Amazon Kendra engineering team. She works on Amazon Q connector design, development, integration, and test operations.
 Dipti Kulkarni is a Software Development Manager on the Amazon Q and Amazon Kendra engineering team of Amazon Web Services, where she manages the connector development and integration teams.
Evaluate conversational AI agents with Amazon Bedrock
As conversational artificial intelligence (AI) agents gain traction across industries, providing reliability and consistency is crucial for delivering seamless and trustworthy user experiences. However, the dynamic and conversational nature of these interactions makes traditional testing and evaluation methods challenging. Conversational AI agents also encompass multiple layers, from Retrieval Augmented Generation (RAG) to function-calling mechanisms that interact with external knowledge sources and tools. Although existing large language model (LLM) benchmarks like MT-bench evaluate model capabilities, they lack the ability to validate the application layers. The following are some common pain points in developing conversational AI agents:
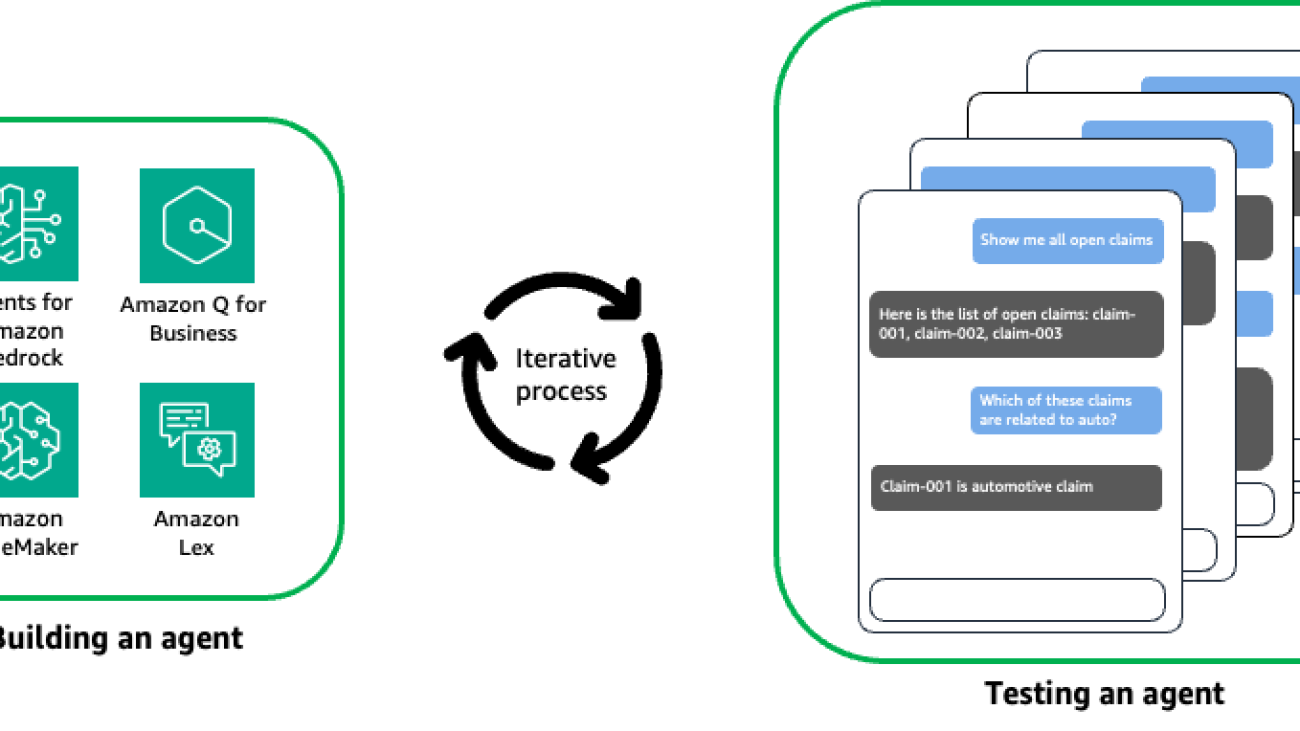
- Testing an agent is often tedious and repetitive, requiring a human in the loop to validate the semantics meaning of the responses from the agent, as shown in the following figure.
- Setting up proper test cases and automating the evaluation process can be difficult due to the conversational and dynamic nature of agent interactions.
- Debugging and tracing how conversational AI agents route to the appropriate action or retrieve the desired results can be complex, especially when integrating with external knowledge sources and tools.

Agent Evaluation, an open source solution using LLMs on Amazon Bedrock, addresses this gap by enabling comprehensive evaluation and validation of conversational AI agents at scale.
Amazon Bedrock is a fully managed service that offers a choice of high-performing foundation models (FMs) from leading AI companies like AI21 Labs, Anthropic, Cohere, Meta, Stability AI, and Amazon through a single API, along with a broad set of capabilities to build generative AI applications with security, privacy, and responsible AI.
Agent Evaluation provides the following:
- Built-in support for popular services, including Agents for Amazon Bedrock, Knowledge Bases for Amazon Bedrock, Amazon Q Business, and Amazon SageMaker endpoints
- Orchestration of concurrent, multi-turn conversations with your agent while evaluating its responses
- Configurable hooks to validate actions triggered by your agent
- Integration into continuous integration and delivery (CI/CD) pipelines to automate agent testing
- A generated test summary for performance insights including conversation history, test pass rate, and reasoning for pass/fail results
- Detailed traces to enable step-by-step debugging of the agent interactions
In this post, we demonstrate how to streamline virtual agent testing at scale using Amazon Bedrock and Agent Evaluation.
Solution overview
To use Agent Evaluation, you need to create a test plan, which consists of three configurable components:
- Target – A target represents the agent you want to test
- Evaluator – An evaluator represents the workflow and logic to evaluate the target on a test
- Test – A test defines the target’s functionality and how you want your end-user to interact with the target, which includes:
- A series of steps representing the interactions between the agent and the end-user
- Your expected results of the conversation
The following figure illustrates how Agent Evaluation works on a high level. The framework implements an LLM agent (evaluator) that will orchestrate conversations with your own agent (target) and evaluate the responses during the conversation.

The following figure illustrates the evaluation workflow. It shows how the evaluator reasons and assesses responses based on the test plan. You can either provide an initial prompt or instruct the evaluator to generate one to initiate the conversation. At each turn, the evaluator engages the target agent and evaluates its response. This process continues until the expected results are observed or the maximum number of conversation turns is reached.

By understanding this workflow logic, you can create a test plan to thoroughly assess your agent’s capabilities.
Use case overview
To illustrate how Agent Evaluation can accelerate the development and deployment of conversational AI agents at scale, let’s explore an example scenario: developing an insurance claim processing agent using Agents for Amazon Bedrock. This insurance claim processing agent is expected to handle various tasks, such as creating new claims, sending reminders for pending documents related to open claims, gathering evidence for claims, and searching for relevant information across existing claims and customer knowledge repositories.
For this use case, the goal is to test the agent’s capability to accurately search and retrieve relevant information from existing claims. You want to make sure the agent provides correct and reliable information about existing claims to end-users. Thoroughly evaluating this functionality is crucial before deployment.
Begin by creating and testing the agent in your development account. During this phase, you interact manually with the conversational AI agent using sample prompts to do the following:
- Engage the agent in multi-turn conversations on the Amazon Bedrock console
- Validate the responses from the agent
- Validate all the actions invoked by the agent
- Debug and check traces for any routing failures
With Agent Evaluation, the developer can streamline this process through the following steps:
- Configure a test plan:
- Choose an evaluator from the models provided by Amazon Bedrock.
- Configure the target, which should be a type that Agent Evaluation supports. For this post, we use an Amazon Bedrock agent.
- Define the test steps and expected results. In the following example test plan, you have a claim with the ID
claim-006in your test system. You want to confirm that your agent can accurately answer questions about this specific claim.
- Run the test plan from the command line:
The Agent Evaluation test runner will automatically orchestrate the test based on the test plan, and use the evaluator to determine if the responses from the target match the expected results.
- View the result summary.
A result summary will be provided in markdown format. In the following example, the summary indicates that the test failed because the agent was unable to provide accurate information about the existing claimclaim-006.
- Debug with the trace files of the failed tests.
Agent Evaluation provides detailed trace files for the tests. Each trace file meticulously records every prompt and interaction between the target and the evaluator.For instance, in the_invoke_targetstep, you can gain valuable insights into the rationale behind the Amazon Bedrock agent’s responses, allowing you to delve deeper into the decision-making process:The trace shows that after reviewing the conversation history, the evaluator concludes, “the agent will be unable to answer or assist with this question using only the functions it has access to.” Consequently, it ends the conversation with the target agent and proceeds to generate the test status.
In the
_generate_test_statusstep, the evaluator generates the test status with reasoning based on the responses from the target.The test plan defines the expected result as the target agent accurately providing details about the existing claim
claim-006. However, after testing, the target agent’s response doesn’t meet the expected result, and the test fails. - After identifying and addressing the issue, you can rerun the test to validate the fix. In this example, it’s evident that the target agent lacks access to the claim
claim-006. From there, you can continue investigating and verify ifclaim-006exists in your test system.
Integrate Agent Evaluation with CI/CD pipelines
After validating the functionality in the development account, you can commit the code to the repository and initiate the deployment process for the conversational AI agent to the next stage. Seamless integration with CI/CD pipelines is a crucial aspect of Agent Evaluation, enabling comprehensive integration testing to make sure no regressions are introduced during new feature development or updates. This rigorous testing approach is vital for maintaining the reliability and consistency of conversational AI agents as they progress through the software delivery lifecycle.
By incorporating Agent Evaluation into CI/CD workflows, organizations can automate the testing process, making sure every code change or update undergoes thorough evaluation before deployment. This proactive measure minimizes the risk of introducing bugs or inconsistencies that could compromise the conversational AI agent’s performance and the overall user experience.
A standard agent CI/CD pipeline includes the following steps:
- The source repository stores the agent configuration, including agent instructions, system prompts, model configuration, and so on. You should always commit your changes to provide quality and reproducibility.
- When you commit your changes, a build step is invoked. This is where unit tests should run and validate the changes, including typo and syntax checks.
- When the changes are deployed to the staging environment, Agent Evaluation runs with a series of test cases for runtime validation.
- The runtime validation on the staging environment can help build confidence to deploy the fully tested agent to production.
The following figure illustrates this pipeline.

In the following sections, we provide step-by-step instructions to set up Agent Evaluation with GitHub Actions.
Prerequisites
Complete the following prerequisite steps:
- Follow the GitHub user guide to get started with GitHub.
- Follow the GitHub Actions user guide to understand GitHub workflows and Actions.
- Follow the insurance claim processing agent using Agents for Amazon Bedrock example to set up an agent.
Set up GitHub Actions
Complete the following steps to deploy the solution:
- Write a series of test cases following the agent-evaluation test plan syntax and store test plans in the GitHub repository. For example, a test plan to test an Amazon Bedrock agent target is written as follows, with
BEDROCK_AGENT_ALIAS_IDandBEDROCK_AGENT_IDas placeholders: - Create an AWS Identity and Access Management (IAM) user with the proper permissions:
- The principal must have InvokeModel permission to the model specified in the configuration.
- The principal must have the permissions to call the target agent. Depending on the target type, different permissions are required. Refer to the agent-evaluation target documentation for details.
- Store the IAM credentials (
AWS_ACCESS_KEY_IDandAWS_SECRET_ACCESS_KEY) in GitHub Actions secrets. - Configure a GitHub workflow as follows:
When you push new changes to the repository, it will invoke the GitHub Action, and an example workflow output is displayed, as shown in the following screenshot.

A test summary like the following screenshot will be posted to the GitHub workflow page with details on which tests have failed.

The summary also provides the reasons for the test failures.

Clean up
Complete the following steps to clean up your resources:
- Delete the IAM user you created for the GitHub Action.
- Follow the insurance claim processing agent using Agents for Amazon Bedrock example to delete the agent.
Evaluator considerations
By default, evaluators use the InvokeModel API with On-Demand mode, which will incur AWS charges based on input tokens processed and output tokens generated. For the latest pricing details for Amazon Bedrock, refer to Amazon Bedrock pricing.
The cost of running an evaluator for a single test is influenced by the following:
- The number and length of the steps
- The number and length of expected results
- The length of the target agent’s responses
You can view the total number of input tokens processed and output tokens generated by the evaluator using the --verbose flag when you perform a run (agenteval run --verbose).
Conclusion
This post introduced Agent Evaluation, an open source solution that enables developers to seamlessly integrate agent evaluation into their existing CI/CD workflows. By taking advantage of the capabilities of LLMs on Amazon Bedrock, Agent Evaluation enables you to comprehensively evaluate and debug your agents, achieving reliable and consistent performance. With its user-friendly test plan configuration, Agent Evaluation simplifies the process of defining and orchestrating tests, allowing you to focus on refining your agents’ capabilities. The solution’s built-in support for popular services makes it a versatile tool for testing a wide range of conversational AI agents. Moreover, Agent Evaluation’s seamless integration with CI/CD pipelines empowers teams to automate the testing process, making sure every code change or update undergoes rigorous evaluation before deployment. This proactive approach minimizes the risk of introducing bugs or inconsistencies, ultimately enhancing the overall user experience.
The following are some recommendations to consider:
- Don’t use the same model to evaluate the results that you use to power the agent. Doing so may introduce biases and lead to inaccurate evaluations.
- Block your pipelines on accuracy failures. Implement strict quality gates to help prevent deploying agents that fail to meet the expected accuracy or performance thresholds.
- Continuously expand and refine your test plans. As your agents evolve, regularly update your test plans to cover new scenarios and edge cases, and provide comprehensive coverage.
- Use Agent Evaluation’s logging and tracing capabilities to gain insights into your agents’ decision-making processes, facilitating debugging and performance optimization.
Agent Evaluation unlocks a new level of confidence in your conversational AI agents’ performance by streamlining your development workflows, accelerating time-to-market, and delivering exceptional user experiences. To further explore the best practices of building and testing conversational AI agent evaluation at scale, get started by trying Agent Evaluation and provide your feedback.
About the Authors
 Sharon Li is an AI/ML Specialist Solutions Architect at Amazon Web Services (AWS) based in Boston, Massachusetts. With a passion for leveraging cutting-edge technology, Sharon is at the forefront of developing and deploying innovative generative AI solutions on the AWS cloud platform.
 Bobby Lindsey is a Machine Learning Specialist at Amazon Web Services. He’s been in technology for over a decade, spanning various technologies and multiple roles. He is currently focused on combining his background in software engineering, DevOps, and machine learning to help customers deliver machine learning workflows at scale. In his spare time, he enjoys reading, research, hiking, biking, and trail running.
 Tony Chen is a Machine Learning Solutions Architect at Amazon Web Services, helping customers design scalable and robust machine learning capabilities in the cloud. As a former data scientist and data engineer, he leverages his experience to help tackle some of the most challenging problems organizations face with operationalizing machine learning.
 Suyin Wang is an AI/ML Specialist Solutions Architect at AWS. She has an interdisciplinary education background in Machine Learning, Financial Information Service and Economics, along with years of experience in building Data Science and Machine Learning applications that solved real-world business problems. She enjoys helping customers identify the right business questions and building the right AI/ML solutions. In her spare time, she loves singing and cooking.
 Curt Lockhart is an AI/ML Specialist Solutions Architect at AWS. He comes from a non-traditional background of working in the arts before his move to tech, and enjoys making machine learning approachable for each customer. Based in Seattle, you can find him venturing to local art museums, catching a concert, and wandering throughout the cities and outdoors of the Pacific Northwest.

Node problem detection and recovery for AWS Neuron nodes within Amazon EKS clusters
Implementing hardware resiliency in your training infrastructure is crucial to mitigating risks and enabling uninterrupted model training. By implementing features such as proactive health monitoring and automated recovery mechanisms, organizations can create a fault-tolerant environment capable of handling hardware failures or other issues without compromising the integrity of the training process.
In the post, we introduce the AWS Neuron node problem detector and recovery DaemonSet for AWS Trainium and AWS Inferentia on Amazon Elastic Kubernetes Service (Amazon EKS). This component can quickly detect rare occurrences of issues when Neuron devices fail by tailing monitoring logs. It marks the worker nodes in a defective Neuron device as unhealthy, and promptly replaces them with new worker nodes. By accelerating the speed of issue detection and remediation, it increases the reliability of your ML training and reduces the wasted time and cost due to hardware failure.
This solution is applicable if you’re using managed nodes or self-managed node groups (which use Amazon EC2 Auto Scaling groups) on Amazon EKS. At the time of writing this post, automatic recovery of nodes provisioned by Karpenter is not yet supported.
Solution overview
The solution is based on the node problem detector and recovery DaemonSet, a powerful tool designed to automatically detect and report various node-level problems in a Kubernetes cluster.
The node problem detector component will continuously monitor the kernel message (kmsg) logs on the worker nodes. If it detects error messages specifically related to the Neuron device (which is the Trainium or AWS Inferentia chip), it will change NodeCondition to NeuronHasError on the Kubernetes API server.
The node recovery agent is a separate component that periodically checks the Prometheus metrics exposed by the node problem detector. When it finds a node condition indicating an issue with the Neuron device, it will take automated actions. First, it will mark the affected instance in the relevant Auto Scaling group as unhealthy, which will invoke the Auto Scaling group to stop the instance and launch a replacement. Additionally, the node recovery agent will publish Amazon CloudWatch metrics for users to monitor and alert on these events.
The following diagram illustrates the solution architecture and workflow.

In the following walkthrough, we create an EKS cluster with Trn1 worker nodes, deploy the Neuron plugin for the node problem detector, and inject an error message into the node. We then observe the failing node being stopped and replaced with a new one, and find a metric in CloudWatch indicating the error.
Prerequisites
Before you start, make sure you have installed the following tools on your machine:
- The latest version of the AWS Command Line Interface (AWS CLI)
- eksctl
- kubectl
- Terraform
- The Session Manager plugin
Deploy the node problem detection and recovery plugin
Complete the following steps to configure the node problem detection and recovery plugin:
- Create an EKS cluster using the data on an EKS Terraform module:
- Install the required AWS Identity and Access Management (IAM) role for the service account and the node problem detector plugin.
- Create a policy as shown below. Update the
Resourcekey value to match your node group ARN that contains the Trainium and AWS Inferentia nodes, and update theec2:ResourceTag/aws:autoscaling:groupNamekey value to match the Auto Scaling group name.
You can get these values from the Amazon EKS console. Choose Clusters in the navigation pane, open the trainium-inferentia cluster, choose Node groups, and locate your node group.
This component will be installed as a DaemonSet in your EKS cluster.
The container images in the Kubernetes manifests are stored in public repository such as registry.k8s.io and public.ecr.aws. For production environments, it’s recommended that customers limit external dependencies that impact these areas and host container images in a private registry and sync from images public repositories. For detailed implementation, please refer to the blog post: Announcing pull through cache for registry.k8s.io in Amazon Elastic Container Registry.
By default, the node problem detector will not take any actions on failed node. If you would like the EC2 instance to be terminated automatically by the agent, update the DaemonSet as follows:
kubectl edit -n neuron-healthcheck-system ds/node-problem-detector

...
   env:
   - name: ENABLE_RECOVERY
     value: "true"
Test the node problem detector and recovery solution
After the plugin is installed, you can see Neuron conditions show up by running kubectl describe node. We simulate a device error by injecting error logs in the instance:
Around 2 minutes later, you can see that the error has been identified:
kubectl describe node ip-100-64-58-151.us-east-2.compute.internal | grep 'Conditions:' -A7Now that the error has been detected by the node problem detector, and the recovery agent has automatically taken the action to set the node as unhealthy, Amazon EKS will cordon the node and evict the pods on the node:
You can open the CloudWatch console and verify the metric for NeuronHealthCheck. You can see the CloudWatch NeuronHasError_DMA_ERROR metric has the value 1.

After replacement, you can see a new worker node has been created:
Let’s look at a real-world scenario, in which you’re running a distributed training job, using an MPI operator as outlined in Llama-2 on Trainium, and there is an irrecoverable Neuron error in one of the nodes. Before the plugin is deployed, the training job will become stuck, resulting in wasted time and computational costs. With the plugin deployed, the node problem detector will proactively remove the problem node from the cluster. In the training scripts, it saves checkpoints periodically so that the training will resume from the previous checkpoint.
The following screenshot shows example logs from a distributed training job.
The training has been started. (You can ignore loss=nan for now; it’s a known issue and will be removed. For immediate use, refer to the reduced_train_loss metric.)

The following screenshot shows the checkpoint created at step 77.

Training stopped after one of the nodes has a problem at step 86. The error was injected manually for testing.

After the faulty node was detected and replaced by the Neuron plugin for node problem and recovery, the training process resumed at step 77, which was the last checkpoint.


Although Auto Scaling groups will stop unhealthy nodes, they may encounter issues preventing the launch of replacement nodes. In such cases, training jobs will stall and require manual intervention. However, the stopped node will not incur further charges on the associated EC2 instance.
If you want to take custom actions in addition to stopping instances, you can create CloudWatch alarms watching the metrics NeuronHasError_DMA_ERROR,NeuronHasError_HANG_ON_COLLECTIVES, NeuronHasError_HBM_UNCORRECTABLE_ERROR, NeuronHasError_SRAM_UNCORRECTABLE_ERROR, and NeuronHasError_NC_UNCORRECTABLE_ERROR, and use a CloudWatch Metrics Insights query like SELECT AVG(NeuronHasError_DMA_ERROR) FROM NeuronHealthCheck to sum up these values to evaluate the alarms. The following screenshots show an example.

Clean up
To clean up all the provisioned resources for this post, run the cleanup script:
Conclusion
In this post, we showed how the Neuron problem detector and recovery DaemonSet for Amazon EKS works for EC2 instances powered by Trainium and AWS Inferentia. If you’re running Neuron based EC2 instances and using managed nodes or self-managed node groups, you can deploy the detector and recovery DaemonSet in your EKS cluster and benefit from improved reliability and fault tolerance of your machine learning training workloads in the event of node failure.
About the authors
 Harish Rao is a senior solutions architect at AWS, specializing in large-scale distributed AI training and inference. He empowers customers to harness the power of AI to drive innovation and solve complex challenges. Outside of work, Harish embraces an active lifestyle, enjoying the tranquility of hiking, the intensity of racquetball, and the mental clarity of mindfulness practices.
 Ziwen Ning is a software development engineer at AWS. He currently focuses on enhancing the AI/ML experience through the integration of AWS Neuron with containerized environments and Kubernetes. In his free time, he enjoys challenging himself with badminton, swimming and other various sports, and immersing himself in music.
 Geeta Gharpure is a senior software developer on the Annapurna ML engineering team. She is focused on running large scale AI/ML workloads on Kubernetes. She lives in Sunnyvale, CA and enjoys listening to Audible in her free time.
 Darren Lin is a Cloud Native Specialist Solutions Architect at AWS who focuses on domains such as Linux, Kubernetes, Container, Observability, and Open Source Technologies. In his spare time, he likes to work out and have fun with his family.

AI achieves silver-medal standard solving International Mathematical Olympiad problems
Breakthrough models AlphaProof and AlphaGeometry 2 solve advanced reasoning problems in mathematicsRead More

AI achieves silver-medal standard solving International Mathematical Olympiad problems
Breakthrough models AlphaProof and AlphaGeometry 2 solve advanced reasoning problems in mathematicsRead More

AI achieves silver-medal standard solving International Mathematical Olympiad problems
Breakthrough models AlphaProof and AlphaGeometry 2 solve advanced reasoning problems in mathematicsRead More

AI achieves silver-medal standard solving International Mathematical Olympiad problems
Breakthrough models AlphaProof and AlphaGeometry 2 solve advanced reasoning problems in mathematicsRead More