I’m here today with Dr. Jina Suh, a Principal Researcher in the Human Understanding and Empathy group at Microsoft Research, and Dr. Shamsi Iqbal, the Principal Applied and Data Science Manager for the Viva Insights team in the Microsoft Data Platform and Growth organization. Jina and Shamsi are collaborating on a research project for Viva Insights that they hope will help people leaders reduce uncertainties and make informed and data-driven decisions for their teams. Before we unpack how they hope to do that, let’s meet our collaborators. Jina, I’ll start with you. Tell us a bit more about the Human Understanding and Empathy group at Microsoft Research and your role there. So what lines of research does the group pursue? And what are your particular interests and passions?
JINA SUH: Thank you for having me here, first of all. So our group does exactly what the name says. [LAUGHTER] We use technologies to gain understanding about people, and we try to design and develop technologies that use this understanding towards human wellbeing. Um, so we try to build technologies that are more empathic, you know, therapeutic; they can assist and augment people and so forth. And so my particular area of interest is in, um, identifying challenges and barriers for mental wellbeing and designing technology interventions and tools to support mental wellbeing. And so while I’ve done this research in the clinical domains, my interest of late has been around workplace wellbeing or mental health in non-clinical domains.
HUIZINGA: Mm hmm. So tell me a little bit more; when you say human understanding and empathy, and yet you’re working with machines, um, are you focused more on the psychological aspects of understanding people and applying those to machine technologies?
SUH: That and, and some more. So we use technologies to gain better understanding about people, their psychologies, their physiology, the contexts around them, whether they’re at work in front of a computer or they’re working out. But we also use technology to bring interventions in a way that actually is more accessible than traditional, I guess, going to therapists, um, and seeing, seeing somebody in person. So we try to bring technologies and interventions in the moment of wherever you are.
HUIZINGA: Yeah, we could have a whole podcast on “can machines have empathy?” but we won’t … today! Maybe I’ll have you back for that. Uh, Shamsi, you’ve had research space in Building 99, and now you’re embedded in a product group. So give us a brief guided tour of Microsoft Viva, and then tell us about the specific work you’re doing there.
SHAMSI IQBAL: Well, thanks, Gretchen. I’m super excited to be here and especially with my good friend Jina today. So let me talk a little bit about Microsoft Viva first. So, um, this is an employee experience platform that is built for organizations, teams, and individuals to support their workplace experience needs. And by experience needs, what I mean is, uh, things that help them thrive at work. So you could imagine these are data-driven insights about how they work and how they achieve their goals, curated knowledge that helps them get to their goals. There are opportunities to foster employee communications and collaborations. There is also learning opportunities tailored to their needs … um, all elements that are really important for people thriving at work.
HUIZINGA: So give me like a 10,000-foot view. I understand there’s four sort of major elements to, to Viva, and you’re particularly in the Insights. What are the other ones, and what does each of them do kind of in the context of what you just said?
IQBAL: So there are a few, and there are a few that are also coming on board soon.
HUIZINGA: Ooohhh! [LAUGHS]
IQBAL: So there is, for example, there is Viva Engage, uh, that helps with employee communication and collaboration. There is Viva Goals that helps you with exactly what I said— goals—and helps you achieve outcomes. There is Viva Topics that helps you with the knowledge generation and knowledge curation and contextually, uh, help people get access to that knowledge. So, so these are a few examples of the modules that are within Viva. And I work in Viva Insights. I lead a team of applied scientists and data scientists, and our particular charter is to bring deep science into the product. And we do this through incubation of new ideas, where we get to partner with MSR and OAR and all these other cool research groups that exist in, in Microsoft. And then we are also tasked with translating some of these complex research findings into practical product directions. So these are kind of like the two main things that we are responsible for.
HUIZINGA: So without giving away any industry secrets, can you hint at what is coming online, or is that all under wraps right now?
IQBAL: Well, I mean, some things are obviously under wraps, so I shouldn’t be letting out all the secrets. But in general, right now, we are focusing on really organizations and organizational leaders and how we can help them achieve the outcomes that they’re trying to achieve. And we are trying to do this in a, in a data-driven way where we can show them the data that is going to be important for them, to help them, uh, reach their organizational decisions. And also at the same time, we want to be able to point them towards actions and provide them support for actions that will help them better achieve those outcomes.
HUIZINGA: Yeah. I’ll be interested when we get into the meat of the project, how what Jina does with human understanding and empathy plays into what you’re doing with kind of business/workplace productivity and I guess we’ll call it wellbeing, because if you’re doing a good job, you usually feel good, right?
IQBAL: Right. So yeah, I think that that’s really important, and that’s where Jina and I kind of started, is that thinking about productivity and wellbeing really being intertwined together. So I mean, if you’re not feeling good about yourself, you’re really not going to be productive. That is at an individual level …
HUIZINGA: … and vice versa. Shamsi, before we go on, I want you to talk a little bit more about your move from research to product. And I’ve often called this the human version of tech transfer, but what prompted the move, and how is your life the same or different now that you’re no longer sort of a research official?
IQBAL: Well, I still like to think of myself as a research official, but I’ll, I’ll give you a little bit of history behind that. So I was in Microsoft Research for, what, 13 years and kind of like settled into my role thinking that, well, going for the next big project and working on the research insights and kind of like making impact at the research level was satisfying. And then COVID happened. 2020. The workplace transformed completely. And I took a step back, and I was thinking that, well, I mean, this may be the time to take the research that we have done for so many years in the lab and take it to practice.
HUIZINGA: Yeah.
IQBAL: And so there was this opportunity in Viva Insights at that point, which was just announced, and I felt that, well, let me go and see if I can do actually some tech transfer there, so bring in some of the work that we have been doing in MSR for years and see how it applies in a practical setting.
HUIZINGA: Yeah. And, and obviously you’re connected to a lot of the people here like Jina. So having followed both of you—and not in a stalker kind of way—but following you and your work, um, over the last couple of years, I know you have a rich history of both research and academic collaborations, but I want to know what you’re working on now and kind of give us an explanation of the project and how it came about. I like to call this “how I met your mother.” Although you guys have known each other for years. So, Jina, why don’t you take the lead on this, and Shamsi can corroborate if the story’s accurate on how you guys got together on this, but what are you doing with this project, and, um, how did it come about?
SUH: Yeah, so I wanted to kind of go back to what Shamsi was saying before. We’ve been collaborating for a while, but our common passion area is really at the intersection of productivity and, and wellbeing. And I think this is like, I don’t know, a match made in heaven … is to help people be productive by, um, you know, helping them achieve wellbeing at work and vice versa. And so my focus area is individual wellbeing. And as prior literature should have warned me, and I had, I had been ignoring, helping individuals can only go so far. There are organizational factors that make it difficult for individuals to perform activities that help them thrive. And so Shamsi and I have been working on several projects that started as individual tools, but later it really revealed fundamental organizational issues where we couldn’t just ignore factors outside of an individual. So in this particular project we’re working on now, we’re focusing our attention on people leaders. These are organizational leaders and executives like C-suites, as well as middle managers and line managers. And these people leaders have to make decisions that impact the work practices, work culture, you know, eventually the wellbeing of the team. And sometimes these decisions are made with a hunch based on anecdotes or these decisions are not made at all. And so the question we’re raising is how do we design tools that support these people leaders to attend to their work practices, um, their team, and their environment to enable more decisive and effective action in a data-driven way? And so what is the role of data in this process, and how do we facilitate that, you know, reflexive conversation with data to reduce uncertainty about these decisions?
HUIZINGA: Mmmm. You know what I love, and this is just a natural give-and-take in the conversation, but the idea that the, the individual is a situated being in a larger cultural or societal or workplace setting, and you can’t just say, well, if I make you happy, everything’s cool. So you’ve got a lot of factors coming in. So it’s really interesting to see where this work might go. I love that. Some collaborators just started working with each other and you guys, because you’ve been together for some time, have an established relationship. How do you think, Shamsi, that that has impacted the work you do or … if at all? I mean, because we’re focusing on collaboration, I’m kind of interested to tease out some of the people on the show who have just started working together. They don’t know each other. They’re in different states, different countries. Are there any advantages to working together for years and now doing a collaboration?
IQBAL: Oh! I can name so many advantages! Jina and I have worked closely for so long. We know each other’s strengths, weaknesses, working styles. So I mean, when I moved into Viva Insights, I knew that Jina was going to be a close collaborator not just because of the projects that we had worked on and the natural connection and alignment to Viva Insights, but it’s just because I knew that whenever I have a question, I can go to Jina and she’s going to go and dig out all the research. She maybe already knew that I was going to ask that question, and she had that already ready. I don’t know. I mean, she seems to read my mind before even I know the questions that I was going to ask her. So this was very natural for me to continue with that collaboration. And my colleagues over in Viva Insights, they also know Jina from previous, uh, interactions. So whenever I say that, “Well, I’m collaborating with Jina Suh in MSR,” and they say, “Oh yeah, we know Jina! So we are in good hands.”
HUIZINGA: Jina, is that true? You can read minds?
SUH: I am …
HUIZINGA: Or just hers? [LAUGHTER]
SUH: I’m … I’m sweating right now! [LAUGHTER] I’m so nervous.
HUIZINGA: Oh my gosh! … Well, so how about you? I mean, you had talked earlier about sort of a language barrier when you don’t know each other and, and because you’ve both been researchers, so … what advantages can you identify from this kind of connection?
SUH: Yeah, I think having Shamsi in the product group and having Shamsi being, uh, in Microsoft Research before, she knows how to translate my words into the product words, and I, I, I’m pretty sure, Shamsi, you, you might have struggled at the beginning. I’m not sure … at the product group.
IQBAL: I did, I did. I still do! [LAUGHTER]
SUH: But I think that struggle, I mean, she knows how to amplify my research and how to, um, talk about it in a way that the product groups will appreciate it. And she finds and identifies opportunities where research is needed, where I could actually shine. You know, before it was like, “I did all this research! Come look at me! Come look at me!” Shamsi will like, you know, find me, find opportunities for me, and say, “Hey, we have this gap. Can you come and speak about that?” And so, I don’t know, having that bridge I think really helps. And Shamsi is more than a collaborator. She’s more of a mentor for me, um, in that regard.
HUIZINGA: Awesome … so academics definitely have a particular way of talking and writing … and communicating, and product people do, too. So what might be an example of what would need that kind of level of translation, if you will? What, what might not someone get?
IQBAL: I think one of the things that I am still learning, and it took me a while to get to that point where I really started understanding that I need to fill this gap because there is a substantial gap between where research findings are and how that actually resonates with a product team.
HUIZINGA: Interesting.
IQBAL: And I think that the biggest question there is that taking the research findings and situating it in a real-world problem. So in the product world, we talk a lot about customer needs. And coming from research, I had the idea that, well, I will identify the problems and if it’s a compelling problem and I have a good solution, the product teams will come. I have no responsibility in figuring out the customer need because, come on, I already identified a great problem. And I think that I have been humbled over the past couple of years that that is quite not how it works. But being in that space now allows me … every time I come across a research question or I’m setting up some kind of a hypothesis, I take a step back and think about, OK, so how does it relate to the product? What customer need, for now, are we solving, or a future customer need are we going to solve?
HUIZINGA: Right.
IQBAL: And I think that with Jina, she keeps me grounded in the research, but she also has an engineering background, as well. So it is not that she does not understand the space. She understands the constraints in implementation in building something. So that is really good for me because I can borrow that knowledge. And when I talk to my product colleagues, I, I can leverage that, as well.
HUIZINGA: That’s, that’s hilarious because you’ve just identified a third group, which is engineering. Jina, I’m interested to know how previous collaborations might have informed the approach to the work you do now, so briefly talk about your early work together and what learnings could you share from any early successes or failures?
SUH: Yeah, maybe this is a little one-sided than a story about a collaboration, but I’ve, I’ve always looked up to Shamsi as kind of like the expert in productivity and wellbeing, so …
IQBAL: I am now blushing! [LAUGHTER]
SUH: So I think I’m more on the receiving end in this collaborative relationship …
IQBAL: That is not true! [LAUGHTER]
SUH: So, you know, I’ve always been passionate about mental health and emotional wellbeing, and unfortunately, mental health isn’t a high priority for a lot of people and organizations. And, you know, in the workplace, it’s sometimes tricky whether this concept of mental health should or should not be part of the work equation. And I’ve always admired how Shamsi was able to naturally … I mean, it’s, it’s kind of amazing how seamlessly she’s integrating aspects of mental health into the research that she does without really calling it mental health. [LAUGHTER] So, for example, like helping people transition in and out of work and disengage from work. I mean, how close to mental health could that be? You know, taking breaks at work, helping people focus more and distract less … like all these studies around attention that she’s done for years. So these kinds of, um, way that Shamsi is able to bring aspects of something that I’m really passionate about into, uh, into the workplace and into a language where product groups and the businesses really care about, that’s one of my biggest learnings from looking up to Shamsi and working together. You know, she’s constantly helping me, trying to understand, um, how do we actually formulate and, and talk about wellbeing in the context of the workplace so that leaders and organizational leaders, as well as product and business owners, as well, Microsoft in general, appreciate the work that we do. So that’s been really a blessing to have Shamsi be my partner …
HUIZINGA: Yeah. Shamsi, do you want to spread the love back on her? [LAUGHS]
IQBAL: Yeah, I think that I get motivated by Jina every single day, and, um, I think one of the things, which … I was going to interrupt you, but you were, you were, you were articulating this so nicely that I felt that I needed to wait and not interrupt and then pick an opportune moment to interrupt! So I, I, I am bringing back my PhD thesis into this conversation. [LAUGHS]
HUIZINGA: Right on!
IQBAL: Yeah! So, so one thing which was super interesting to me when I moved over to the product group and I was starting to look deeply into how we can bring some of the wellbeing-related work into the product. And I started digging into the organizational behavior literature. And what was fascinating is that everything we talked about in terms of wellbeing had a different definition in terms of like workplace thriving. And so things about giving people mental space to work and giving people opportunity to grow and belonging and all of these constructs that we typically relate to mental health, those are actually important workplace wellbeing constructs that have a direct relationship to workplace outcomes. And so I tried to reframe it in that way so that it doesn’t come across as a “good to have”; it comes across as a “really necessary thing to have.” What has happened over the past few months or so, I would say, there has been a shift in how organizations are thinking about people and individuals and wellbeing and productivity, and this is just a function of how the world is right now, right? So organizations and leaders are thinking that maybe now is the time to bring the focus back onto outcomes— productivity, revenue. And it seems that all the other things that we were focusing on … 2020, 2021 … about really being employee-centric and allowing employees to bring their best selves to work, it seems on the surface that that has gone sideways. But I’m going to argue that we should not be doing that because at the end of the day, the individuals are the ones whose work is going to aggregate up to the organizational outcomes. So if we want organizations to succeed, we need individuals to succeed. And so, um, at the beginning of the podcast, Gretchen, you were talking about individuals being parts of organizations. So individuals are embedded in teams; teams are embedded in organizations. So if organizations figure out what they want to do, it kind of bubbles down to the individuals. And so we need to think big, think from an organizational point of view, because that keeps us scoped and constrained. And then we need to think about if we walk it back, how does this impact teams? And if we want teams to function well, how do we enable and empower the individuals within those teams? So, so it’s a, it’s a bigger construct than what we had originally started with. And I think that now I am also pushing myself to think beyond just individuals and thinking about how we can best support individuals to thinking about how that actually bubbles up to an organization.
HUIZINGA: Right.
SUH: This is exactly what I’m talking about. [LAUGHTER]
HUIZINGA: Yeah, no, I’m …
SUH: This is exactly … She’s helping me. [LAUGHS]
HUIZINGA: It’s a podcast and you can’t see Jina smiling and nodding her head as Shamsi’s talking. Umm, let’s, let’s drill in a little bit on alignment between product and research, because we talked a little bit earlier about the language barrier and sometimes the outcome difference. And it’s not necessarily conflicting, but it might be different. How do you get to what I’ll call the Goldilocks position of alignment, and what role do you think collaboration plays, if any, in facilitating that alignment?
IQBAL: So it is not easy. And, I mean, obviously, and I think that again, this is where I’m starting to learn how to do this better. I think that starting off with a problem that a product team cares about—and the leaders in the product team care about—I think that that’s where we really want to start. And in this particular collaboration that Jina and I are right now, um, we started off with having a completely different focus, and then in January I came back and told Jina, scratch that; we’ll have to go back to the drawing board and change things! And she didn’t bat an eyelash. Because I was expecting that she would push back and say that, well, I, I have things to deliver, as well. You can’t come and randomize me. But I mean, knowing Jina, she was completely on board. I mean, I was worried. She was less worried than I was. But I think that, um, going back to your original question, I think that alignment in terms of picking a problem that product teams care about, I think that that’s super important. I think that then, going back to the original point about translating the research findings, for this particular project, what we are doing is that we are looking at something that is not going to block the product right now in any way. We are looking at something in the future that will hopefully help, and we are really trying to understand this population in, in a much more deeper way than what we have done before.
HUIZINGA: Right, right. Jina on that same note, you know, Shamsi’s actually sitting over in product right now, so she’s talking about finding a problem that product people care about. But what about from the research angle? How do product people get you on board?
SUH: Yeah, I think for me, I, I wonder about my role in Microsoft Research. You know, why am I in Microsoft doing research? Why am I not doing research somewhere else? So I try to make a concerted effort to see if there are collaborators outside of just research to justify and to make sure that my impact is beyond just research. And so it was just natural, like, you know, me and Shamsi having shared interests, as well as her, you know … collaborating together with Shamsi and her moving to Viva was a natural kind of transition for me. And so having connections into Viva and making sure that I participate in, you know, Viva share-outs or other things where I learn about the product’s priorities, as well as the questions that they have, concerns, challenges that they’re facing. Those are all great opportunities for me to learn about what the product is going through and how I can maybe think about my research direction a little bit differently. You know, I feel like every research question can be morphed into different things, can be looked at it from different perspectives. But having that extra, um, signal from the product group helps me, you know, think about it in a different way, and then I can approach the product group and say, hey, I heard your challenges, and I thought about it. Here’s my research direction. I think it aligns. You know, it’s kind of a back-and-forth dance we have to play, and sometimes it doesn’t quite work out. Sometimes, you know, we just don’t have the resources or interests. But you know, in this case with Shamsi and Viva, I think our interests are just like perfectly aligned. So, you know, Shamsi talked about pivoting … Shamsi has given me enough warnings or, you know, kind of signals that things are changing early enough that I was already thinking about, OK, well, what does it mean for us to pivot? So it wasn’t that big of a deal.
HUIZINGA: Well, yeah, and we’ll get to pivot in a second. So the interesting thing to me right now is on this particular project, where you’re working on data-driven insights for people leaders to make data-driven decisions, how do you then balance say, you have a job at Microsoft Research, you have a lane that you’re running in in terms of deliverables for your bosses, does that impact you in terms of other things you’re doing? Do you have more than one project on the go at a time, or are you pretty focused on this? How does it look?
IQBAL: Jina is smiling! [LAUGHTER]
SUH: I think the DNA of a researcher is that you have way too many things going [LAUGHS] on than you have hands and arms to handle them, so, yes, I have a lot of things going on …
HUIZINGA: What about the researchers? Do the product people have to figure out something that the researchers care about?
IQBAL: So when we started first conceptualizing this project, I think that we started off with the intent that we will have research outcomes and research contributions, but that would be constrained within a particular product space. I think that that’s how we kept it kind of like both interesting for research and for product.
HUIZINGA: Got it.
IQBAL: I mean, one of the responsibilities that I have in my new role is that I also have to kind of deliver ideas that are not going to be immediately relevant maybe but towards the future. And so this gives me the opportunity to explore and incubate those new ideas. Maybe it works out; maybe it doesn’t. Maybe it creates a new direction. The product team is not going to hold me accountable for that because they have given me that, that flexibility that I can go and explore.
HUIZINGA: Have some runway …
IQBAL: Yeah. And so that’s, that’s why I tried to pick something—or Jina and I worked together to pick something—which would have enough interest as a research contribution as well as something that could be picked up by product leader, as well.
HUIZINGA: That’s a perfect way of putting it. You know, speaking of incubation, in some ways, Microsoft is well known for its internships. And you have an intern working on this project right now. So it’s sort of a Microsoft/Microsoft Research/university, um, collaboration. Jina, tell us about the student you’re working with and then talk about how Microsoft Research internships are beneficial, maybe … and anchor that on this particular project.
SUH: So the intern that is working on our project is Pranav Khadpe. He’s a PhD student in the, uh, Human-Computer Interaction Institute at Carnegie Mellon University. So Pranav studies and builds infrastructures that strengthen interdependence and collaboration in occupational communities, which is, I think, really aligned to what this podcast is trying to do!
HUIZINGA: Yeah, absolutely.
SUH: So for example, he builds technologies that support people seeking help and getting feedback, getting mentoring and a sense of belonging through interaction with others within those communities. And I think internships primarily have the benefit of mentoring for the future generation of researchers, right? We’re actually building this pipeline of researchers into technology companies. We’re giving them opportunities to, to experience what it’s like to be in the industry research and use that experience and, and entice them to come work for us, right? [LAUGHS]
HUIZINGA: Right. It’s a farm team!
SUH: Right. [LAUGHTER] Um, so I feel like I have this dual role at Microsoft Research. On one hand, we are researchers like Shamsi and I. We need to continue to push the boundaries of scientific knowledge and disseminate it with the rest of the world. But on the other hand, I need to bring value of that research back into our products and business, right? And so, um, internships that are designed with product partners are really forcing functions for us to think about this dual role, right? It’s a learning opportunity for all of us involved. So from the research side, we learn how to find the right balance between research and product, um, and ensuring that we do successful technology transfer. But from the product perspective, they learn how to apply scientific rigor in their product decisions or decisions that they make … or designs that they make. And it’s a, it’s a really great opportunity for Pranav to be sitting in between the product and research. He’s not only learning what he’s already being trained to do in his PhD, being mainly an independent researcher, but he’s also learning how to bring that back into the product. So now he’s being trained not only to be a researcher in MSR but perhaps an applied scientist in the industry, as well. So I think there’s that benefit.
HUIZINGA: And that gets back to the individual being situated within an organization. And so being an independent researcher is cool, but you’re always going to be working with a team of some kind … if you want a paycheck. [LAUGHS] Or you can just go off and invent. Shamsi, I always ask what could possibly go wrong? Some people hate that question, but I think it’s worth asking. And while I know that data driven—quotation marks around that, air quotes around that—is generally a positive buzz-phrase in decision-making today, I wonder how you’re addressing this augment-not-replace mandate in the work you’re doing. How do you keep humans in the loop with real life wisdom and emotions and prevent the march toward what I would call outsourcing decision-making, writ large, to machines?
IQBAL: I think it’s a, it’s a great question, and it’s a very timely one, right? And, uh, the way that I like to think about it, being a human-computer interaction researcher is—who is now dealing with a lot of data—is that data can show but not necessarily tell. And I think that the “telling” part comes from the humans. Maybe in the future, AI and data will be able to do the telling job better, but right now, humans have the context. So a human being who has the context can look at the data and explain why it is showing certain things. And I think that that’s where I feel that the integration of the human in that process is so important. The challenge is showing them the right data. I think that that is also where the human comes in, in figuring out what they need to see. The data can show them that, and then the human gets to tell the story around it.
HUIZINGA: OK. Jina, do you have any insights on that?
SUH: One of the challenges is that, um, we’re not only just building tools to help people look at the data and contextualize it and explain it and understand it but also show them how powerful it can be in changing their behaviors, changing their organization. And it takes work. So one challenge that, you know, we were just having a discussion over lunch is that, how do we actually get people to be motivated enough to interact with the data, have a conversation with the data? And so these are some of the questions that we are still … uh, we don’t have an answer for; we’re still trying to answer. But, you know, our role is not just to feed data and help them look at it and tell a story about it, but also demonstrate that it’s empowering so that they can have more engaging experience with that data.
HUIZINGA: Tell me what you mean by having a conversation with the data. I mean, what does that look like?
SUH: The obvious … most obvious example would be with the large language models.
HUIZINGA: OK!
SUH: You can have a …
HUIZINGA: An actual conversation!
SUH: An actual conversation with the data. But you can also do that through user experience, right? You can be asking questions. I think a lot of these things happen naturally in your head. You’re formulating questions about data. You’re finding insights. You move on to the next question. You become curious. You ask the next question. You explain it. You bring your context to it and then you explain it. So that sort of experience. But I think that takes a lot of work. And we need to make sure that we entice them to, to make sure that there’s value in doing that extra work.
HUIZINGA: Well, and the fact that you’re embedded in a group called Human Understanding and Empathy and that your intern is on human-computer interaction, the human-centeredness is a huge factor in this kind of work today. Ummm. The path from lab to life, as they say—wait, it’s what I say!—is not necessarily straight and linear and sometimes you have to pivot or, as I like to say, add a kick ball change to the research choreography. How did this work begin? Shamsi, you told a story, um, early on, and I think people like stories. I’m going to have you both address this, but I want Shamsi to go first. How did it begin, and then how did it change? What were the forcing functions that made the pivot happen and that you both reacted to quite eagerly, um, both to meet the research and organizational outcomes?
IQBAL: As we said many times in this podcast, I mean, Jina and I, we, we naturally gravitate towards the same research problems. And so, we were looking at one aspect of Viva Insights last year with another intern, and that internship project, apart from being really impactful and well-received in Viva Insights, as well, I think it was just a lot of fun doing a joint internship project with Jina. And so this time when the application period came around, it was a no-brainer. We were going to submit another proposal. And at that point … based on some of the work that we had done last year … so we were really going to focus on something around how we can help people managers and their reports have better conversations and … towards their goals. Right, Jina? I think that that’s where we had kind of like decided that we were going to focus on. And then we started interviewing interns with that project in mind, and then it was December or January where things shifted, the tech world went through quite a tumultuous time, and, uh, we just had to pivot because our organization had also changed directions and figured that, well, we need to focus more on supporting organizations and organization leaders through this time of change. Which meant that we could still do our internship project, but it just didn’t seem right in terms of what we could do, in terms of impact and maybe immediate impact, too, uh, for the field. So Jina and I talked. I recommended that we shift the intern that we had talked to. I think that we had already talked to Pranav. I mean, he seemed really versatile and smart. And then we just decided, I think he’ll be OK. I think that he will be fine. I think that he would actually be even a better fit for the project that we have in mind.
HUIZINGA: Yeah. You know, as you’re talking, I’m thinking, OK, yeah, we think of the workers in a workplace, but the pressure on leaders or managers is intense to make the right decision. So it seems really in line with the empathy and the productivity to bring those two together, to, to help the people who have the severe pressure of making the right decisions at the right time for their teams, so that’s awesome. Jina, do you have anything to add to the pivot path? I mean, from your perspective.
SUH: Yeah, I mean, like I was saying, I think Shamsi was giving us, or me, plenty of signals that this might be happening. So it gave me plenty of opportunities to think about the research. And really, we didn’t make too many changes. I mean, I’d, I’d like to think that we’re, we’re trying to get at the same problem but from a slightly different angle. And so, you know, before it was individual and manager conversations. Now we’re going from, you know, managers to organizational leaders. At the end of the day, like the real transformative change in an organization happens through the leadership. And so, I think before, we were just kind of trying to connect the individual needs to their, to their immediate managers. But now I think we’re going at the problem in a more fundamental way, really tackling the organizational leaders, helping them make the right decisions to, to help their organizations thrive. And I’m more excited about this new direction than before.
HUIZINGA: Yeah. You know, I hadn’t asked this, and I should be asking it to everyone that comes in the booth or on screen. What are the primary methodologies you engage with in this research? I mean, quantitative, qualitative, mixed?
SUH: Yeah, we, we do everything, I think. [LAUGHS] Um, I, I think that’s the beauty of the human-computer interaction … the space is huge. So we do anything from qualitative interviews, uh, you know, contextual inquiry, like observing people, understanding their work practices, to interviewing people, as well as running survey studies. We’ve done purely quantitative studies, as well, looking at Viva Insights data and understanding the correlation between different signals that Viva Insights is providing with workplace stress at a large scale, at high fidelity, so…
IQBAL: I think another thing that I would add is that sometimes we also build prototypes based on the ideas that we come up with and so we get to evaluate those prototypes in, in smaller scale but in far more depth. And so those kinds of results are also super important for the product teams because that helps bring those ideas to life, is that well, I understand your research and I understand your research findings, but what do I do with it? And so if you have a prototype and that shows that, well, this is something that you might be able to do, and then it’s up to them to figure out whether or not this is actually scalable.
HUIZINGA: Well, as we wrap up, I’d like to give each of you, uh, the chance to do a little future envisioning. And I know that that’s kind of a researcher’s brain anyway, is to say what kind of a future do I want to help build? But how will the workplace be different or better because of the collaborative work you’ve done? Jina, why don’t you go first.
SUH: As researchers, I think it’s our job to get ahead of the curve and to really teach the world how to design technology in a, in a way that considers both its positive and negative impacts. So in the context of using data at work, or data about work, how the data gets used for and against people at work …
HUIZINGA: Ooohh!
SUH: … there’s a lot of fear. Yes, there’s a lot of fear about workplace surveillance.
HUIZINGA: Yeah!
SUH: And so the question for us is, you know, how do we demonstrate that this data can be used ethically and responsibly and that there is value in, in this data. So I, I am hoping that, you know, through this collaboration, I’m hoping that we can pave the way for how to design these technologies responsibly, um, and, and develop data-driven practices.
HUIZINGA: Shamsi, close the show with us and tell me your preferred future. What, what are you going to contribute to the workplace world?
IQBAL: So I would just add one more thing. I think that data responsibility, transparency, and ethical use of data, I think it’s at the core of Microsoft’s mission, and I think it’s on us to show that in our products. I think that the other thing, which is a little away from the data, I think that just going back to this concept of leaders and, uh, individuals, I have always maintained that there is oftentimes a tension between what an individual’s goals might be and what an organization’s goals might be. And I’m hoping through this work that we can kind of like help resolve some of those tensions, that once organization leaders are provided with the right kind of insights and data, they will be more motivated to take actions that will be also beneficial to individuals. Oftentimes, that connection is not very clear, uh, but I’m hoping that we can shed some light on it.
HUIZINGA: Jina, Shamsi, so good to see you again. Smiles so big. Thanks for coming in and sharing your “insights” today.
SUH: Thank you for having us.
IQBAL: Thank you so much. This was a lot of fun.


NVIDIA GeForce NOW (@NVIDIAGFN) August 2, 2023


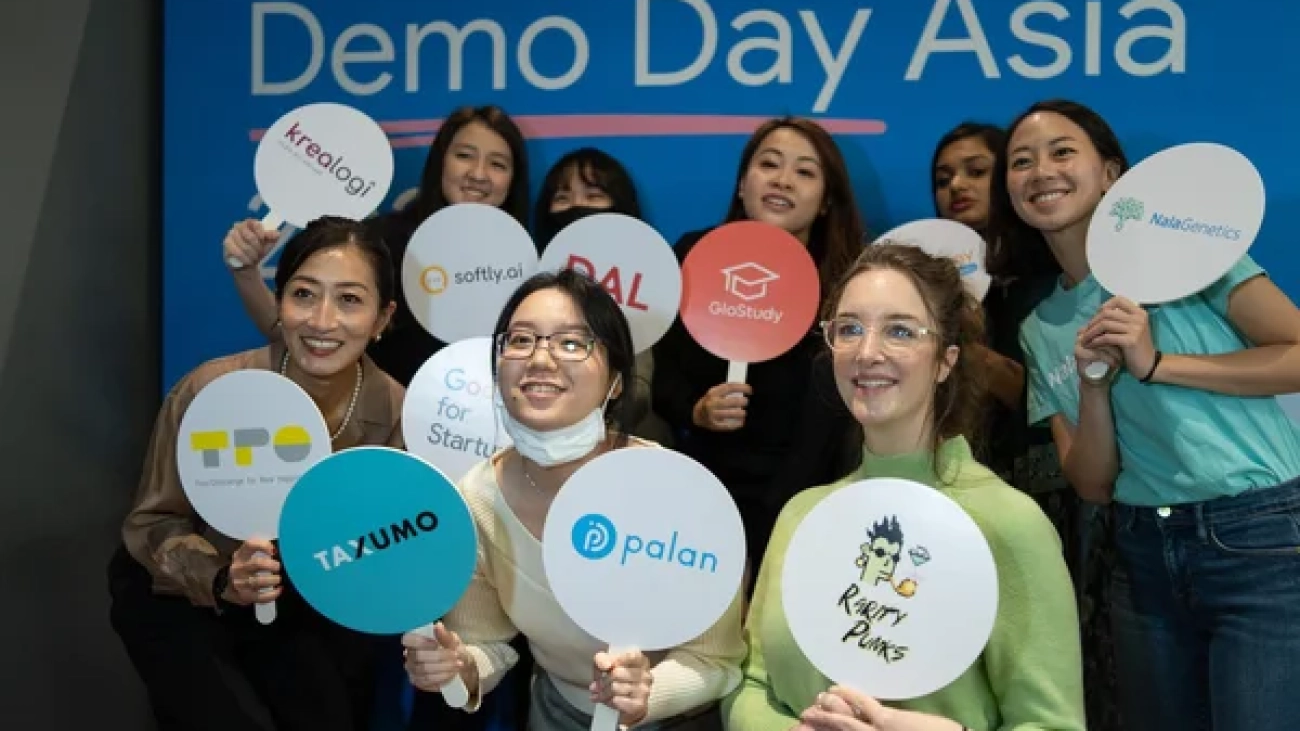
 The Google for Startups Women Founders Fund will provide equity-free funding and Google support to women-led AI startups in India, Japan and Korea.


 Simon Zamarin is an AI/ML Solutions Architect whose main focus is helping customers extract value from their data assets. In his spare time, Simon enjoys spending time with family, reading sci-fi, and working on various DIY house projects.
 Saurabh Trikande is a Senior Product Manager for Amazon SageMaker Inference. He is passionate about working with customers and is motivated by the goal of democratizing machine learning. He focuses on core challenges related to deploying complex ML applications, multi-tenant ML models, cost optimizations, and making deployment of deep learning models more accessible. In his spare time, Saurabh enjoys hiking, learning about innovative technologies, following TechCrunch and spending time with his family.

 Durga Sury is an ML Solutions Architect in the Amazon SageMaker Service SA team. She is passionate about making machine learning accessible to everyone. In her 4 years at AWS, she has helped set up AI/ML platforms for enterprise customers. When she isn’t working, she loves motorcycle rides, mystery novels, and hiking with her 5-year-old husky.
 Ketan Vijayvargiya is a Senior Software Development Engineer in Amazon Web Services (AWS). His focus areas are machine learning, distributed systems and open source. Outside work, he likes to spend his time self-hosting and enjoying nature.


 Charalampos Grouzakis is a Data Scientist within AWS Professional Services. He has over 11 years of experience in developing and leading data science, machine learning, and big data initiatives. Currently he is helping enterprise customers modernizing their AI/ML workloads within the cloud using industry best practices. Prior to joining AWS, he was consulting customers in various industries such as Automotive, Manufacturing, Telecommunications, Media & Entertainment, Retail and Financial Services. He is passionate about enabling customers to accelerate their AI/ML journey in the cloud and to drive tangible business outcomes.
 Bharathi Srinivasan is a Data Scientist at AWS Professional Services where she loves to build cool things on Sagemaker. She is passionate about driving business value from machine learning applications, with a focus on ethical AI. Outside of building new AI experiences for customers, Bharathi loves to write science fiction and challenge herself with endurance sports.
 Jean-Michel Lourier is a Senior Data Scientist within AWS Professional Services. He leads teams implementing data driven applications side by side with AWS customers to generate business value out of their data. He’s passionate about diving into tech and learning about AI, machine learning, and their business applications. He is also an enthusiastic cyclist, taking long bike-packing trips.
 Tanvi Singhal is a Data Scientist within AWS Professional Services. Her skills and areas of expertise include data science, machine learning, and big data. She supports customers in developing Machine learning models and MLops solutions within the cloud. Prior to joining AWS, she was also a consultant in various industries such as Transportation Networking, Retail and Financial Services. She is passionate about enabling customers on their data/AI journey to the cloud.
 Abhishek Maligehalli Shivalingaiah is a Senior AI Services Solution Architect at AWS with focus on Amazon Kendra. He is passionate about building applications using Amazon Kendra ,Generative AI and NLP. He has around 10 years of experience in building Data & AI solutions to create value for customers and enterprises. He has built a (personal) chatbot for fun to answers questions about his career and professional journey. Outside of work he enjoys making portraits of family & friends, and loves creating artworks.
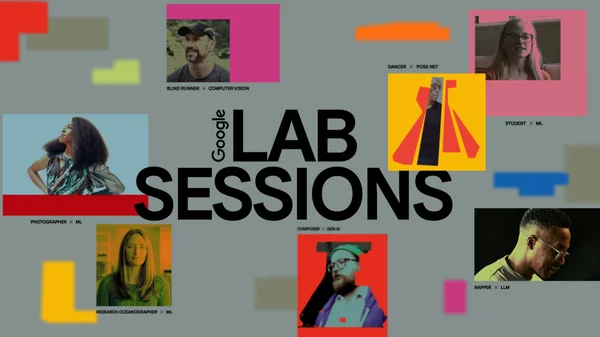 Lab Sessions is a series of experimental AI collaborations with everyone from artists to academics, scientists to students.