Introducing TorchRec, a library for modern production recommendation systems
We are excited to announce TorchRec, a PyTorch domain library for Recommendation Systems. This new library provides common sparsity and parallelism primitives, enabling researchers to build state-of-the-art personalization models and deploy them in production.

How did we get here?
Recommendation Systems (RecSys) comprise a large footprint of production-deployed AI today, but you might not know it from looking at Github. Unlike areas like Vision and NLP, much of the ongoing innovation and development in RecSys is behind closed company doors. For academic researchers studying these techniques or companies building personalized user experiences, the field is far from democratized. Further, RecSys as an area is largely defined by learning models over sparse and/or sequential events, which has large overlaps with other areas of AI. Many of the techniques are transferable, particularly for scaling and distributed execution. A large portion of the global investment in AI is in developing these RecSys techniques, so cordoning them off blocks this investment from flowing into the broader AI field.
By mid-2020, the PyTorch team received a lot of feedback that there hasn’t been a large-scale production-quality recommender systems package in the open-source PyTorch ecosystem. While we were trying to find a good answer, a group of engineers at Meta wanted to contribute Meta’s production RecSys stack as a PyTorch domain library, with a strong commitment to growing an ecosystem around it. This seemed like a good idea that benefits researchers and companies across the RecSys domain. So, starting from Meta’s stack, we began modularizing and designing a fully-scalable codebase that is adaptable for diverse recommendation use-cases. Our goal was to extract the key building blocks from across Meta’s software stack to simultaneously enable creative exploration and scale. After nearly two years, a battery of benchmarks, migrations, and testing across Meta, we’re excited to finally embark on this journey together with the RecSys community. We want this package to open a dialogue and collaboration across the RecSys industry, starting with Meta as the first sizable contributor.
Introducing TorchRec
TorchRec includes a scalable low-level modeling foundation alongside rich batteries-included modules. We initially target “two-tower” ([1], [2]) architectures that have separate submodules to learn representations of candidate items and the query or context. Input signals can be a mix of floating point “dense” features or high-cardinality categorical “sparse” features that require large embedding tables to be trained. Efficient training of such architectures involves combining data parallelism that replicates the “dense” part of computation and model parallelism that partitions large embedding tables across many nodes.
In particular, the library includes:
- Modeling primitives, such as embedding bags and jagged tensors, that enable easy authoring of large, performant multi-device/multi-node models using hybrid data-parallelism and model-parallelism.
- Optimized RecSys kernels powered by FBGEMM , including support for sparse and quantized operations.
- A sharder which can partition embedding tables with a variety of different strategies including data-parallel, table-wise, row-wise, table-wise-row-wise, and column-wise sharding.
- A planner which can automatically generate optimized sharding plans for models.
- Pipelining to overlap dataloading device transfer (copy to GPU), inter-device communications (input_dist), and computation (forward, backward) for increased performance.
- GPU inference support.
- Common modules for RecSys, such as models and public datasets (Criteo & Movielens).
To showcase the flexibility of this tooling, let’s look at the following code snippet, pulled from our DLRM Event Prediction example:
# Specify the sparse embedding layers
eb_configs = [
   EmbeddingBagConfig(
       name=f"t_{feature_name}",
       embedding_dim=64,
       num_embeddings=100_000,
       feature_names=[feature_name],
   )
   for feature_idx, feature_name in enumerate(DEFAULT_CAT_NAMES)
]

# Import and instantiate the model with the embedding configuration
# The "meta" device indicates lazy instantiation, with no memory allocated
train_model = DLRM(
   embedding_bag_collection=EmbeddingBagCollection(
       tables=eb_configs, device=torch.device("meta")
   ),
   dense_in_features=len(DEFAULT_INT_NAMES),
   dense_arch_layer_sizes=[512, 256, 64],
   over_arch_layer_sizes=[512, 512, 256, 1],
   dense_device=device,
)

# Distribute the model over many devices, just as one would with DDP.
model = DistributedModelParallel(
   module=train_model,
   device=device,
)

optimizer = torch.optim.SGD(params, lr=args.learning_rate)
# Optimize the model in a standard loop just as you would any other model!
# Or, you can use the pipeliner to synchronize communication and compute
for epoch in range(epochs):
   # Train
Scaling Performance
TorchRec has state-of-the-art infrastructure for scaled Recommendations AI, powering some of the largest models at Meta. It was used to train a 1.25 trillion parameter model, pushed to production in January, and a 3 trillion parameter model which will be in production soon. This should be a good indication that PyTorch is fully capable of the largest scale RecSys problems in industry. We’ve heard from many in the community that sharded embeddings are a pain point. TorchRec cleanly addresses that. Unfortunately it is challenging to provide large-scale benchmarks with public datasets, as most open-source benchmarks are too small to show performance at scale.
Looking ahead
Open-source and open-technology have universal benefits. Meta is seeding the PyTorch community with a state-of-the-art RecSys package, with the hope that many join in on building it forward, enabling new research and helping many companies. The team behind TorchRec plan to continue this program indefinitely, building up TorchRec to meet the needs of the RecSys community, to welcome new contributors, and to continue to power personalization at Meta. We’re excited to begin this journey and look forward to contributions, ideas, and feedback!
References
[1] Sampling-Bias-Corrected Neural Modeling for Large Corpus Item Recommendations [2] DLRM: An advanced, open source deep learning recommendation modelControl formality in machine translated text using Amazon Translate
Amazon Translate is a neural machine translation service that delivers fast, high-quality, affordable, and customizable language translation. Amazon Translate now supports formality customization. This feature allows you to customize the level of formality in your translation output. At the time of writing, the formality customization feature is available for six target languages: French, German, Hindi, Italian, Japanese, and Spanish. You can customize the formality of your translated output to suit your communication needs.
You have three options to control the level of formality in the output:
- Default – No control over formality by letting the neural machine translation operate with no influence
- Formal – Useful in the insurance and healthcare industry, where you may prefer a more formal translation
- Informal – Useful for customers in gaming and social media who prefer an informal translation
Formality customization is available in real-time translation operations in commercial AWS Regions where Amazon Translate is available. In this post, we walk you through how to use the formality customization feature and get a customized translated output securely.
Solution overview
To get formal or informal words and phrases in your translation output, you can toggle the formality button under the additional settings on the Amazon Translate console when you run the translations through real-time requests. The following sections describe using formality customization via the Amazon Translate console, AWS Command Line Interface (AWS CLI), or the Amazon Translate SDK (Python Boto3).
Amazon Translate console
To demonstrate the formality customization with real-time translation, we use the sample text “Good morning, how are you doing today? ” in English:
- On the Amazon Translate console, choose English (en) for Source language.
- Choose Spanish (es) for Target language.
- Enter the quoted text in the Source language text field.
- In the Additional settings section, enable Formality, and select Informal on the drop-down menu.
The translated output is “Buenos días, ¿cómo te va hoy? ” which is casual way of speaking in Spanish.

- Now, select Formal on the drop-down Formality menu.
The translated output changes to “Buenos días, ¿cómo le va hoy? ” which is a more formal way of speaking in Spanish.

You can follow the preceding steps to change the target language to other supported languages and note the difference between the informal and formal translations. Let’s try some more sample text.
In the following examples, we translate “So what do you think? ” from English to German. The first screenshot shows an informal translation.

The following screenshot shows the formal translation. 
In another example, we translate “Can I help you? ” from English to Japanese. The first screenshot shows an informal translation.

The following screenshot shows the formal translation.

AWS CLI
The translate-text AWS CLI command with --settings Formality=FORMAL | INFORMAL translates words and phrases in your translated text appropriately.
The following AWS CLI commands are formatted for Unix, Linux, and macOS. For Windows, replace the backslash () Unix continuation character at the end of each line with a caret (^).
In the following code, we translate “How are you? ” from English to Hindi, using the FORMAL setting:
aws translate translate-text
--text "How are you?"
--source-language-code "en"
--target-language-code "hi"
--settings Formality=FORMAL
You get a response like the following snippet:
{     "TranslatedText": "आप कैसे हो?",
       "SourceLanguageCode": "en",
       "TargetLanguageCode": "hi",
       "AppliedSettings": {
                            "Formality": "FORMAL"
                           }
}
The following code translates the same text into informal Hindi:
aws translate translate-text
--text "How are you?"
--source-language-code "en"
--target-language-code "hi"
--settings Formality=INFORMAL
You get a response like the following snippet:
{     "TranslatedText": "तुम कैसे हो?",
      "SourceLanguageCode": "en",
      "TargetLanguageCode": "hi",
      "AppliedSettings": {
                          "Formality": "INFORMAL"
                          }
}
Amazon Translate SDK (Python Boto3)
The following Python Boto3 code uses the real-time translation call with both formality settings to translate “How are you? ” from English to Hindi.
import boto3
import json

translate = boto3.client(service_name='translate', region_name='us-west-2')

result = translate.translate_text(Text="How are you?", SourceLanguageCode="en", TargetLanguageCode="hi", Settings={"Formality": "INFORMAL"})
print('TranslatedText: ' + result.get('TranslatedText'))
print('SourceLanguageCode: ' + result.get('SourceLanguageCode'))
print('TargetLanguageCode: ' + result.get('TargetLanguageCode'))
print('AppliedSettings: ' + json.dumps(result.get('AppliedSettings')))

print('')

result = translate.translate_text(Text="How are you?", SourceLanguageCode="en", TargetLanguageCode="hi", Settings={"Formality":"FORMAL"})
print('TranslatedText: ' + result.get('TranslatedText'))
print('SourceLanguageCode: ' + result.get('SourceLanguageCode'))
print('TargetLanguageCode: ' + result.get('TargetLanguageCode'))
print('AppliedSettings: ' + json.dumps(result.get('AppliedSettings')))
Conclusion
You can use the formality customization feature in Amazon Translate to control the level of formality in machine translated text to meet your application context and business requirements. You can customize your translations using Amazon Translate in multiple ways, including custom terminology, profanity masking, and active custom translation.
About the Authors
 Siva Rajamani is a Boston-based Enterprise Solutions Architect at AWS. He enjoys working closely with customers and supporting their digital transformation and AWS adoption journey. His core areas of focus are serverless, application integration, and security. Outside of work, he enjoys outdoors activities and watching documentaries.
 Sudhanshu Malhotra is a Boston-based Enterprise Solutions Architect for AWS. He’s a technology enthusiast who enjoys helping customers find innovative solutions to complex business challenges. His core areas of focus are DevOps, machine learning, and security. When he’s not working with customers on their journey to the cloud, he enjoys reading, hiking, and exploring new cuisines.
 Watson G. Srivathsan is the Sr. Product Manager for Amazon Translate, AWS’s natural language processing service. On weekends you will find him exploring the outdoors in the Pacific Northwest.
Probing Image-Language Transformers for Verb Understanding
Multimodal Image-Language transformers have achieved impressive results on a variety of tasks that rely on fine-tuning (e.g., visual question answering and image retrieval). We are interested in shedding light on the quality of their pretrained representations–in particular, if these models can distinguish verbs or they only use the nouns in a given sentence. To do so, we collect a dataset of image-sentence pairs consisting of 447 verbs that are either visual or commonly found in the pretraining data (i.e., the Conceptual Captions dataset). We use this dataset to evaluate the pretrained models in a zero-shot way.Read More
An intro to AI, made for students
Adorable, operatic blobs. A global, online guessing game. Scribbles that transform into works of art. These may not sound like they’re part of a curriculum, but learning the basics of how artificial intelligence (AI) works doesn’t have to be complicated, super-technical or boring.
To celebrate Digital Learning Day, we’re releasing a new lesson from Applied Digital Skills, Google’s free, online, video-based curriculum (and part of the larger Grow with Google initiative). “Discover AI in Daily Life” was designed with middle and high school students in mind, and dives into how AI is built, and how it helps people every day.
AI for anyone — and everyone
“Twenty or 30 years ago, students might have learned basic typing skills in school,” says Dr. Patrick Gage Kelley, a Google Trust and Safety user experience researcher who co-created (and narrates) the “Discover AI in Daily Life” lesson. “Today, ‘AI literacy’ is a key skill. It’s important that students everywhere, from all backgrounds, are given the opportunity to learn about AI.”
“Discover AI in Daily Life” begins with the basics. You’ll find simple, non-technical explanations of how a machine can “learn” from patterns in data, and why it’s important to train AI responsibly and avoid unfair bias.
First-hand experiences with AI
“By encouraging students to engage directly with everyday tools and experiment with them, they get a first-hand experience of the potential uses and limitations of AI,” says Dr. Annica Voneche, the lesson’s learning designer. “Those experiences can then be tied to a more theoretical explanation of the technology behind it, in a way that makes the often abstract concepts behind AI tangible.”
Guided by Google’s AI Principles, the lesson also explores why it’s important to develop AI systems responsibly. Developed with feedback from a student advisor and several middle- and high-school teachers, the lesson is intended for use in a wide range of courses, not just in computer science (CS) or technology classes.
“It’s crucial for students, regardless of whether they are CS students or not, to understand why the responsible development of AI is important,” says Tammi Ramsey, a high school teacher who contributed feedback. “AI is becoming a widespread phenomenon. It’s part of our everyday lives.”
Whether taught in-person or remotely, teachers can use the lesson’s three- to six-minute videos as tools to introduce a variety of students to essential AI concepts. “We want students to learn how emerging technologies, like AI, work,” says Sue Tranchina, a teacher who contributed to the lesson. “So students become curious and inspired to not just use AI, but create it.”
Announcing the 2022 Apple Scholars in AI/ML
Apple Machine Learning Research
Talking the Talk: Retailer Uses Conversational AI to Help Call Center Agents Increase Customer Satisfaction
With more than 11,000 stores across Thailand serving millions of customers, CP All, the country’s sole licensed operator of 7-Eleven convenience stores, recently turned to AI to dial up its call centers’ service capabilities.
Built on the NVIDIA conversational AI platform, the Bangkok-based company’s customer service bots help call-center agents answer frequently asked questions and track customer orders. The bots understand and speak Thai with 97 percent accuracy, according to Areoll Wu, deputy general manager of CP All.
This kind of innovation is a key value for CP All, which partners with several industry groups and national agencies on an annual awards program to encourage research and entrepreneurship in Thailand.
CP All’s system uses NVIDIA DGX systems and the NVIDIA NeMo framework for natural language processing training, and the NVIDIA Triton Inference Server for AI inference and model deployment.
Keeping Up With the Calls
CP All’s 7-Eleven call centers manage customer inquiries in many business domains — including e-commerce, finance and retail — which each have area-specific expert representatives. The centers typically get nearly 250,000 calls a day, according to Kritima Klomnoi, project manager at Gosoft, a subsidiary of CP All.
“Reducing hold time for customers is a key measure of our service performance,” Klomnoi said. “NVIDIA technologies offer us a 60 percent reduction in the call load that human agents must handle, allowing employees to efficiently tackle more unique and complex problems raised by customers.”
Using AI-driven automatic speech recognition services, CP All’s customer phone calls are transcribed in real time. When a customer service bot recognizes a question based on the NVIDIA-powered intelligent FAQ system, it immediately provides an answer using text-to-speech technologies.
Otherwise, the AI quickly analyzes and routes calls to the appropriate employee who can assist in resolving the query in its specific business domain. CP All has also automated all e-commerce order-tracking inquiries using AI.
Adapting to the Thai Language
When first exploring conversational AI, the CP All team faced the challenge of getting the model to recognize the nuances of the Thai, Wu said.
Standard Thai uses 21 consonants, 18 pure vowel sounds, three diphthongs and five tones — making it a complex language. NVIDIA NeMo — a framework for building, training and fine-tuning GPU-accelerated speech and natural language understanding models — helped CP All work through the intricacies.
“The toolkit’s pretrained models and tools made the process of deploying our service much less daunting,” said Wu. “With the help of NeMo, we were able to quickly build and improve our AI language models, which are now optimized to understand and speak the unique Thai language.”
According to Wu, the NeMo framework enabled a 97 percent accuracy in CP All’s Thai language models, more than tenfold the accuracy achieved previously.
Looking forward, CP All plans to expand its AI services to more business domains and scale to millions of concurrent sessions on NVIDIA GPU inference architecture.
Learn more at CP All’s panel at GTC, running March 21-24.
The post Talking the Talk: Retailer Uses Conversational AI to Help Call Center Agents Increase Customer Satisfaction appeared first on The Official NVIDIA Blog.
What’s next for deep learning?
Integrating symbolic reasoning and learning efficiently from interactions with the world are two major remaining challenges, says vice president and distinguished scientist Nikko Ström.Read More
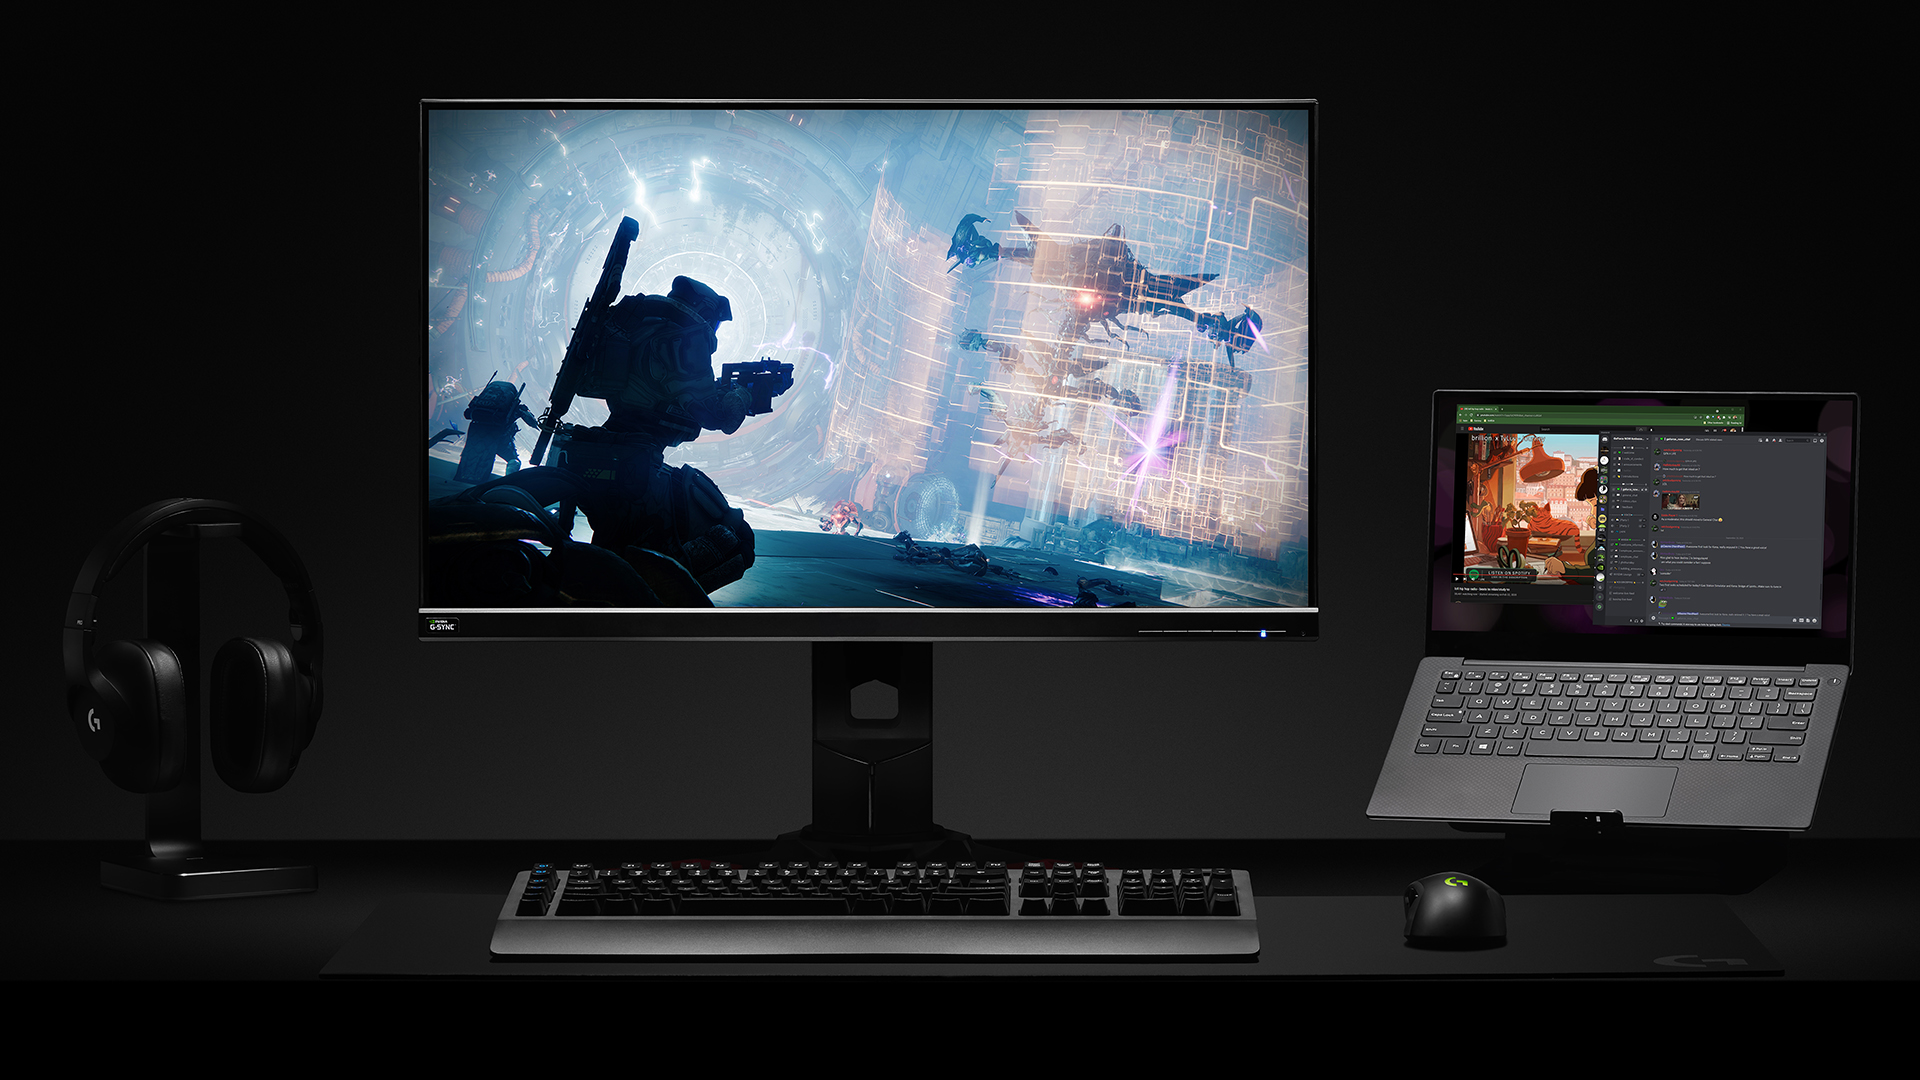
How to Make the Most of GeForce NOW RTX 3080 Cloud Gaming Memberships
This is, without a doubt, the best time to jump into cloud gaming.
GeForce NOW RTX 3080 memberships deliver up to 1440p resolution at 120 frames per second on PC, 1600p and 120 FPS on Mac, and 4K HDR at 60 FPS on NVIDIA SHIELD TV, with ultra-low latency that rivals many local gaming experiences.
All RTX 3080 members will experience benefits of the new service level by default — reduced latency, longer session lengths, smoother streams, dedicated access to a high-performance cloud gaming rig — and there are additional ways to make the most of your membership.
Understanding Resolution and FPS
Today’s PC gaming visuals are nothing short of extraordinary. Advancements in ray tracing simulate lighting and shadows to create stunning, photographic scenes, resulting in realism and deeper gaming immersion.
Resolution is the size of the image, measured in pixels. A pixel is the smallest physical point on a display, the building block of any onscreen visual. A larger number of pixels, or “higher resolution,” delivers sharper details and visuals that can accommodate a wider variety of colors, leading to stunning graphics.
Standard HD monitors are 1080p resolution, 1920 pixels wide by 1080 pixels tall. Displays with 1440p, aka 2K screens, are 2560 x 1440 and contain 4x more pixels than HD for incredible graphical fidelity. Some newer Macbooks have 1600p resolution displays — a 2560 × 1600 pixel count.
FPS measures the number of times an image is rendered or redrawn per second onscreen by the graphics card.
Refreshes must be extremely quick to represent fluid, smooth movement. Key frame rates include 30, 60 and 120 FPS. These thresholds are leaps in performance that have matched new generations of displays.
How come every game can’t play at 4K resolution and 120 FPS? Simply put, there are trade-offs.
GPUs and CPUs working in tandem perform a variety of tasks, such as rendering graphics, particle effects like explosions, and visual effects, all of which become exponentially harder when graphical settings are maximized.
Most game developers prioritize delivering buttery-smooth graphics by perfecting frame rate. From there, they increase resolution and FPS for the best possible visual experience.
With a handful of hardware checks, you can unlock the maximum resolution and FPS with a GeForce NOW RTX 3080 membership, beginning with the display.
Setup the Display to Unlock 1440p (or 1600p) at 120 FPS
Start by maximizing the display resolution.
On most Windows PCs, click the Start button, Control Panel, and then, under Appearance and Personalization, select Adjust screen resolution. Then, click the drop-down list next to Resolution, move the slider to the highest resolution and click Apply. On Mac, choose the Apple menu, then System Preferences > Displays > Scaled, then choose the highest resolution.
Next, unlock a maximum of 120 FPS.
While some games are capable of 120 FPS, the display needs the capability to refresh just as fast. This is measured in Hertz. The higher the display Hertz, or Hz, the smoother and more responsive gameplay feels.

Some displays have a refresh rate higher than 120Hz. On these displays, members will still stream at up to 120 FPS. But the higher refresh rate helps lower click-to-pixel latency, which refers to the amount of time it takes from a physical action, like pressing a controller button in a soccer game, to when it’s reflected on the screen, like the player attempting a shot.
Lower click-to-pixel latency adds responsiveness to fast-paced games and is especially critical for competitive gamers, where milliseconds can be the fine margin separating victory and defeat.
Members have the option to play at 120 FPS on a laptop with a 120Hz display, such as the newly announced MacBook Pros, or connect to a compatible 120Hz+ display, such as NVIDIA G-SYNC monitors.
To change the refresh rate on PC, click the Start button, then Settings > System > Display > Advanced display settings, selecting Refresh rate and the desired Hertz. On Mac, select the Apple menu, access System Preferences, click Displays, navigate the Refresh Rate pop-up menu and choose the requisite Hertz. For further details, visit Windows Central or Apple Support.
To connect to a 120Hz+ display, check the laptop for a compatible video port.
One of the following will work for PC: USB-C (DisplayPort or Thunderbolt), HDMI (1.4 for 1080p, or HDMI 2.0 or later for 1440p) DisplayPort 1.2 and Mini DisplayPort 1.2.

On Mac, look for a USB-C, Thunderbolt (1/2/3), HDMI (1.4 for 1080p, or HDMI 2.0 or later for 1440p), Mini DisplayPort 1.2 or USB 4 port.

Next, look for a compatible port on the monitor. Any of the above will do.
Identifying ports can be tricky, but Digital Trends and Apple have useful articles for PC and Mac, respectively.
To finish, simply acquire the necessary cable and connect devices by plugging them in.
Combinations of cables and connections will work, like HDMI to HDMI or USB-C to DisplayPort. However, performance may vary slightly.
According to testing, the optimal connection to maximize graphics performance on laptops is USB-C to DisplayPort. With Mac, a USB-C (Thunderbolt) adaptor to Thunderbolt to DisplayPort connection works best.
Some laptops can connect with a simple docking station or a hub, but double check as not all can output maximum resolution and FPS.
For a complete guide of compatible connectors, read our support articles for Windows and macOS.
Maximize Streaming Settings on PC and Mac
With hardware sorted out, adjust streaming settings.
GeForce NOW has a convenient built-in network test that automatically detects the best streaming settings, but only up to 1080p at 60 FPS. This happens in the cloud, so gamers get a great experience and can jump in to play immediately. If the test determines an internet connection can’t maintain resolution, GeForce NOW may select a lower resolution.
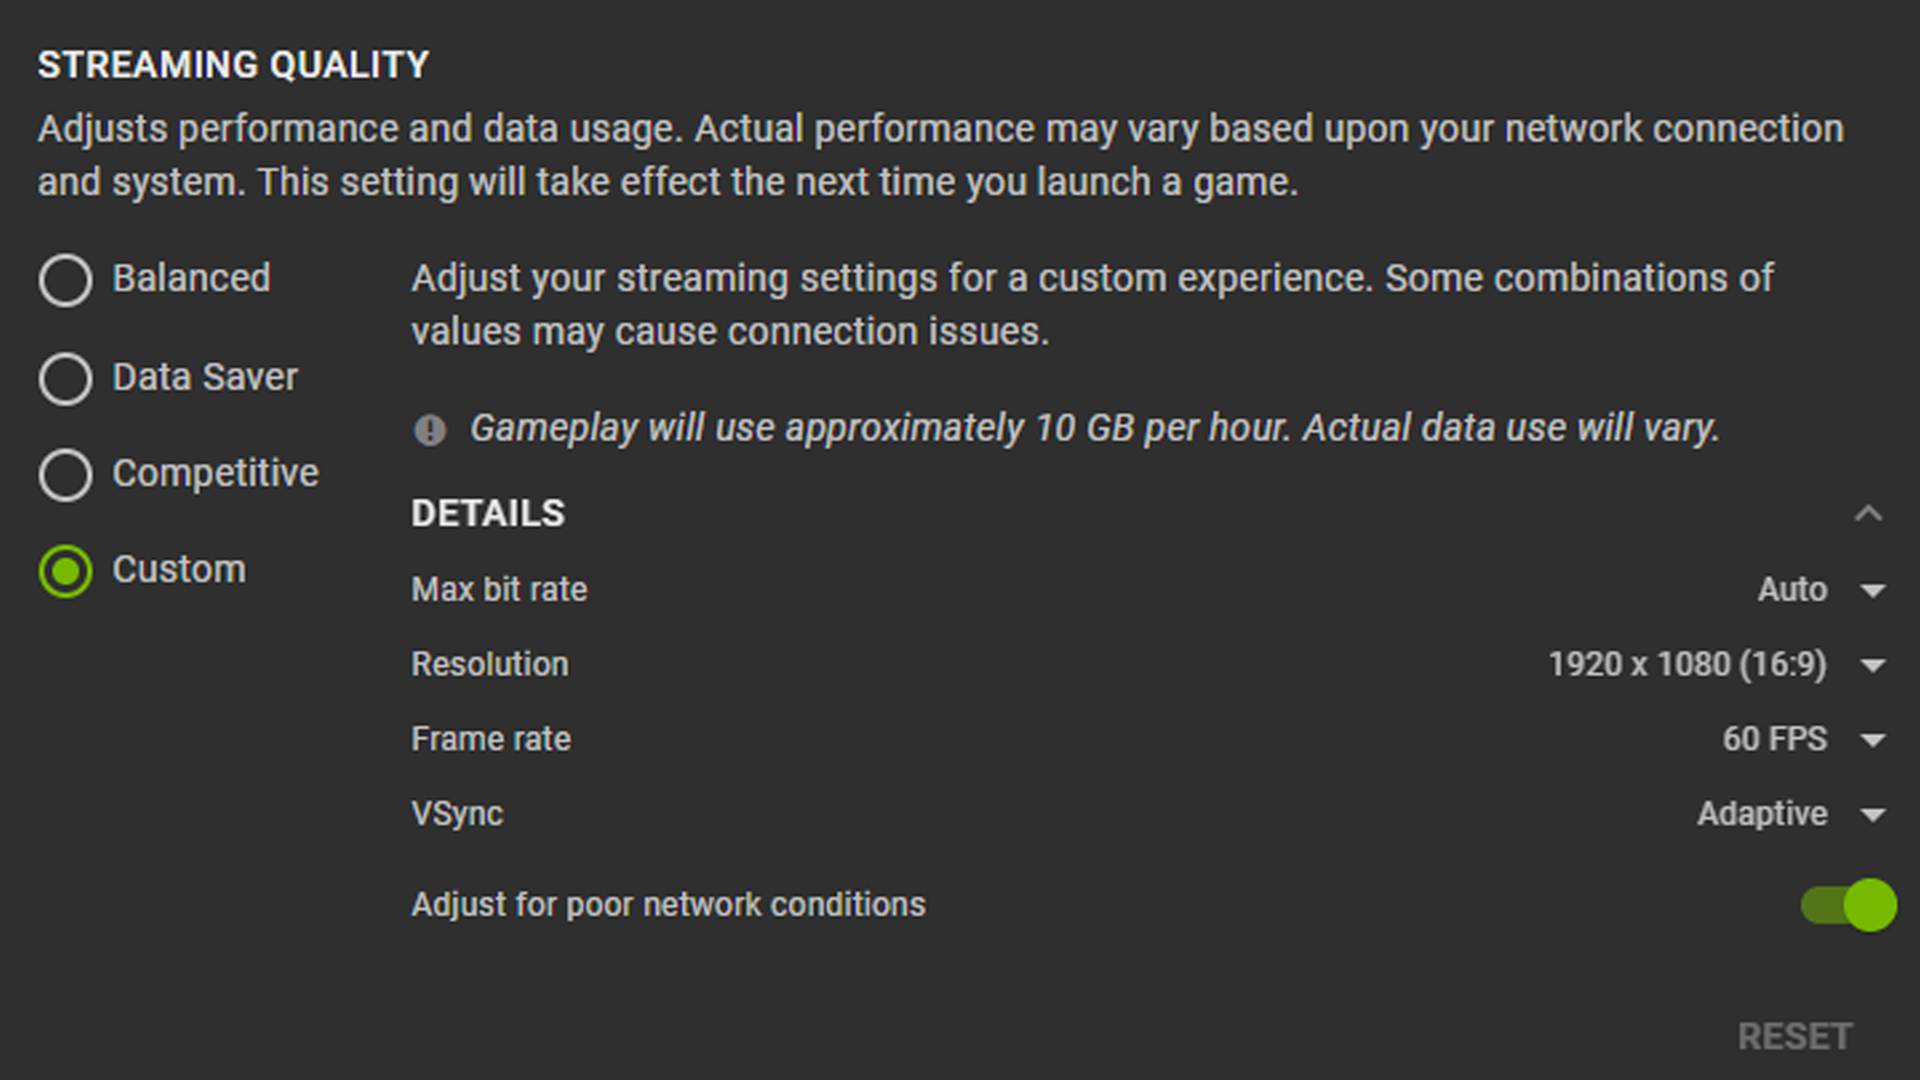
For maximum resolution, open the GeForce NOW app, go to Settings, Streaming Quality and select Custom. This will open the Details drop-down menu where Resolution can be adjusted to match the maximum size — 1440p for PC and iMacs, and 1600p on select Macbooks.
Cranking FPS up to 120 requires slight modifications.
- Open GeForce NOW, go to Settings, Streaming Quality and select Custom mode.
- Change Max bit rate to Auto (our recommendation) or select the desired value.
- Set Frame Rate to 120 FPS or higher. If the display can output 144Hz, set to 144 FPS.
- Select VSync and choose Adaptive for good latency and smooth streaming. Turning Vsync off may lower latency even further, but may cause video tearing during gameplay.
Game settings in GeForce NOW are automatically optimized for 1440p and 120 FPS in our most popular games. Changes shouldn’t be needed to get the best in-game experience.
Feel free to change settings as needed. To save custom in-game graphics, open Settings and turn on IN-GAME GRAPHICS SETTINGS. Otherwise, graphics will revert back to recommended settings.

Maximizing display settings will differ depending on the platform.
Streaming on SHIELD TV With 4K HDR
GeForce NOW members can play PC games with 4K resolution and HDR at 60 FPS in exceptional 5.1 or 7.1 surround sound on SHIELD TV.
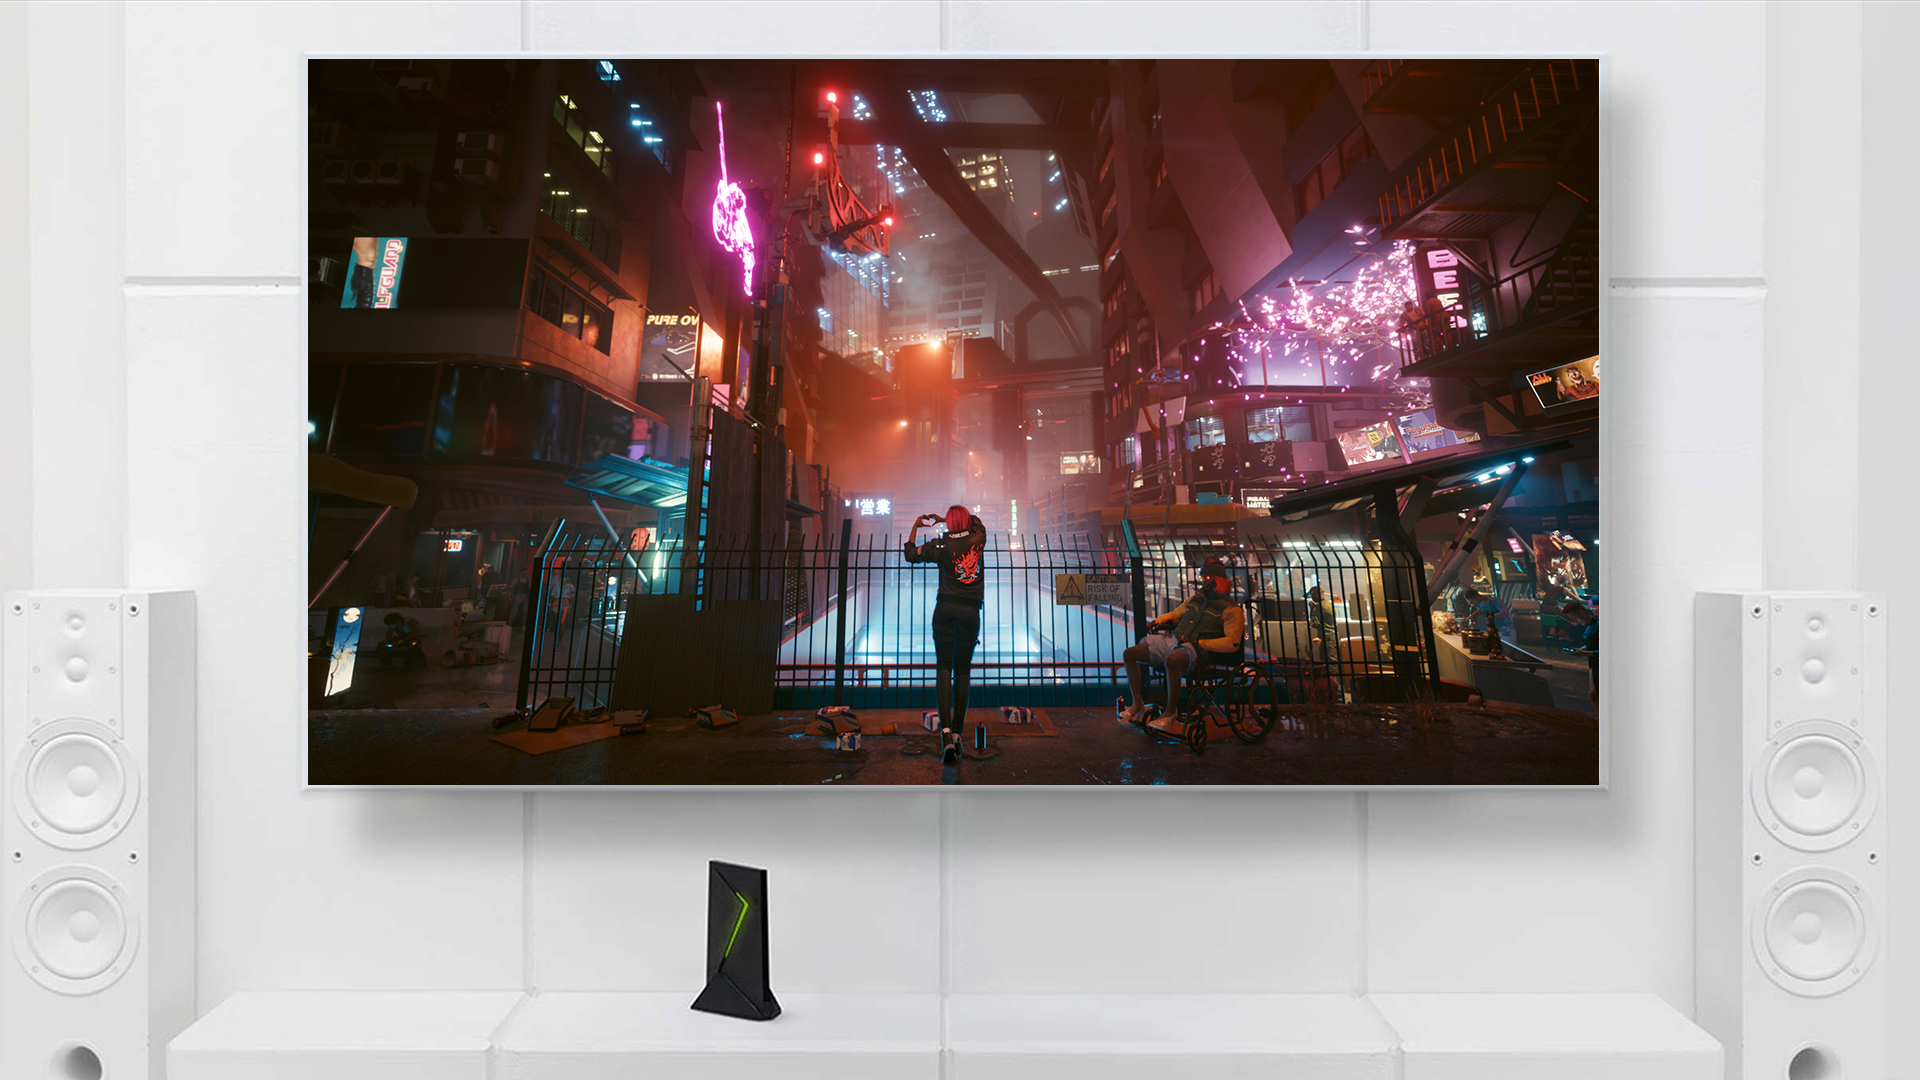
Setup is quick and easy. On a TV that is 4K-HDR-compatible, access the menu, click Settings > Stream Quality and run a network test.
GeForce NOW optimizes graphics settings for the most popular games to stream 4K HDR at 60 FPS on SHIELD. No changes to settings are needed. Similar to PC and Mac, settings can be saved with the Save my changes feature.
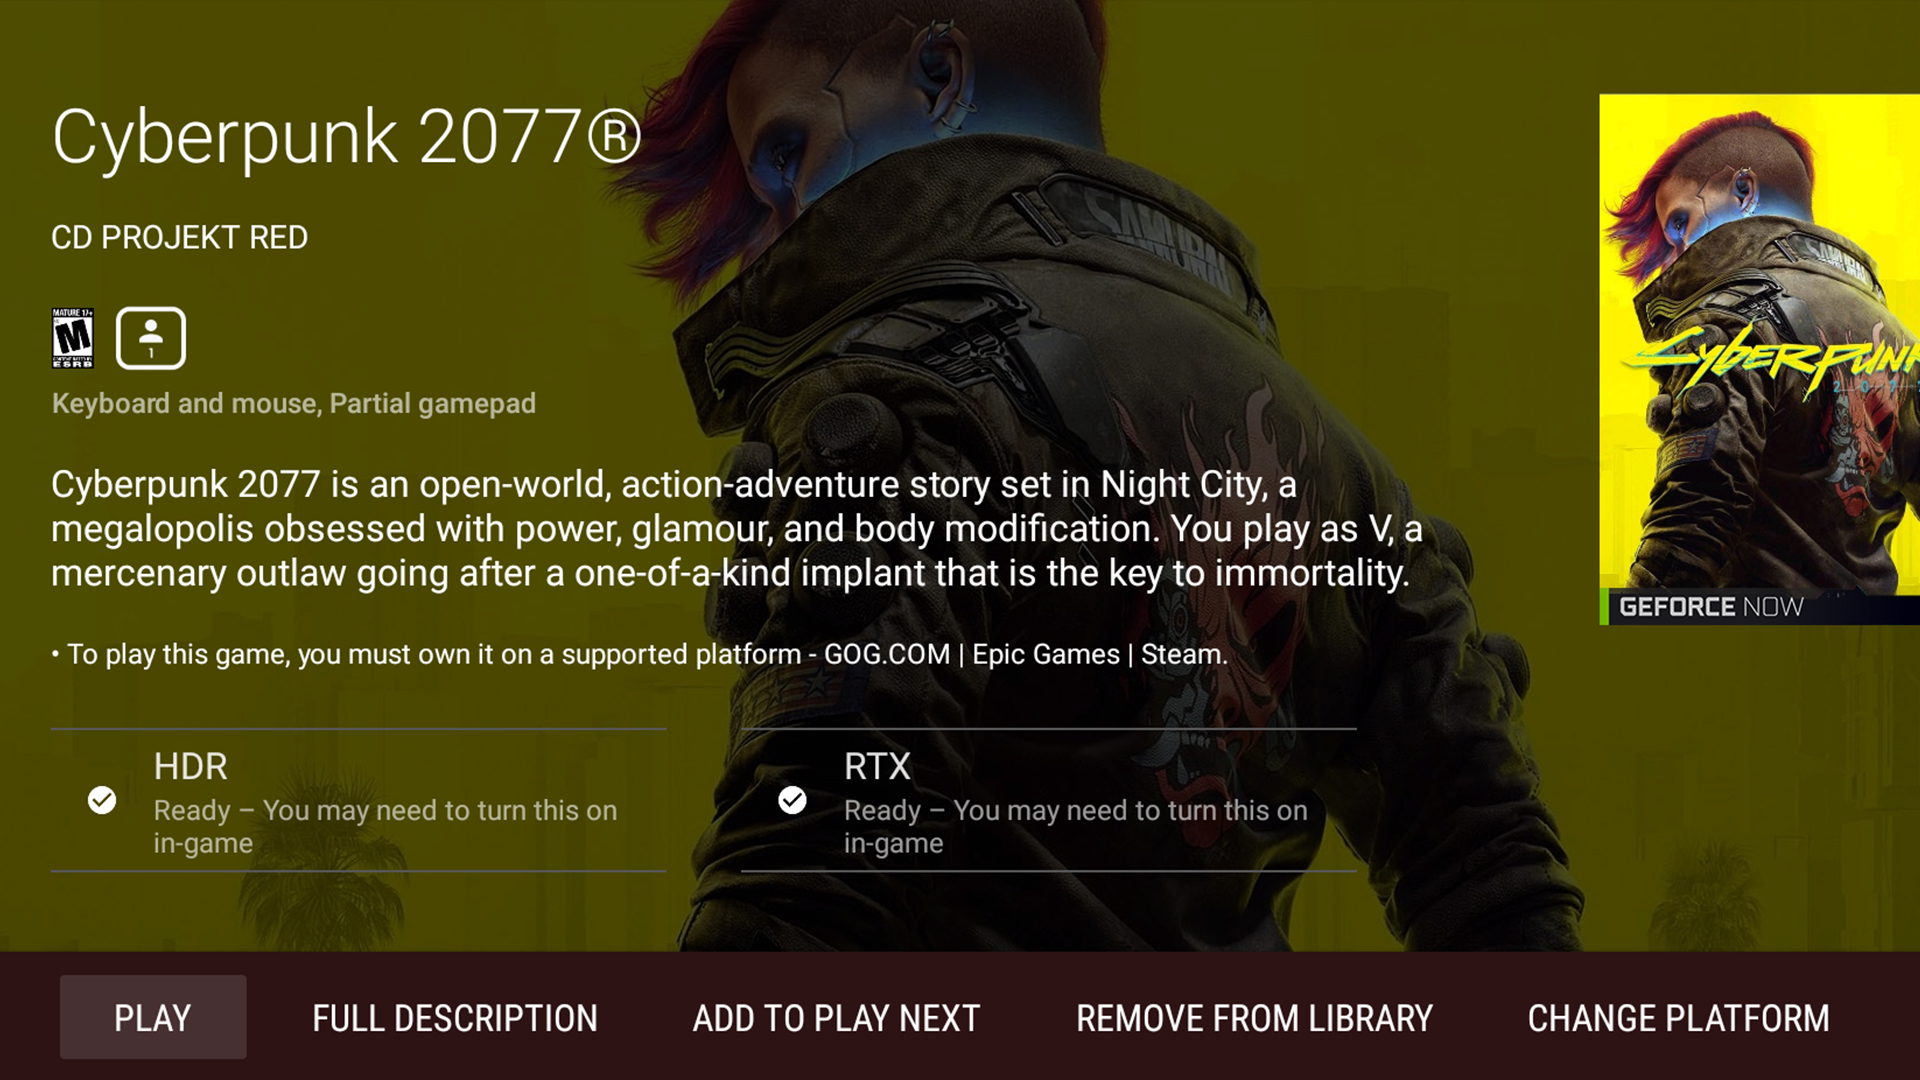
To play HDR-compatible games, look for the HDR badge. The GeForce NOW team configures HDR games individually, and will continue to onboard new titles in the coming months.
GeForce NOW provides gamers the freedom to save games in the cloud, then pick up and play on the go, retaining a true PC experience.
GeForce NOW at 120 FPS on Android Mobile Devices
GeForce NOW RTX 3080 memberships stream at up to 120 FPS on select Android devices.
Supported phones include the Google Pixel 6 Pro and Samsung S20 FE EG, S21, S21+, S21 Ultra and Note20 Ultra 5G, with plans to add new phones and tablets over time.

Not all phones enable 120Hz by default. It’s the maximum performance, which some users don’t need, and can reduce battery life.
Enable 120Hz for Samsung devices by following these instructions — or check out the phone’s user guide.
With game settings adjusted, it’s game time, hoop!
With Great Internet Comes Ultra-Low Latency
As a cloud gaming service, GeForce NOW benefits from a strong internet connection.
PC and Mac need at least 35mbps for streaming up to 1440p or 1600p at 120 FPS. SHIELD TV requires 40mbps for 4K HDR at 60 FPS. And Android requires 15mbps for 720p at 120 FPS, or 25mbps for 1080p at 120 FPS.
We strongly recommend a hardwired Ethernet connection. A 5GHz WiFi connection also provides a great gaming experience.
Check out the recommended routers automatically optimized for GeForce NOW.
Next, run the GeForce NOW in-app network test to measure latency by opening GeForce NOW, navigating to Server Location and selecting Test Network.
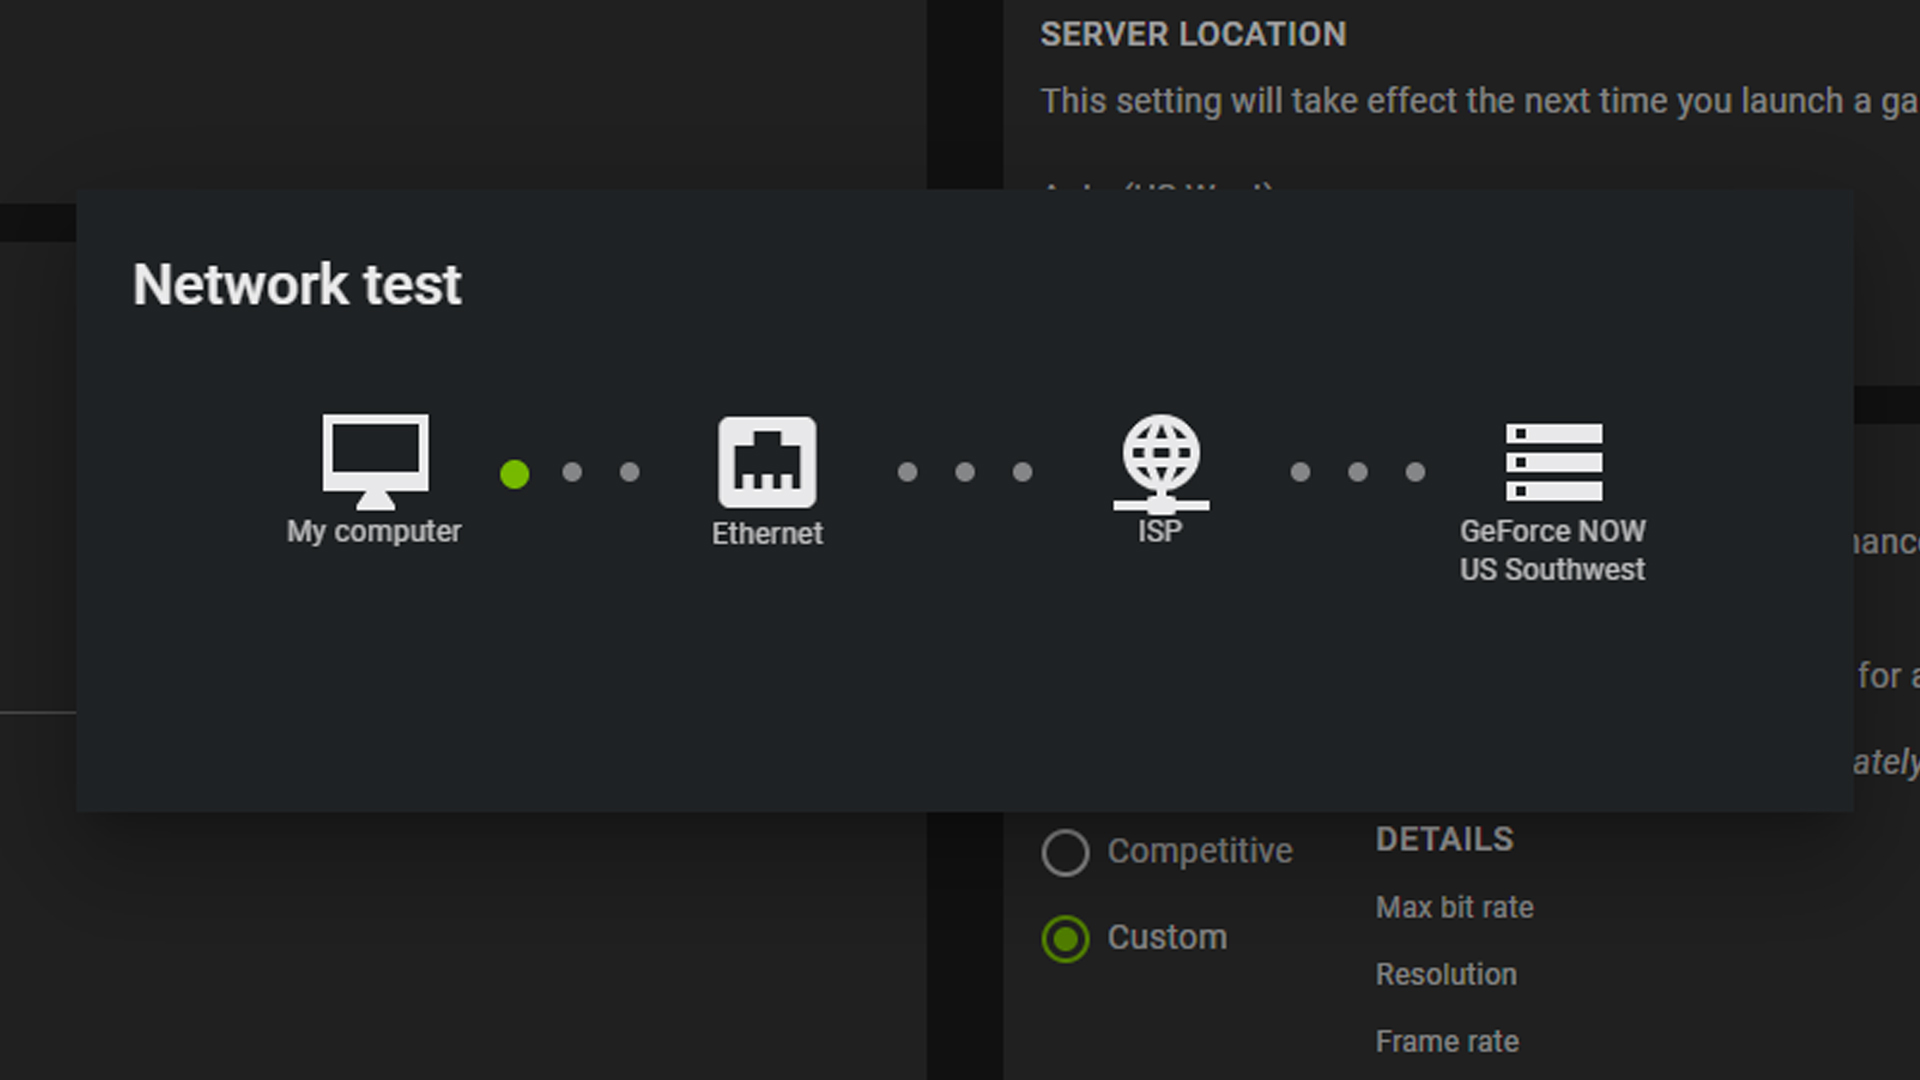
Internet service provider and proximity to the closest server are two variables that can impact the overall experience — and are likely out of most members’ control. But there are ways to improve the home network setup for a top-tier cloud gaming experience.
Read more about reducing latency in cloud gaming.
Get Gaming in GeForce RTX 3080
Interested in RTX 3080 in the cloud? Be sure to check the regional availability website to confirm memberships are available in your country and determine if the server closest to you has been upgraded to the new GeForce NOW RTX 3080 cloud gaming rigs.
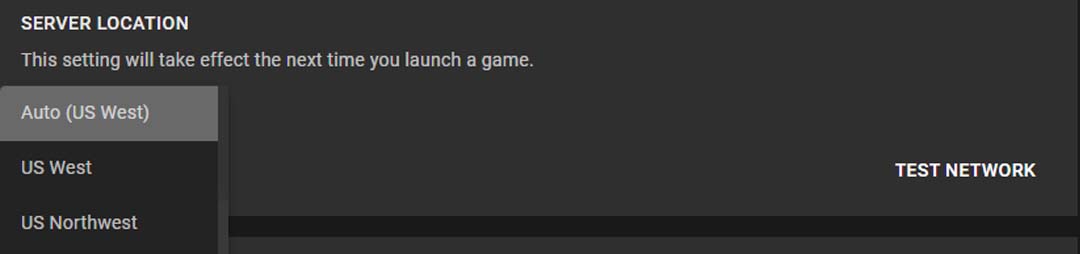
If not, run a network test to the closest RTX 3080-enabled server to determine if the ping time is acceptable.
Now that you’ve mastered the basics, it’s time to give the cloud everything you’ve got. Ready? Begin.
Follow GeForce NOW on Facebook and Twitter, and check out the GeForce NOW blog every GFN Thursday, to stay up to date on the latest features and game launches.
The post How to Make the Most of GeForce NOW RTX 3080 Cloud Gaming Memberships appeared first on The Official NVIDIA Blog.