Robots are great specialists, but poor generalists. Typically, you have to train a model for each task, robot, and environment. Changing a single variable often requires starting from scratch. But what if we could combine the knowledge across robotics and create a way to train a general-purpose robot?Read More
Robots are great specialists, but poor generalists. Typically, you have to train a model for each task, robot, and environment. Changing a single variable often requires starting from scratch. But what if we could combine the knowledge across robotics and create a way to train a general-purpose robot?Read More
Robots are great specialists, but poor generalists. Typically, you have to train a model for each task, robot, and environment. Changing a single variable often requires starting from scratch. But what if we could combine the knowledge across robotics and create a way to train a general-purpose robot?Read More
Robots are great specialists, but poor generalists. Typically, you have to train a model for each task, robot, and environment. Changing a single variable often requires starting from scratch. But what if we could combine the knowledge across robotics and create a way to train a general-purpose robot?Read More
Robots are great specialists, but poor generalists. Typically, you have to train a model for each task, robot, and environment. Changing a single variable often requires starting from scratch. But what if we could combine the knowledge across robotics and create a way to train a general-purpose robot?Read More
Robots are great specialists, but poor generalists. Typically, you have to train a model for each task, robot, and environment. Changing a single variable often requires starting from scratch. But what if we could combine the knowledge across robotics and create a way to train a general-purpose robot?Read More
Editor’s note: This post is part of our weekly In the NVIDIA Studio series, which celebrates featured artists, offers creative tips and tricks, and demonstrates how NVIDIA Studio technology improves creative workflows. We’re also deep-diving on new GeForce RTX 40 Series GPU features, technologies and resources and how they dramatically accelerate content creation.
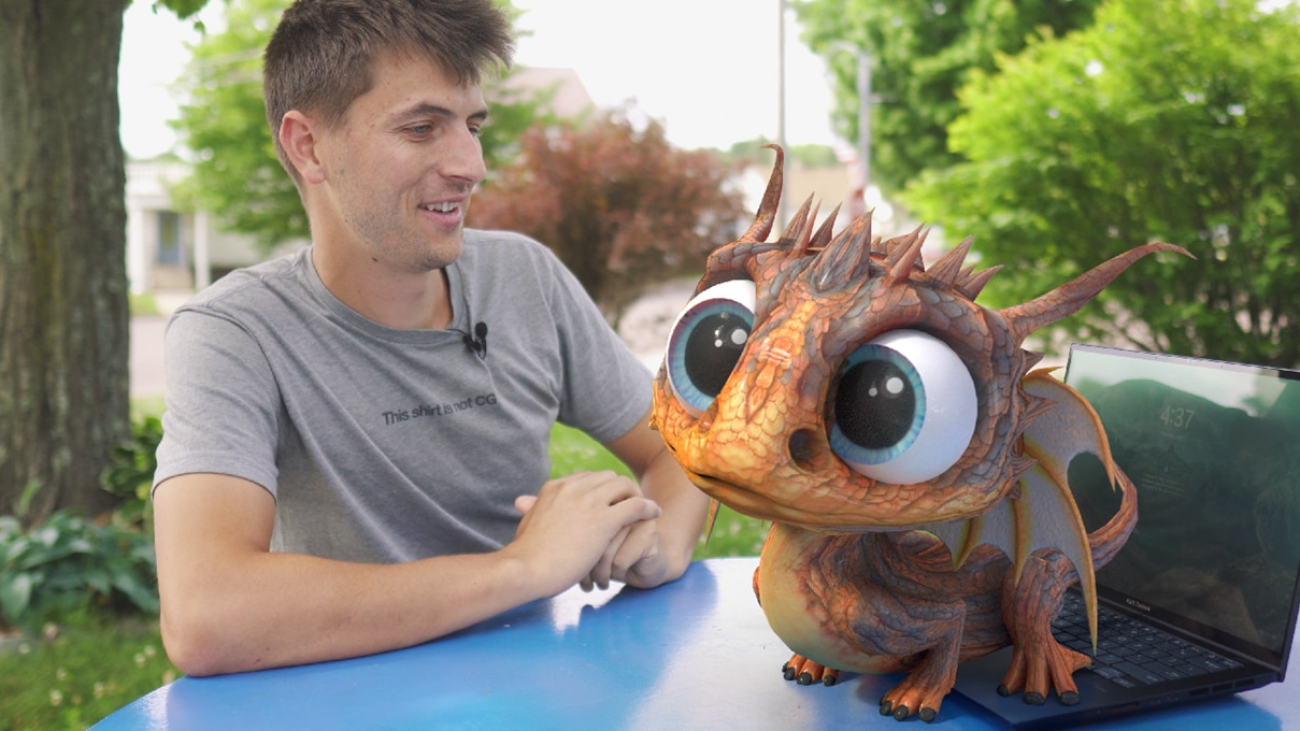
Releasing a 3D tutorial dubbed The Easiest VFX Tutorial Ever takes supreme confidence and the skills to back it up.
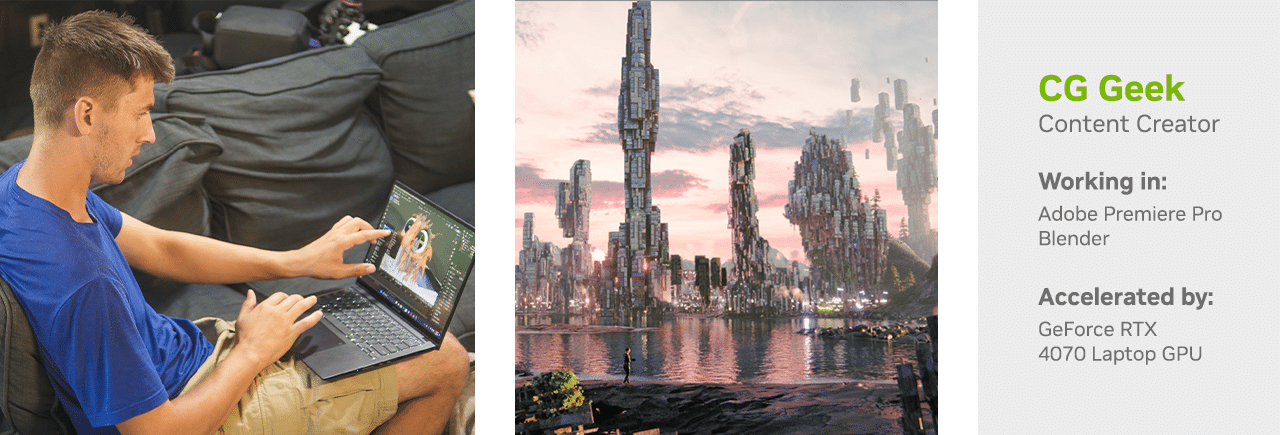
Steve Lund a.k.a. CG Geek — the featured artist of this week’s In the NVIDIA Studio installment — has both in spades. It’s no surprise that over 1 million people have subscribed to his YouTube channel, which features tutorials on animation and visual effects (VFX) as well as select tech reviews.
CG Geek has been a content creator for over 13 years, starting with videos on stop-motion animation before moving on to 3D software. Films and movies are his primary sources of inspiration. He grew up creating short films with his family — experimenting with and implementing video effects and 3D characters — which became a critical foundation for his current work.
Artists can strengthen their creative arsenal with the new Microsoft Surface Laptop Studio 2, available for pickup today. It’s powered by GeForce RTX 4060, GeForce RTX 4050 or NVIDIA RTX 2000 Ada Generation Laptop GPUs with 13th Gen Intel Core processors, up to 64GB of RAM and a 2TB SSD. It features a bright, vibrant 14.4-inch PixelSense Flow touchscreen, a 120Hz refresh rate, and Dolby Vision IQ and HDR to deliver sharper colors.
The versatile Microsoft Surface Laptop Studio 2.
The Easiest VFX Tutorial Ever
CG Geek also happens to be a geek for Blender, free for 3D enthusiasts, who regularly create impressive, individualistic art.
“I love the amazing Blender 3D community,” he said. “Whenever you need inspiration or creative feedback, they’re the most helpful, kind and talented collective of ever-growing artists.”
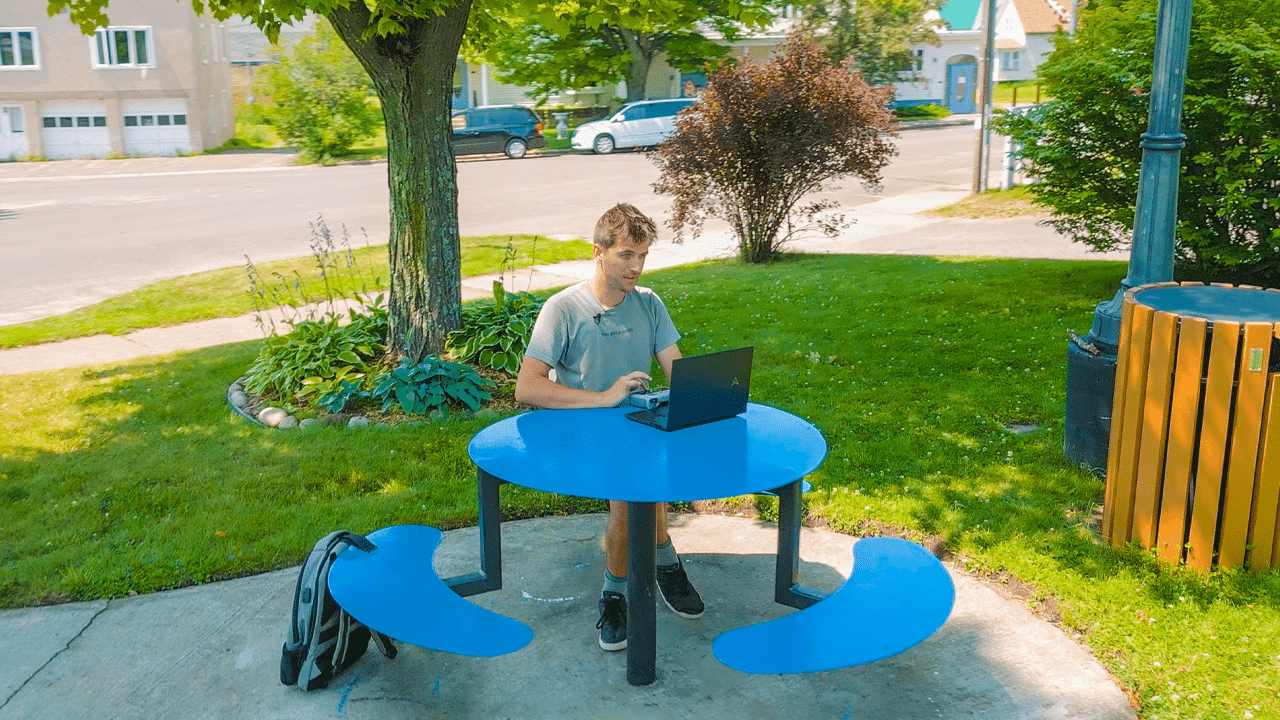
CG Geek wanted to make a tutorial that could prove that virtually anyone could get started in VFX with relative ease, from anywhere, at any time.
Work on VFX from anywhere — even the outdoors.
The first step, he instructs, is to capture video footage. To keep things simple, CG Geek recommends mounting a camera or mobile device to a tripod. Note that the camera lens determines the focal length and sensor size — critical details to input in Blender later in the process.
Keep track of the camera’s focal length and sensor size.
Keep a close eye on the video footage lighting for shadows and light intensity — it helps to snap a straight-down photo of the environment the 3D element will populate, namely for light bounces, to help create more realistic shadows.
Seasoned visual effects artists can capture and scan the entire 3D area.
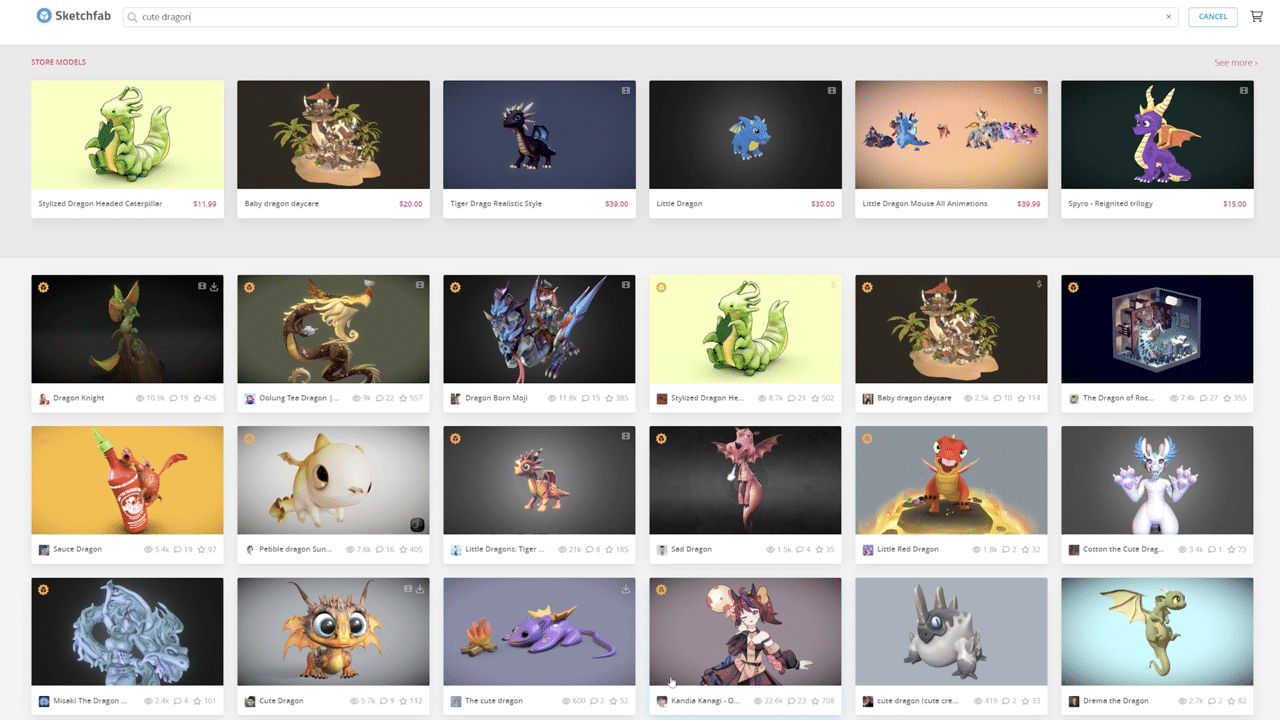
Next, secure a 3D model. Create one with guidance from an NVIDIA Studio blog or watch detailed tutorials on the Studio YouTube channel. Alternatively, look online for a 3D model equipped with basic physically based rendering materials, as well as a roughness and normal map.
Sketchfab is an excellent resource for acquiring 3D models.
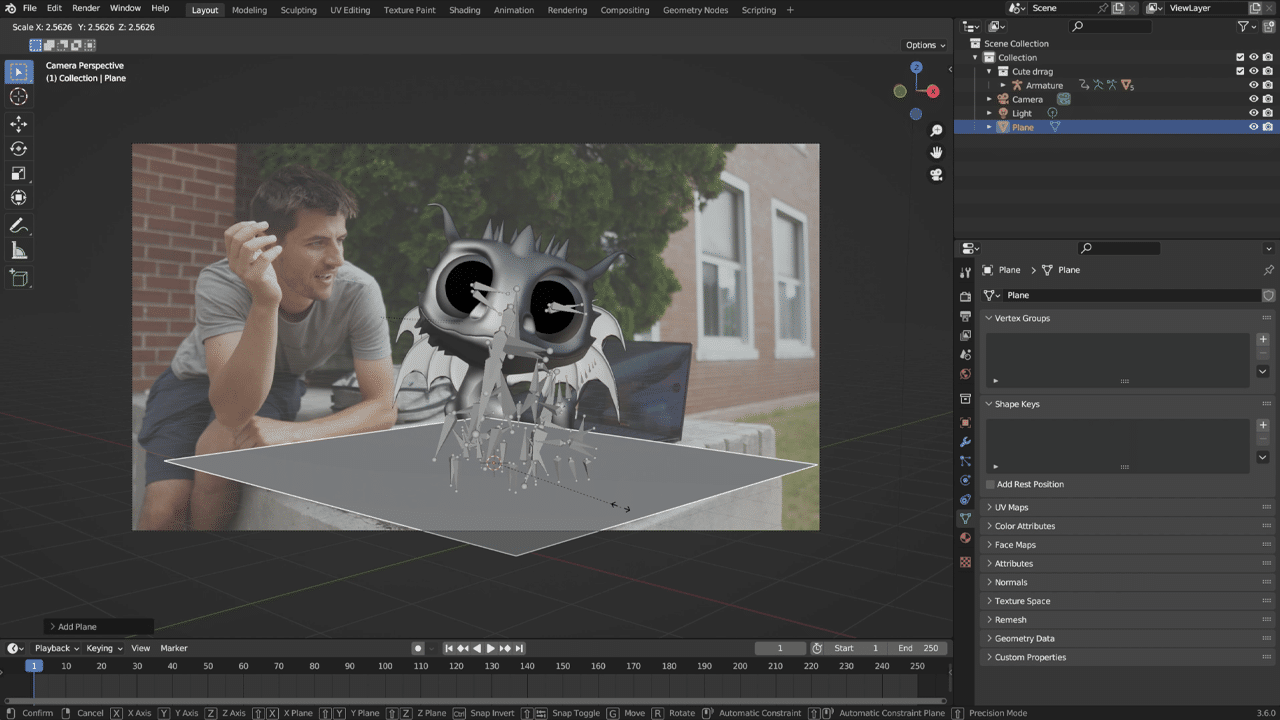
Next, combine the video footage and 3D materials. Open Blender, import the video footage and line up the 3D grid floor to the surface where the model will be presented. The 3D grid doubles as a shadow catcher that will grab the shadows being cast from the 3D elements. With an added texture, lighting will bounce back against the object, resulting in heightened realism.
The 3D grid floor will determine where the 3D model will be placed.
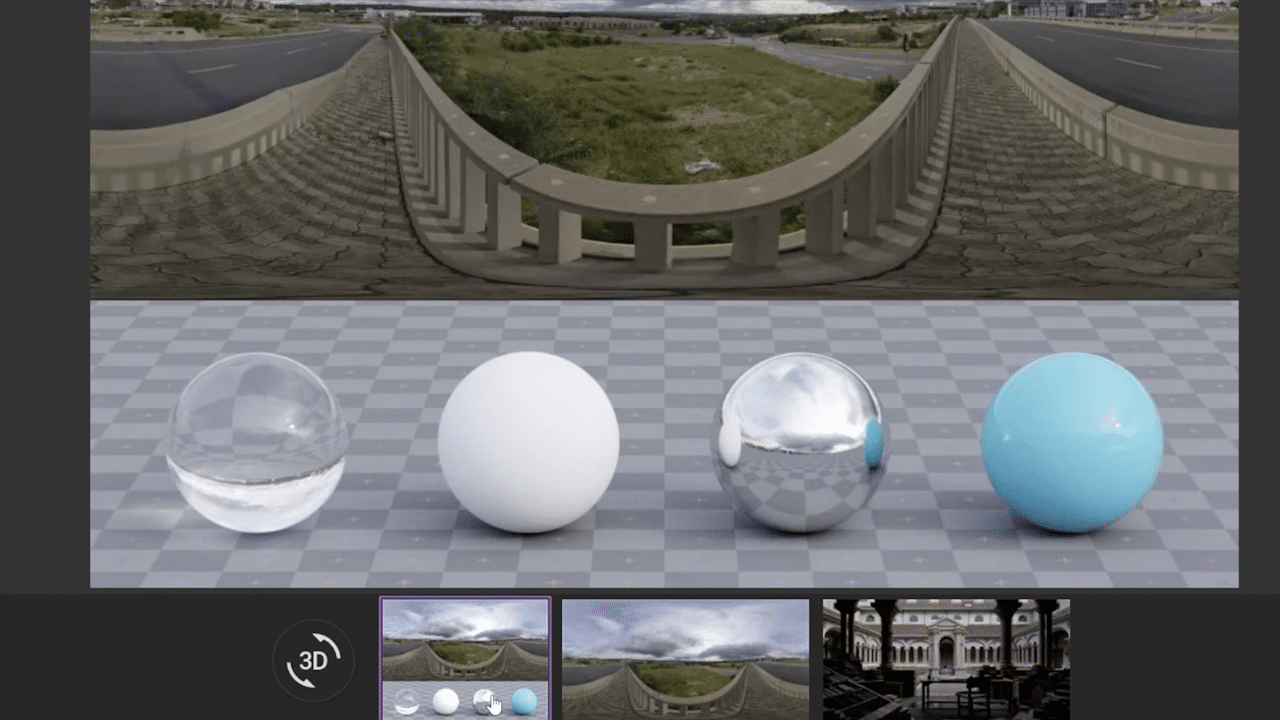
Then, light the 3D model to match the video footage. Most commonly, this is achieved by acquiring a high-dynamic range image (HDRI), a panorama with lighting data. CG Geek recommends Poly Haven for free, high-quality HDRIs. The key is picking one that resembles the lighting, color, shadow and intensity of the video footage.
Poly Haven has HDRIs for use in VFX work.
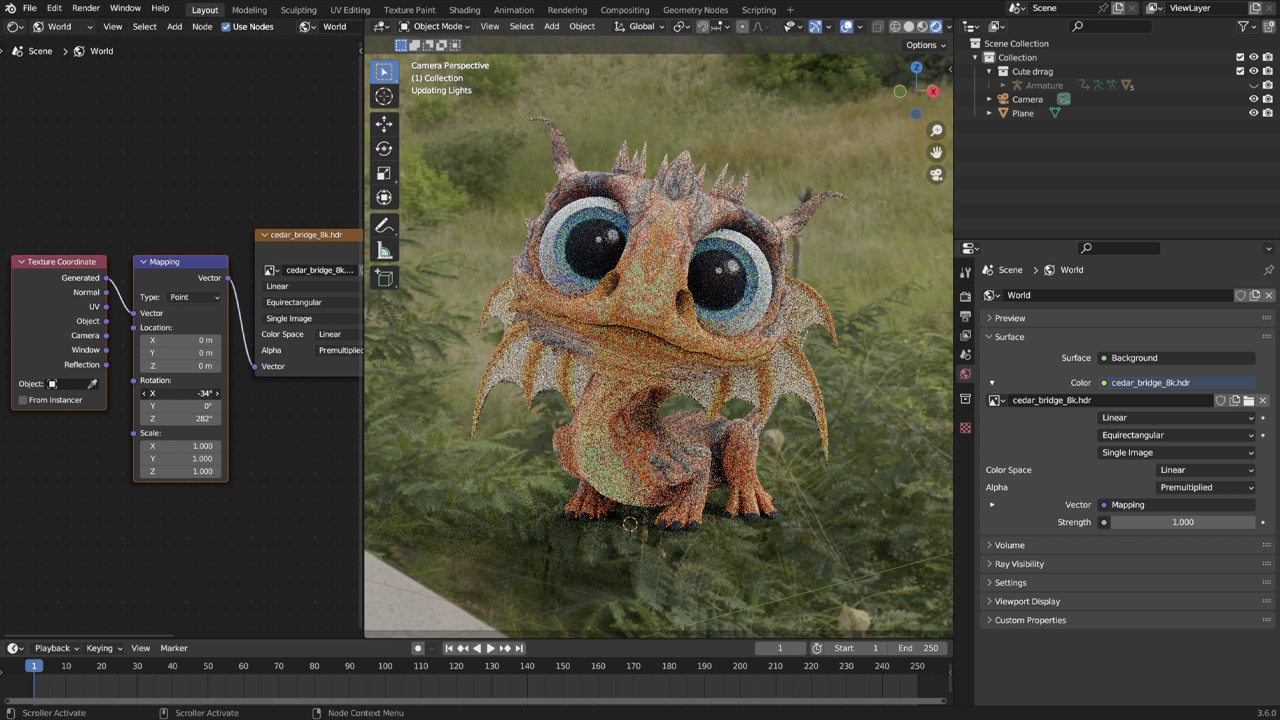
Use the HDRI lighting to align the sun’s rotation with the shadows of the footage, adding further realism.
Lighting adjustments in Blender.
From there, import camera information into Blender and render out passes for the 3D model over a transparent background in Cycles. Create as many render layers as possible for added post-render editing flexibility, especially in compositing. Shadowcatcher, glossy passes, Z depth and ambient occlusion layers are recommended for advanced users.
Speedy renders in Blender on NVIDIA Studio hardware.
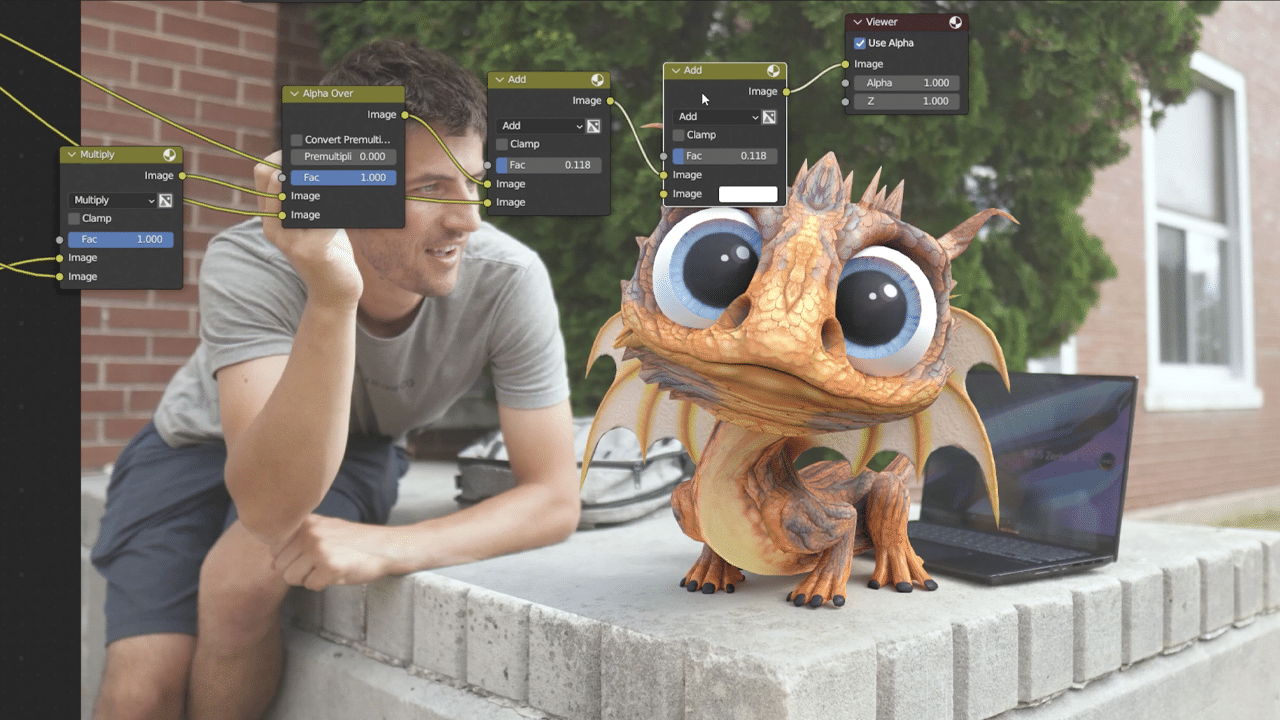
These layers can then be combined in popular creative apps like Adobe Premiere Pro, After Effects, Blackmagic Design’s DaVinci Resolve or any of the over 100 NVIDIA RTX GPU-accelerated apps. This workflow, in particular, will be completed in Blender’s custom compositor.
Speedy renders in Blender.
Add shadows to the live footage with a multiple overlay. Then, carry over the 3D elements render layer to adjust the intensity of the shadows, helping them mesh better with the video capture. Individual layers can be edited to match the desired tone.
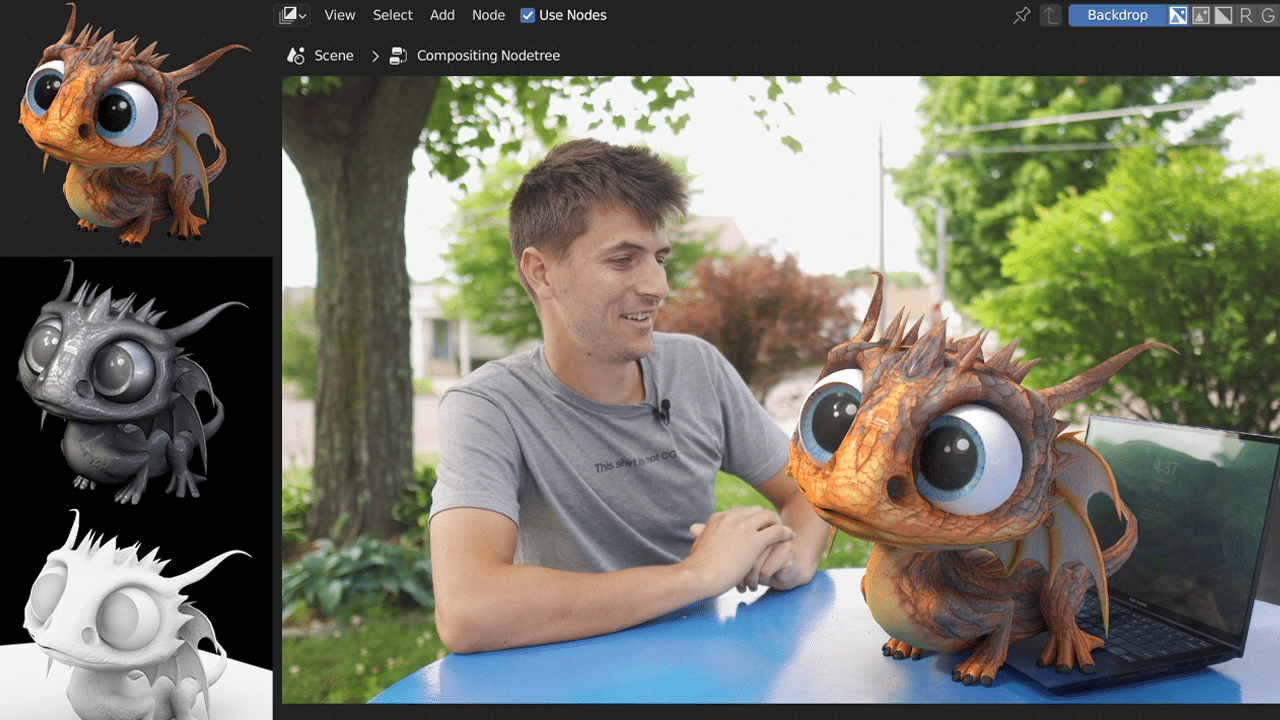
CG Geek made use of Blender Cycles’ RTX-accelerated OptiX ray tracing in the viewport. “Rendering in Cycles with multiple render layers and passes, along with the NVIDIA OptiX Denoiser, made animations and early tests a breeze,” he said.
“All my rendering changes can be visualized in real time thanks to the power of NVIDIA Studio before ever even hitting that button.” – CG Geek
Finally, perform simple masking on areas where the 3D model passes in front of or behind objects. CG Geek’s one-minute YouTube tutorial can help guide this process. DaVinci Resolve or Premiere Pro’s AI-powered magic mask features can further speed the process by automatically masking background elements, saving the effort of painstakingly editing videos frame by frame.
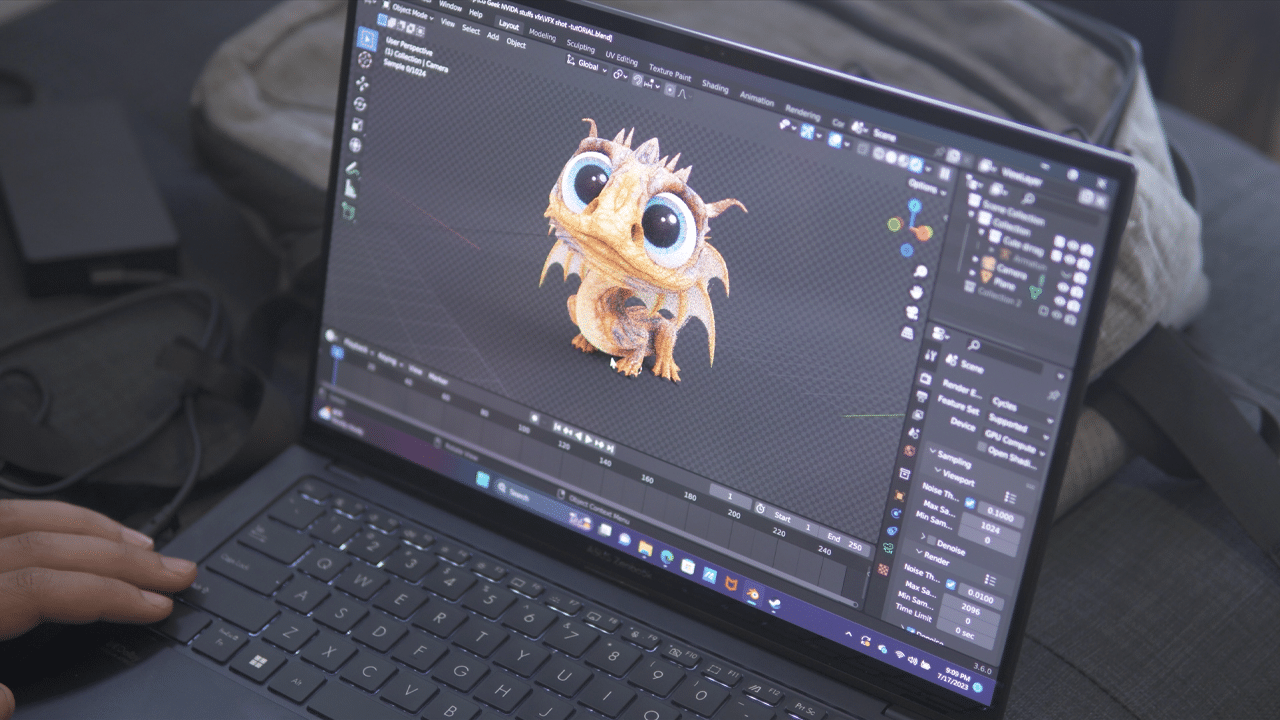
These AI features are all accelerated by the GeForce RTX 4070 GPU equipped in CG Geek’s ASUS Zenbook 14 NVIDIA Studio laptop.
An entire workflow in a single shot.
“NVIDIA Studio laptops powered by RTX GPUs are great for portability and speed in a compact form factor.” – CG Geek
For CG Geek, getting reps in, making mistakes and strengthening weaknesses are the keys to evolving as an artist. “Don’t get hung up on the details!” he stressed. “Give yourself a deadline and then get started on another project.”
For more on the basics of 3D VFX and CGI with Blender, accelerated by the NVIDIA Studio platform and RTX GPUs, watch his featured five-minute tutorial.
The focus on interactive chat-generation (or conversational response-generation) models has greatly increased in the past several months. Conversational response-generation models such as ChatGPT and Google Bard have taken the AI world by storm. The purpose of interactive chat generation is to answer various questions posed by humans, and these AI based models use natural language processing (NLP) to generate conversations almost indistinguishable from those generated by humans.
This article showcases a code sample on how to create interactive chats based on a pre-trained DialoGPT model from Hugging Face with the addition of the Intel® Extension for PyTorch to perform dynamic quantization on the model.
Get Started
Why DialoGPT?
DialoGPT (Dialogue Generative Pre-trained Transformer) is a large-scale, pre-trained dialogue-response-generation model trained on 147M conversation-like exchanges pulled out from Reddit comment chains and discussion threads. DialoGPT was proposed by Microsoft in 2019. The main goal was to create open-domain chatbots capable of producing natural responses to a variety of conversational topics. The conversational response-generation systems that leverage DialoGPT generate more applicable, resourceful, diverse, and context-specific replies.
DialoGPT Architecture
DialoGPT architecture is based on the GPT-2 model. It is formulated as an autoregressive language model and uses a multi-layer transformer as the model architecture. GPT-2 was proposed by OpenAI. GPT-2 models are trained on general text data whereas DialoGPT is trained on Reddit discussion threads.
Let’s look at the GPT-2 architecture. There are two types of blocks in general transformer architecture:
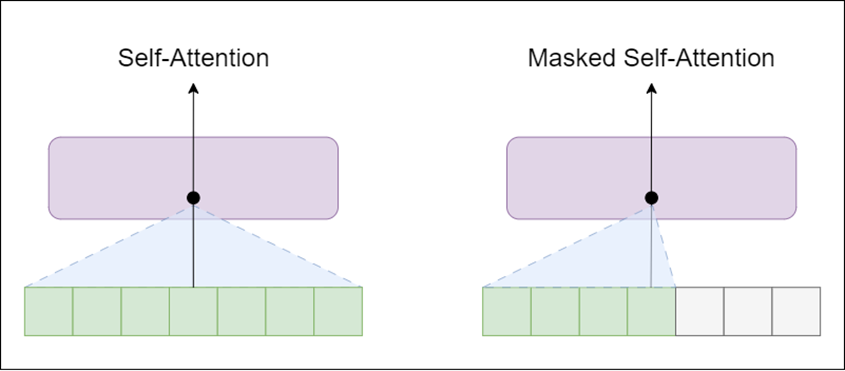
Encoder – contains self-attention layer and feed-forward neural network
Decoder – similar to encoder, but the self-attention layer is masked
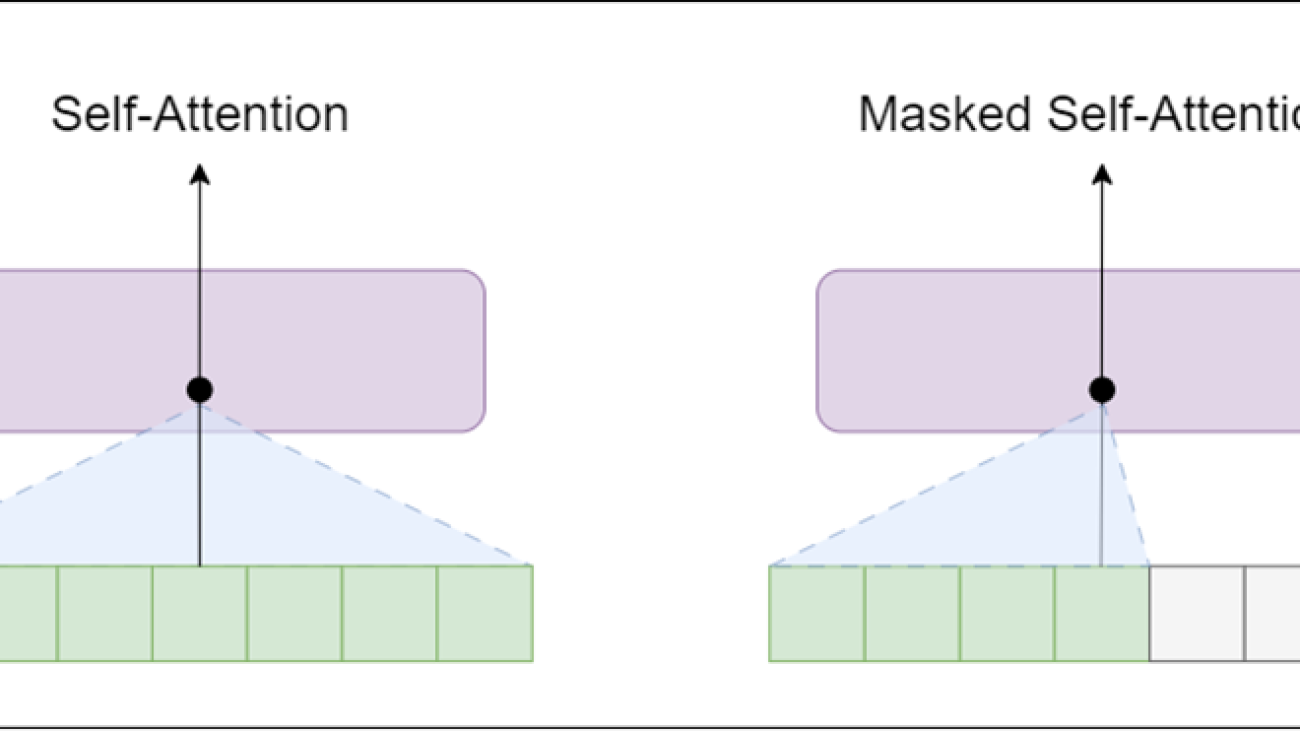
The self-attention layer allows a position to peak at tokens to the right of the current word (the successive words in text), whereas masked self-attention layer prevents that from happening.
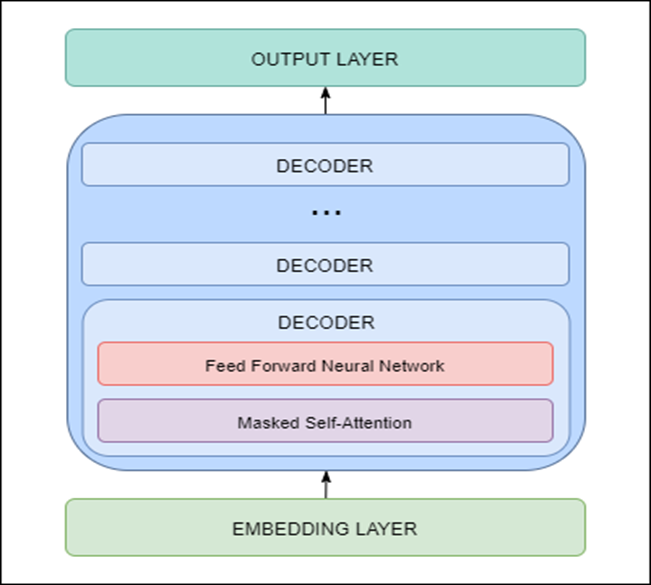
GPT-2 is built using transformer decoder blocks. This means that the following layers are used in the architecture:
Embedding Layer – responsible for converting input text into embeddings (each word is converted to a fixed-length vector representation)
Transformer Decoder – includes multiple decoder blocks with masked self-attention and feed forward neural network layers
Output Layer – responsible for converting embeddings obtained from the decoder into words
GPT-2 architecture (and DialoGPT architecture) is shown below.
As the model is based on transformers architecture, it has the issue of repetition and copying the inputs. To avoid repetition, we can use Top-K sampling and Top-p sampling.
Top-K sampling – filters the K most likely next words and redistributes the probability mass among only those K next words.
Top-p sampling – rather than selecting only the most likely K words, selects the smallest possible set of words whose cumulative probability exceeds the probability p.
The probability mass is then redistributed among the words in the set. As a result, the size of the set of words can be dynamically increased and decreased based on the probability distribution of the next word.
Quantization using Intel® Extension for PyTorch
What is Quantization?
Quantization is a systematic reduction of the precision of all or several layers within the model. This means a higher-precision type, such as the single-precision floating-point (FP32) mostly used in deep learning, is converted into a lower-precision type such as FP16 (16 bits) or INT8 (8 bits).
This helps in achieving,
lower memory bandwidth
lower storage
higher performance with minimum-to-zero accuracy loss
Quantization is especially important with large models such as those based on the Transformer architecture like BERT or GPT.
There are two types of quantization:
Static – Static quantization quantizes the weights and activations of the model. This quantization is used when both memory bandwidth and compute savings are important.
Dynamic – In dynamic quantization, the weights are quantized ahead of time, but the activations are dynamically quantized during inference.
Intel Extension for PyTorch: The Intel Extension extends PyTorch with up-to-date features and optimizations for an extra performance boost on Intel® hardware. Learn how to install it standalone or get it a part of the Intel® AI Analytics Toolkit.
The extension can be loaded as a Python* module or linked as a C++ library. Python users can enable it dynamically by importing intel_extension_for_pytorch.
This CPU tutorial gives detailed information about Intel Extension for PyTorch for Intel CPUs. Source code is available at the master branch.
This GPU tutorial gives detailed information about Intel Extension for PyTorch for Intel GPUs. Source code is available at the xpu-master branch.
How to perform dynamic quantization using Intel Extension for PyTorch?
Here are the steps to quantize the existing FP32 model to INT8 model using dynamic quantization:
Prepare quantization configuration – We can use default dynamic quantization configuration with ipex.quantization.default_dynamic_qconfig.
Prepare the FP32 model by using the** ipex.quantization.prepare **method (provide the input parameters such as FP32 model to quantize, the prepared configuration, example inputs and information if the quantization should be in place).
Convert the model from FP32 to INT8 – Use ipex.quantization.convert method for conversion. The input model will be the model prepared in step 2.
We also encourage you to check out the Intel® Neural Compressor tool that automates popular model-compression technologies such as quantization, pruning, and knowledge distillation across multiple deep learning frameworks.
Code Sample
The following steps are implemented in the code sample:
tokenizer = AutoTokenizer.from_pretrained(model)
model = AutoModelForCausalLM.from_pretrained(model)
The model parameter is specified as an input for the tokenizer, and model initialization is just the path to the pre-trained DialoGPT model. In this sample, we are using ‘microsoft/DialoGPT-large.’ If you have limited resources, you can use ‘microsoft/DialoGPT-medium’ or ‘microsoft/DialoGPT-small’ models and receive comparable results.
Perform dynamic quantization of the model:
Create the configuration using the default dynamic quantization configuration from Intel Extension for PyTorch library.
Prepare the model.
Convert the model from FP32 to INT8.
The steps are explained in detail in the above section.
Response generation: The first step in response generation is to encode the input sentence as shown in the code below:
The text generation can be done by the model.generate function, where we can specify all important parameters like saved chat history, length of the response in tokens, and usage of both Top-K and Top-p sampling.
The last step is to decode and print the response:
Preparation for interactive conversation: After response generation, the last step is to add interaction. This can be done by using a simple for loop. Based on the initialized tokenizer, model, and empty chat history, responses are generated for a number of rounds:
for chat_round in range(n):
chat_history_ids = generate_response(
tokenizer,
model,
chat_round,
chat_history_ids
)
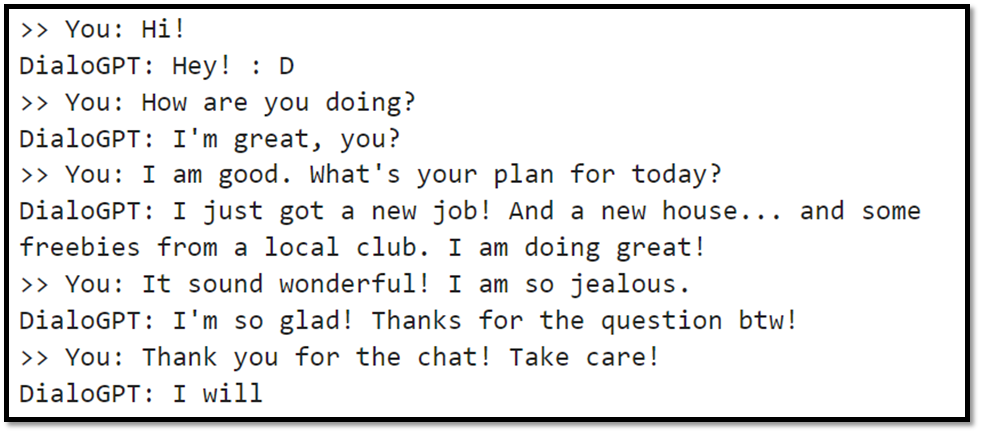
An example of interactive chat generation will look like the one shown in the picture below.
What’s Next?
Get started with interactive chat-generation models using Intel Extension for PyTorch and DialoGPT. Download and try the Intel AI Analytics Toolkit and Intel Extension for PyTorch for yourself to build various end-to-end AI applications.
We encourage you to also check out and incorporate Intel’s other AI/ML Framework optimizations and end-to-end portfolio of tools into your AI workflow and learn about the unified, open, standards-based oneAPI programming model that forms the foundation of Intel’s AI Software Portfolio to help you prepare, build, deploy, and scale your AI solutions.
For more details about the new 4th Gen Intel® Xeon® Scalable processors, visit Intel’s AI Solution Platform portal where you can learn how Intel is empowering developers to run end-to-end AI pipelines on these powerful CPUs.
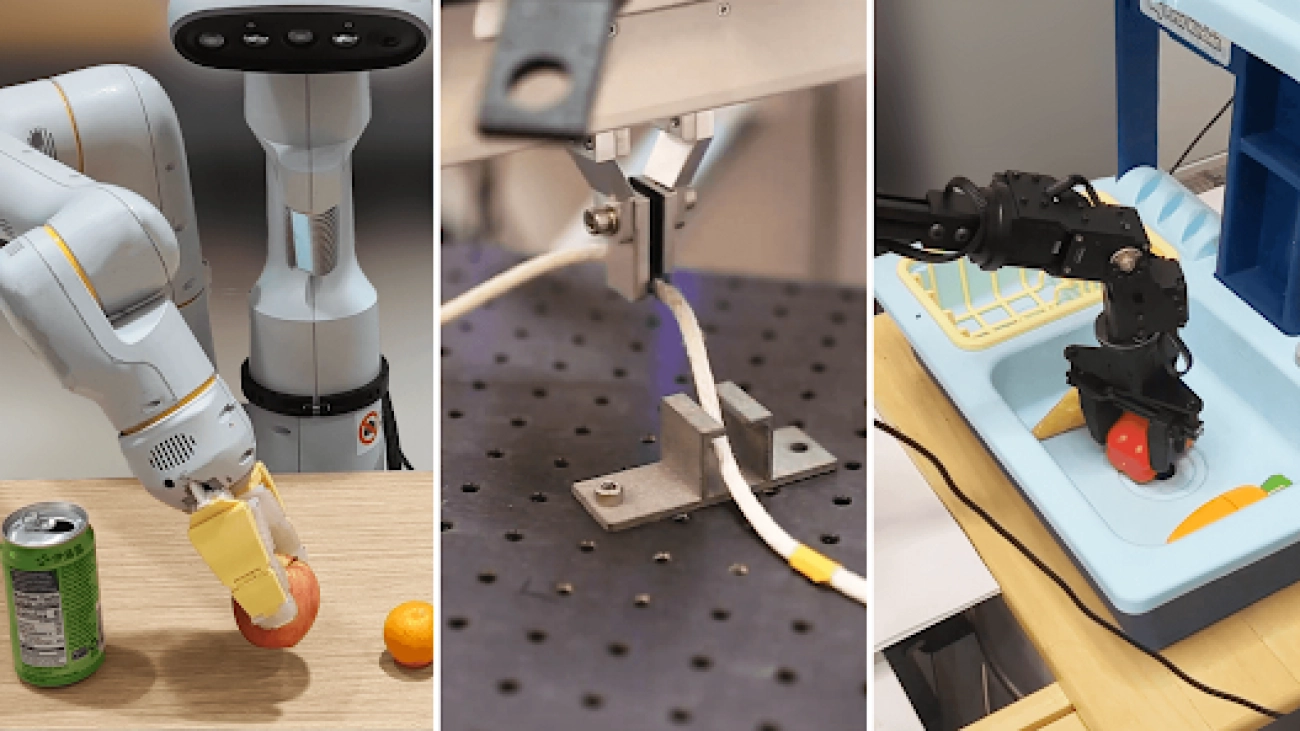
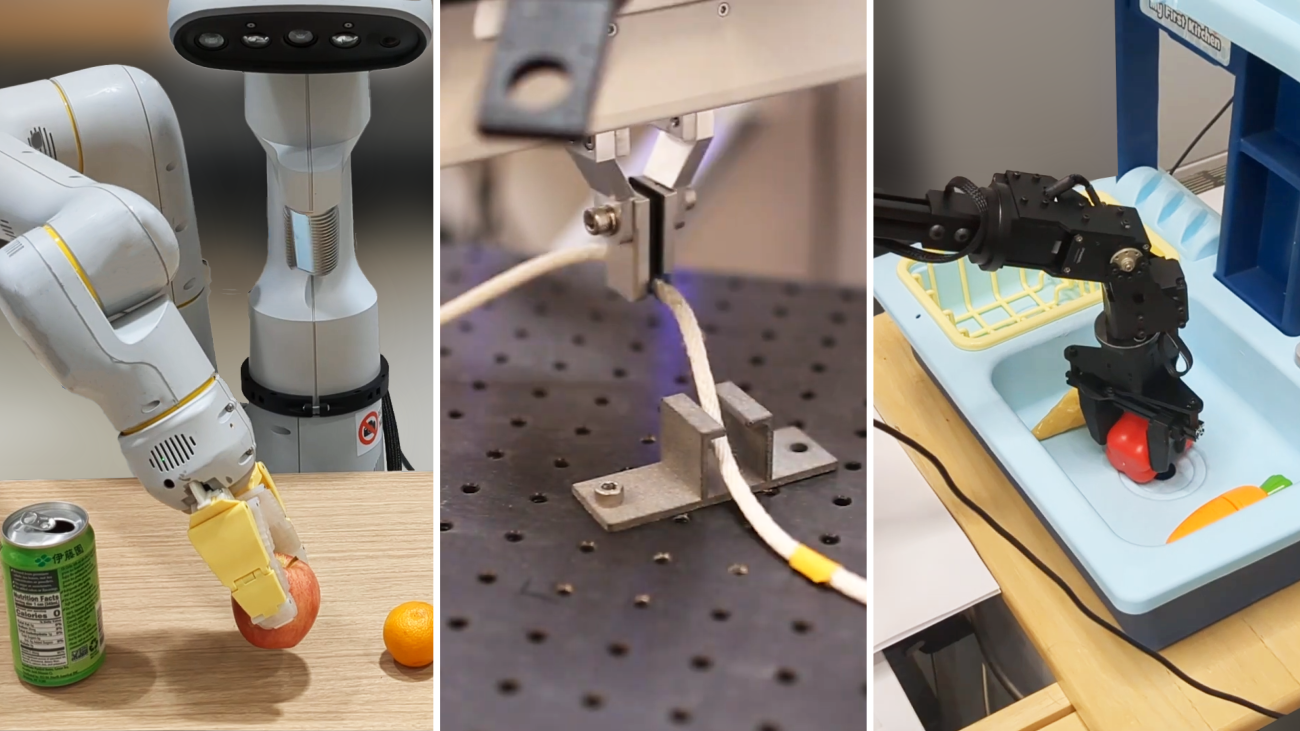
We are launching a new set of resources for general-purpose robotics learning across different robot types, or embodiments. Together with partners from 34 academic labs we have pooled data from 22 different robot types to create the Open X-Embodiment dataset. We also release RT-1-X, a robotics transformer (RT) model derived from RT-1 and trained on our dataset, that shows skills transfer across many robot embodiments.Read More